About Me

My photo
Sewing is therapy for me. I hoard fabric, patterns, notions, and spend more time shopping for fabric than I care to admit...

Saturday, January 26, 2019


Have you checked out this pattern company?  It's Papercut from New Zealand.  I discovered them last summer and have loved all their styles.  This one, however, fit the bill for winter and cold weather!  I had to create it and fast-like.

Rise & Fall Turtlenecks

Here's the description from the pattern envelope: 
The perfect turtleneck pattern to help ease you through the cooler months. This pattern has two completely different variations, a chic fitted version, or a dropped shoulder loose fitting option. These are wardrobe staples!
Fabric:  Jersey/Knit Fabrics. 
Merino/Wool Jersey, Cotton Knit, Cotton/Lycra, Viscose/Lycra.
Model is 5’9” / 176cm 
and wears NZ 8/XS | UK 8 | EU 36 | US 4

And the line drawings!  Both images are from the website.  

Here's my version.  This is actually my second make from this pattern.  My first is a ecru colored cotton-lycra knit from Stof.  This is a textured knit in this gorgeous colored tealish that I purchased from Fabric Mart eons ago.  I am not sure what took me so long to use it.  I just love the color and the fabric.  


That neck!  I just love it!  This is nicely oversized but not too much.


I made my usual alterations to the pattern by lengthening from the shoulder to the bust and lengthening the bust curve.  To accommodate that difference in the back, I lengthened this by the same amount at the lower hemline. I also found that the shoulders are made for someone with less sloping shoulders than I have.  I took those in about 1/2 inch at the shoulder/arm intersection.  Other than that, this is as the pattern is drafted. 


Just for reference, I am 5'7" and you can see this fits in the length but I don't want to do any dancing with my arms over my head in this or the world will see more than I want them to of my midriff.  

I will be making this often.  I hope you won't get tired of seeing me in it!

Thanks for reading!
Sue

Saturday, January 19, 2019

Yet another McCall's 6886

I can't stop pulling out this pattern!  I can't even tell you how many times I've created it.  This time, I used a heavily textured ponte from my stash.  I love this fabric!!!  

                  Sewing Pattern Women's Dress Pattern, Sheath Dress Pattern, Close ...


See what I mean by heavily textured?  Isn't that red just lucious?  


With this pattern, I made my usual alterations: 
lengthened from the shoulder to the apex
Lengthened the bust curve
Added to back from the neck to the waist
added a seam across the back waist


I also played with the v-neckband a bit.  With every fabric, you have to test and see how the neckband will lie when it's sewn on.  Since my fabric was heavier, I had to stretch the neckband a bit more than the pattern called for.  The best and easiest thing to do is baste it on.  If it fits and looks great, permanently stitch.  If you need to alter, do so.  


I also added a side slit.  The sleeve length is perfect for me, even though I am 5'7".  
I am not done with this pattern.  Expect to see more makes from me!

Thanks for reading!
Sue 

Sunday, January 6, 2019

Pattern hacking--Simplicity 8375

Do you hack?  I do sometimes, but when I saw this Simplicity 8375 for $1, I knew I'd hack it to bits. 

Simplicity Pattern 8375 Misses' Knit Dress or Top with Multiple Pattern Pieces for Design Hacking


I was especially intrigued by the lace up back.  Now this wouldn't be hard to do without the pattern, but for a dollar, I purchased it so all the thinking was done for me.  Cop out, right?   


I really wanted to make a tunic or dress but I didn't have enough of this mustard yellow textured knit.  I did have enough to make a long-sleeved top with the lace up back.  


I can see this pattern getting a lot of love, especially from me.  When I compared my measurements to the flat pattern, I made very few alterations to the pattern tissue.  Here they are, and BTW, these are usual for me.  


1.  Lengthen from the shoulder seam to the apex.  
2.  Lengthen the bust curve
3.  That's it, however since I did modify the front of the pattern piece, I also had to lengthen the back but I added the length below the waistline since the measurement from my nape to waistline was spot on.  


The instructions for this appear to be well written, logical, and well illustrated.  If you don't have a serger, the directions are so thorough for use of your regular machine, you'll be fine using that.   You can also see the topstitching I use on typically use on the hems and bands to stitch in place.  It reminds me a lot of the underside of a coverstitch machine.  It's my go-to finish.    


Above you can see how the lace/ties are attached on the inside.  I followed the directions for this and use simple plastic rings typically used in making draperies.  I sewed them on by hand.  As you can see, I try to use matching serger thread when it's available.  


I really like this top.  This may not be the best color for me, but whatever.  I like it.  I paired this with my most recent pair of Georgie pants by Style Arc. 
I won't review these again but will tell you that my fabric is super stretchy and a telio stretch woven. I purchased both fabrics from fabric.com.  


Thanks for reading!  I hope you are sewing some fun things!
Sue 

Thursday, December 27, 2018

More Christmas gifts

I so love this pattern.  It is so well drafted and I believe it gives you great results. 
Previously, I made the hippo and decided to give it another go as every little girl needs a giraffe.  

Image result for images Simplicity 1082
Just because this is a giraffe, there isn't any rule that he/she can't be a floral giraffe, right?


Both fabrics were in my stash.  For the eyes, I used plastic snaps.  I reinforced the area with interfacing, lined up both sides of the head and used my awl to punch tiny holes, both in the same location, so the eyes weren't wonky.


How cute are the proportions on this?  


Sorry, but the above photo won't let me turn it. 


As with any sort of pattern like this, cut and sew carefully and don't forget to press as you go.
I didn't stuff this one as tightly as I could have as I was hoping Elaina would want to sleep with it and I tried to make it somewhat cuddly.

I can foresee making the flamingo.  Why not?
Thanks for reading!
Sue 

Monday, December 17, 2018

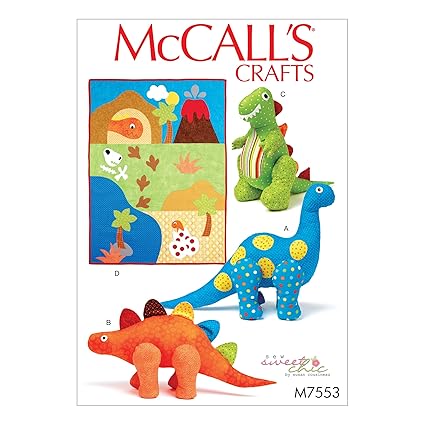
Dinosaurs for little people!


I love making Christmas gifts for people I love and this year I decided to make some stuffed animals for my four grandbabies.  I like how these turned out, but this isn't the best drafted pattern in the world.  
Image result for images McCalls 7553

Its cute, but I don't feel like you can get a result that looks anything other than home made.  


I made all three dinos.  The brontosaurus is for grandson number 2.  Elliot is 2 and he will hopefully love that the legs coordinate, but don't match the body.  For the eyes, I used a plastic snap layered on top of a scrap of felt.


This T-rex is for Simon who's five.  I thought he'd appreciate the scary face the most.  I really love this fabric and wish I had more to cut all three from.


His spikes are from some Riley Blake fat quarters I had in my stash.  


The Stegosaurus is for Leon.  He is just about 2 months old.  


I really thought about redoing the brontosaurus' legs but my daughter said Elliot will love it anyway.  He's two, he probably will and won't say anything.  I am probably being too critical.   


My pet peeve about this pattern is in the drafting.  I pride myself on cutting, stitching, and carefully sewing.  No matter what I did, the bumps on the face and legs wouldn't disappear.  Ugh.


I guess tho, that these aren't for me but for three precious little boys.  I really hope they love them to pieces!

Thanks for reading!
Sue

Monday, December 10, 2018

having fun mixing and matching fabrics

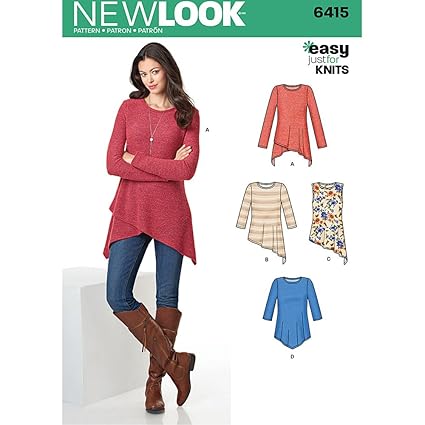
How cute is this tunic?  I love view A, with the asymmetrical side seams.  


Image result for images New Look patterns

Sorry about the indoor photos as it is dark before I leave for work and after I get home.  


I used a stretch velvet for the outer layer and wool knit for the inner layer.  The sleeves are a lightweight ponte.


Black is so difficult to photograph indoor but you get the idea of the shine and design of the fabric.  


This is such a great length for leggings, even for my 5'7" frame.  Everything is covered, both front and back.  Gotta love that!


I am showing you the underlayer here of the wool knit.  All three fabrics are washable.  
Thanks for reading!
Sue

Sunday, December 9, 2018

Finally jumping on the Kimono train

Happy December everyone! 
I wanted to share my latest post from Fabric Mart--I finally made a Kimono.  Everyone around me has been wearing super cute ones so I finally decided to create one. 


I just LOVE This fabric!  It is a poly woven and those colors are so vibrant!  This fabric came from Fabric Mart.  It is from a famous dress designer.  


Here is the pattern I used: 

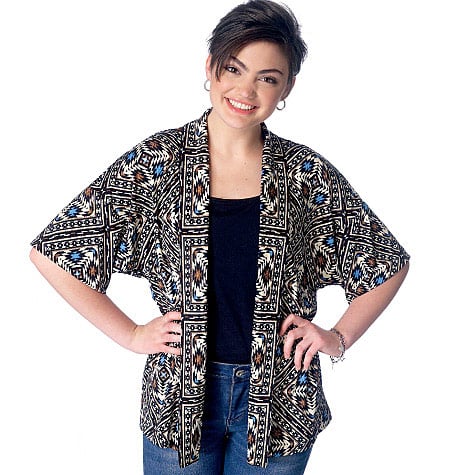
McCall's 7200 (image from Sewing Pattern Review).  As you can see, mine is longer with longer sleeves.  There are some variations with the pattern.  


I chose to keep this super simple to really show off that fabric.  I can't tell you how much prettier this is in person.  


For fitting, I know this is a loose-fitting garment, but it still needs to fit in all the right places.  I lengthened from the shoulder to the apex and lengthened the bust curve.  


On the back of the garment, I added 1" total between the shoulder blades at the intersection of the neck and the shoulder.  I also added an inch at shoulder blade level.  


For the length of this Kimono, I added 6 inches.  


I decided to hand sew the facings in place along with the hems.  Hand sewing can be so very relaxing.


That's it!  A fast and easy make but make sure you fit it to you so you look fabulous!

Thanks for reading!
Sue