About Me

My photo
Sewing is therapy for me. I hoard fabric, patterns, notions, and spend more time shopping for fabric than I care to admit...
Showing posts with label cotton knit. Show all posts

Monday, March 4, 2019

The Abby Cardi by StyleArc

I think it's safe to say that I am a huge SA fan.  I made this cardi previously but sort of forgot about the pattern until Elizabeth hosted her Day to Night Dress challenge.  For my dress, I knew for evening I wanted to make a black cardi with some umph. 


I really love this dress.  It's casual but can also be dressy.  The fabric is a textured knit in this stunning color!  

Now you can see it with my Abby Cardi.  This is a great pattern!  
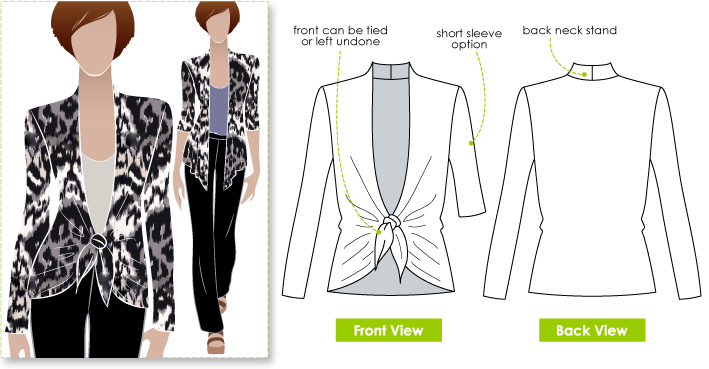
Image result for images Style Arc Abbi Cardi

It goes together quickly and is designed beautifully!


I love how it ties!  You can also wear it loose and open, but I currently love wearing it tied at the waist.


A peek at the inside! 

My normal alterations include lengthening from the shoulder to the apex, lengthening the bust curve, lengthening the back from the shoulder to the waist.  SA patterns fit me well in the sleeve length and are exceptionally well drafted.


Here are a few details.  I used a decorative stitch on my machine to cover the outside seams and the hems.  I also always use SewKeysE hem tape to stabilize prior to stitching by hems.  At the neckline, I stabilized using SewKeysE stabilizer tape.  If you've never tried this stuff, you must!  Its awesome and makes sewing knits so successful! 


Thanks for reading!  In case you are wondering, this is a jet black knit that's cotton-lycra manufactured by Stof.  I really love this stuff!

Sue

Monday, July 30, 2018

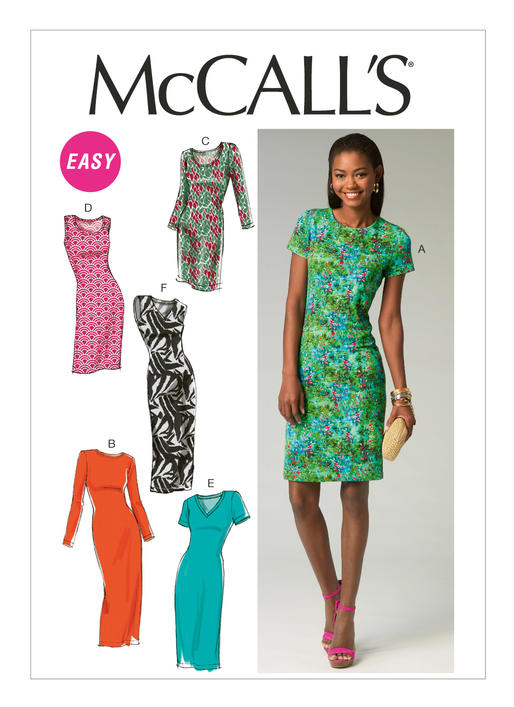
Playing with fit, McCall's 6886

Recently I attended a workshop where we talked about fit and I realized I have a lot more work on achieving the perfect fit.  I choose to work with my current favorite, McCall's 6886.  Knits, I feel, are much more difficult to get a great fit on because well, they show everything you've got and then some.  I thought that in working to get that just-right fit, I needed to work with knits.  

In case you've been living under a bridge and haven't seen all the hype about this pattern, here is McCall's 6886.  
Image result for images McCalls 6886
There are so many adorable versions of this dress.  The pattern is well drafted, has a variety of reviews, and is such an instant-gratification project.  

Here's what I did.  


I used a book by Designer Joi's book, Creating the Perfect Fit.  This book has you work on your fit by dividing your body into numerous quadrants and then dividing those even smaller.  I've never seen a system like this and I must say I am quite smitten!  


Don't confuse movement lines with flaws in the fit.  And, I should also note, I am much too old to have something fit skin tight.  Not only would that look dreadful but that just isn't me!  In order to deal with my swayback, I added a seam line vertically across the back waist.  This seemed to be the best solution given my fabric choice.  


I will say however that I do need to work on the fit in the bust area or the upper under arm.  I will have to read more and experiment more to figure this out.


Yes, very dumb look on my face!  When the hubby takes photos, he manages to catch the worst looks!


I like the v-neck on this a lot!  It isn't too low but still gives you a different look.  


Here's a close up of the v-neck. 

I used a Stof knit for this dress and I am so in love with the fabric!

What are you working on in your sewing goals this time of the year?  Do you have any inspiration to share?

Sue :)


Thursday, July 26, 2018

Yet another version of McCall's 6886

Have you seen enough of this pattern yet?  
Image result for images McCalls 6886

Please say no, as I feel like I am just getting started!  It's such a blank canvas to let your imagination run wild! 


This is such a simple, simple design that is really well drafted.  Every version I've seen looks great!  This is also a great pattern to hack to your heart's content, which is what I am going to experiment with in the future.  

Here's what I did with it this time.  

I am sort of obsessed with Alabama Chanin's embellishing lately land this time, I wanted to add some 'stripes' to my fabric.  When I talked to DH about this, he was skeptical and thought the dress would look like something made in a weekend craft shop.  Tsk, tsk! I hoped he was wrong, but wondered the same thing.  Since both pieces of the fabric I was planning on using were left overs from other projects, I decided to give it a whirl anyway!

Here is what I came up with: 


What do you think?  

Of course you can see I hacked the pattern to color block it.  


Of course you can see where I added the hand embroidery to the strips of fabric to make my 'stripes'.  


I used Chanin's embroidery book,The Geometry of Hand Sewing.    It has very clear illustrations and a helpful plastic template to assist you in marking where your stitches will go in order to create symmetrical designs.  


For my embroidery, I knew I wanted a contrast color and I love this mustard-yellow with the gray and white.  This is just plain ol' embroidery floss from Hobby Lobby.  I separated it into three strands and just went to town!  

For the hacking part, I cut the bodice and skirt separately and sewed them together.  I pinned the lower and upper half together and manipulated the length of each until I was happy.  

I am really in love with this dress!  When I showed it to DH, he was so very pleasantly surprised that he simply stopped what he was doing, smiled his little half-smile and said, "Wow!"  Isn't that one of the best compliments of all???

Thanks for reading!  What is inspiring you lately?  Do tell!

Sue 

Monday, February 26, 2018

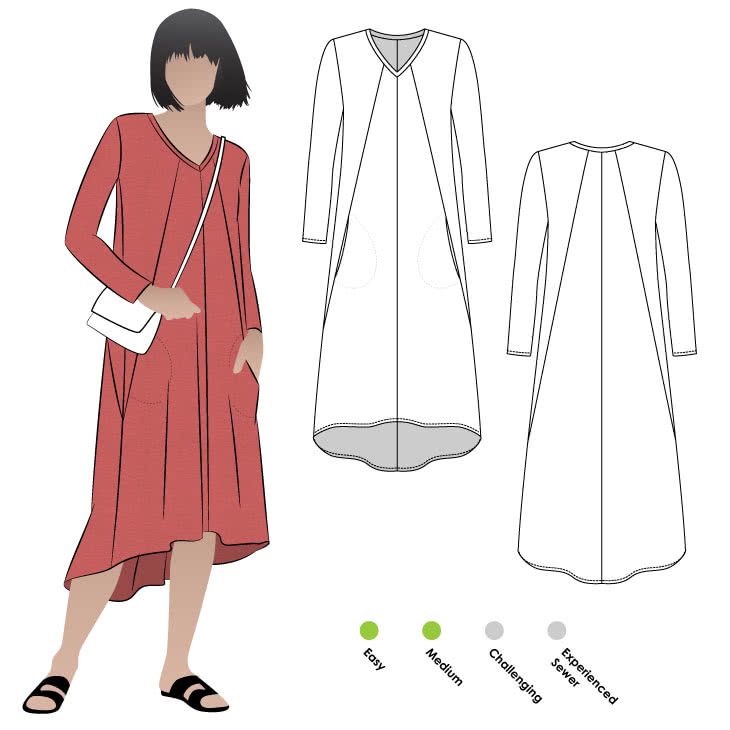
StyleArc Eden Dress--Love!!!

Here is one of my latest makes...the StyleArc Eden Knit dress.  Can I say, it's love?  

Image result for images style arc eden dress

This dress is so freaking comfortable!  It has some super fun seaming and pockets.  Normally, I hate pockets in knit dresses since they add girth to my already curvy figure, so with these being on the front princess seams, I knew they were worth a try.  


Would yo look at those pockets?  They are in the perfect position.  For reference, I am 5'7".  Most of my height is in my legs.


For this dress, I made a FBA, sloping shoulder, and swayback adjustment--these are standard for me.


Normally I don't need a FBA but I knew that with this dress to look right, I would need one.  


With the high-low hemline, this dress is super fun.  It has a rather casual vibe, which is perfect.
My only deviation from the pattern (sorry, I didn't take a close-up of it) but I made the v-neck a cross-over instead of having a center seam at the v.  Hopefully that makes sense. I also used SewkeysE stay tape at the hem edges.

Did I mention this fabric at all?  This is a cotton-Lycra mix from Stof.  This stuff is so amazing.  It is soft, holds its shape, and feels so wonderful on your skin.  I so highly recommend this manufacturer!

Thanks for reading!
What say you?  Do you have a favorite fabric manufacturer like I do?  I have this one and also Telio.  
What's yours?

Sue :) 


Saturday, February 17, 2018

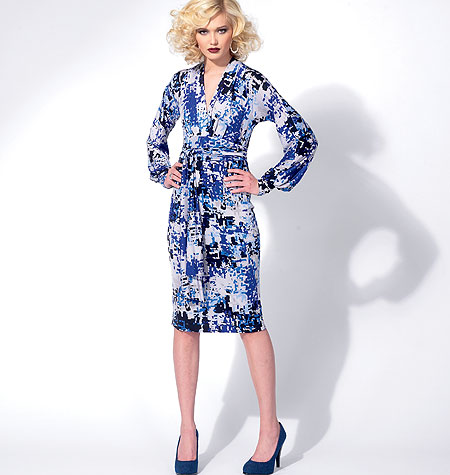
Vogue 8825

So....ever have a pattern for years, yes I mean years, sew it up because there are so many positive reviews and then feel slightly deflated when you were done?  Welp, that was me with this dress.  It isn't that I don't like it, I do but I am underwhelmed...


This pattern has been around for a while--it is copyrighted 2012.  Many reviewers have had success with it.  And, lets just say that if you have a slim body, it will look great!


See where the bodice ends on me compared to the pattern cover?  For reference, I am 5'7".  Typically I do not alter patterns in the bodice length, except for when I make a FBA.


This dress is described as a pullover dress/tunic has front extending into the back collar, fitted, front pleated bodice, raised waist, tie ends, two-piece sleeves with barrel cuffs and stitched hem.  


So yes, the waist is raised, but with mine, I felt like with the belt, it wasn't hitting me in the right place.  So, I took it off.  I probably could have messed with the placement of it, but since I didn't have enough of the main fabric anyway, I had to make it in a black for contrast.  It just didn't do it for me.


There is a center back seam and while you may be tempted to cut this on the fold and loose that seam, I would caution you against it.  There is some nice shaping there.

I really love this fabric--it is from Stof.  It is 95 or so percent cotton and the rest is lycra.  It sews, wears, washes, and dries like a dream!


The length of this dress is just perfect for boots and such.  And that cross over bodice--it stays in place because I stitched it close with a very narrow zig-zag.  This bodice is very, very well designed. and the two piece shoulders are great as well.


Here is a shot of the barrel cuffs.  The are nice and long and support the weight and volume of the gathered sleeve.


If you look closely, you can see the stitch I use for my hems.  It is a stretch stitch on my Bernina.  I like this so much better than my coverstitch.  I really should sell that thing!  


Friday, July 28, 2017

Simplicity 8383 a swingy dress!

Have you seen this pattern yet?  I skipped past it last time I was looking at patterns.  That was a mistake!  I could have had this adorable dress in my closet much sooner!

Image result for images Simplicity 8383

Look at how adorable this is!  That is if it is okay to say so myself!


This is an easy to sew dress and I literally sewed it up in less than two hours.  


It is super, duper short so I doubt I will wear this as a dress but more of a tunic.  Have you heard that rule, no mini skirts after 35?  I am way over that year!


I knew this would be short but with my limited amount of fabric, this was all the longer I could make it.  


I love how this fits at the shoulders and bust and then just flows.


This gorgeous fabric is from Stof.  It is 94% cotton and 6% lycra.  It stitches up beautifully!  


I reinforced those little areas where the sleeve attaches to the arm using a small piece of stay tape.


Look how smooth that upper back is along with the sleeves and upper arm.  


I recently promised a tutorial on how I stabilize the neckline...well here it is!


I use ordinary Dritz stay tape.  I can easily find this at JoAnns.  You can see where I stitched it on with it barely extending over the seam allowance.  


I use about every landmark I can on my machine or feet.  I line up the edge of the stay tape with a part of my presser foot.  After this step, I apply the neckband as usual.  The little edge of the stay tape is covered by the neckband.  


I had a blast making this dress/tunic!  It is well drafted and I can see making another view in the near future!

Thanks for reading!
Sue :)

Thursday, July 20, 2017

Summer sewing for Elaina! Ottobre 3/2013 # 2

Hello all!  I've been busy sewing for the little people in my life and I've loved every minute of it!

I used my stack of Ottobre design to find a few items to make for Elaina, 3 months.  I can't believe she is three months already!

I really wanted to try the romper for her.  Yes, they made this for a boy and I am sewing for a girl, but really, depending on the fabric, many articles can be either male or female.

Image result for Images ottobre 3/2013


As you can see, it is a one-piece romper with functioning pockets!  DD1 doesn't want things too ruffly and since they live in Baton Rouge, LA, and the temp and humidity is unbearable this time of the year, I knew I needed to make something in a natural fiber (cotton) and have just a garment that is cool and comfortable.


This little pattern ranges in sizes from 56 to 92 cm.  I did some quick math and found that I needed to make a size 62 cm or about 25 inches.  I wanted a bit of growing room so this size fit the bill.

This fabric I choose to use was all that is available for knits in my local area of the US.  It is from JoAnns.  It isn't the best quality, but was 100% cotton, is soft and the colors are cute.  Plus it isn't too girly or fussy.


This pattern literally goes together in about 30 or so minutes.  The longest part of the process is figuring out how much to stretch the trim that is on almost every surface of these that shows on the right side.  Just play with the trim on a scrap piece of main fabric and you'll pretty quickly discover what you need to do to make the trim lay correctly and look good.

I used actual ribbing for the trim.  It's a little difficult to find but this was in my stash from the now defunct Hancocks.  Can you tell I am still in mourning?


I almost left those little pockets off but decided they are such a cute part of the design I had to leave them on.  The DH asked what on earth she would do with those--put her baby car keys in there? Well, duh!

I love the drafting on every Ottobre design I've used.  This was easy to sew and it has a variety of options for either boys or girls.  Plus, little ones look darn cute in this!

Thanks for reading!
Sue