About Me

My photo
Sewing is therapy for me. I hoard fabric, patterns, notions, and spend more time shopping for fabric than I care to admit...
Showing posts with label Grainline Studios. Show all posts

Saturday, February 13, 2016

The Grainline Tamarack jacket customized!


Maybe you've figured this out, but I really love sewing with wool, and I love making jackets.  So for this month's contribution to Fabric Mart, I choose this lovely wool that has a slight hint of some sparkle in it.  I wish I could have captured it with my camera!  Trust me, the sparkle is there.


I knew I wanted to make a jacket with the lining quilted to the wool and when I came across this newish pattern from Grainline, called the Tamarack, I knew it was exactly what I was looking for!

                       Tamarack Jacket PDF

The style is classic, there isn't a lot of fitting, and it looks like the jacket would look great on a variety of figures.  I eliminated using the batting between the lining and the wool.  Had I used a cotton or a similar lightweight fabric then I would have used the extra layer of warmth.  I also thought it would be fun to use this 'suede' to trim the jacket.  I love mixing wool with other fabrics that you might not expect.


Construction of this jacket is easy-peasy and it gives you some room to play with your fabric.  I decided at the last minute to add the fringed trim to the cuffs and the neckline to give the jacket a unique look.  


To make your own fringe from wool fabric, cut strips of your fabric either on the lengthwise or crosswise grains, about twice the width of what you'd like it to finish as.  On one side of the width of the fabric, stitch, sort of like staystitching.  This wool was pretty ravely so I decided to serge the side that would be enclosed in the trim.  Fray the side not staystitched and trim as necessary to give you the finished width you prefer.  Baste the trim to the jacket and apply the finish.  In this case, my finish was bias cut pieces of the 'suede' that I cut in 2.5 inch strips. I applied the trim to the jackets right side, folded the edge to the inside and then stitched the trim by hand to the lining.


Do you have fun with lining colors?  I thought about black or gray but decided on this spring green color which is much more evident in the photo above this one.   I am so ready for spring temps to arrive and this brightened my mood as I stitched the wool to the lining in a grid pattern.


This wool behaved beautifully!  See how nice the sleeve hangs along with how well the sleeve was set into the garment?  One thing to remember when you are working with a wool that has a novelty thread running through it is to use a press cloth so the fibers don't melt.  It is a good idea to test iron a scrap of your fabric so you don't make any big mistakes on your garment!  


I love how the shoulders are slightly dropped and the easy fit of the back.  The shaped hemlines are also pretty cool and lend a nice component to this jacket.  I did make my standard alterations to this jacket: 1/2" swayback adjustment, 1/2" FBA, and 1/4" sloping shoulder adjustment.  I am 5'7" and the jacket length and sleeve length are perfect.


Those welt pockets are nice and deep and in a great position on the garment.  I really like them trimmed with the suede.


I needed these nice deep pockets today!  It is cold outside!


This jacket has hook and eye closures and I just laid them out how I wanted them spaced on the front.

I like my new jacket!  It is warm and comfortable and I love the fabrics I choose!

Thanks for reading!
Sue


Tuesday, December 23, 2014

I cord, do you?

Well yes, I did make another Archer from Grainline studios.  I love my other four so much that I knew I had to have a fifth!  Honestly, I think this is my new fav!


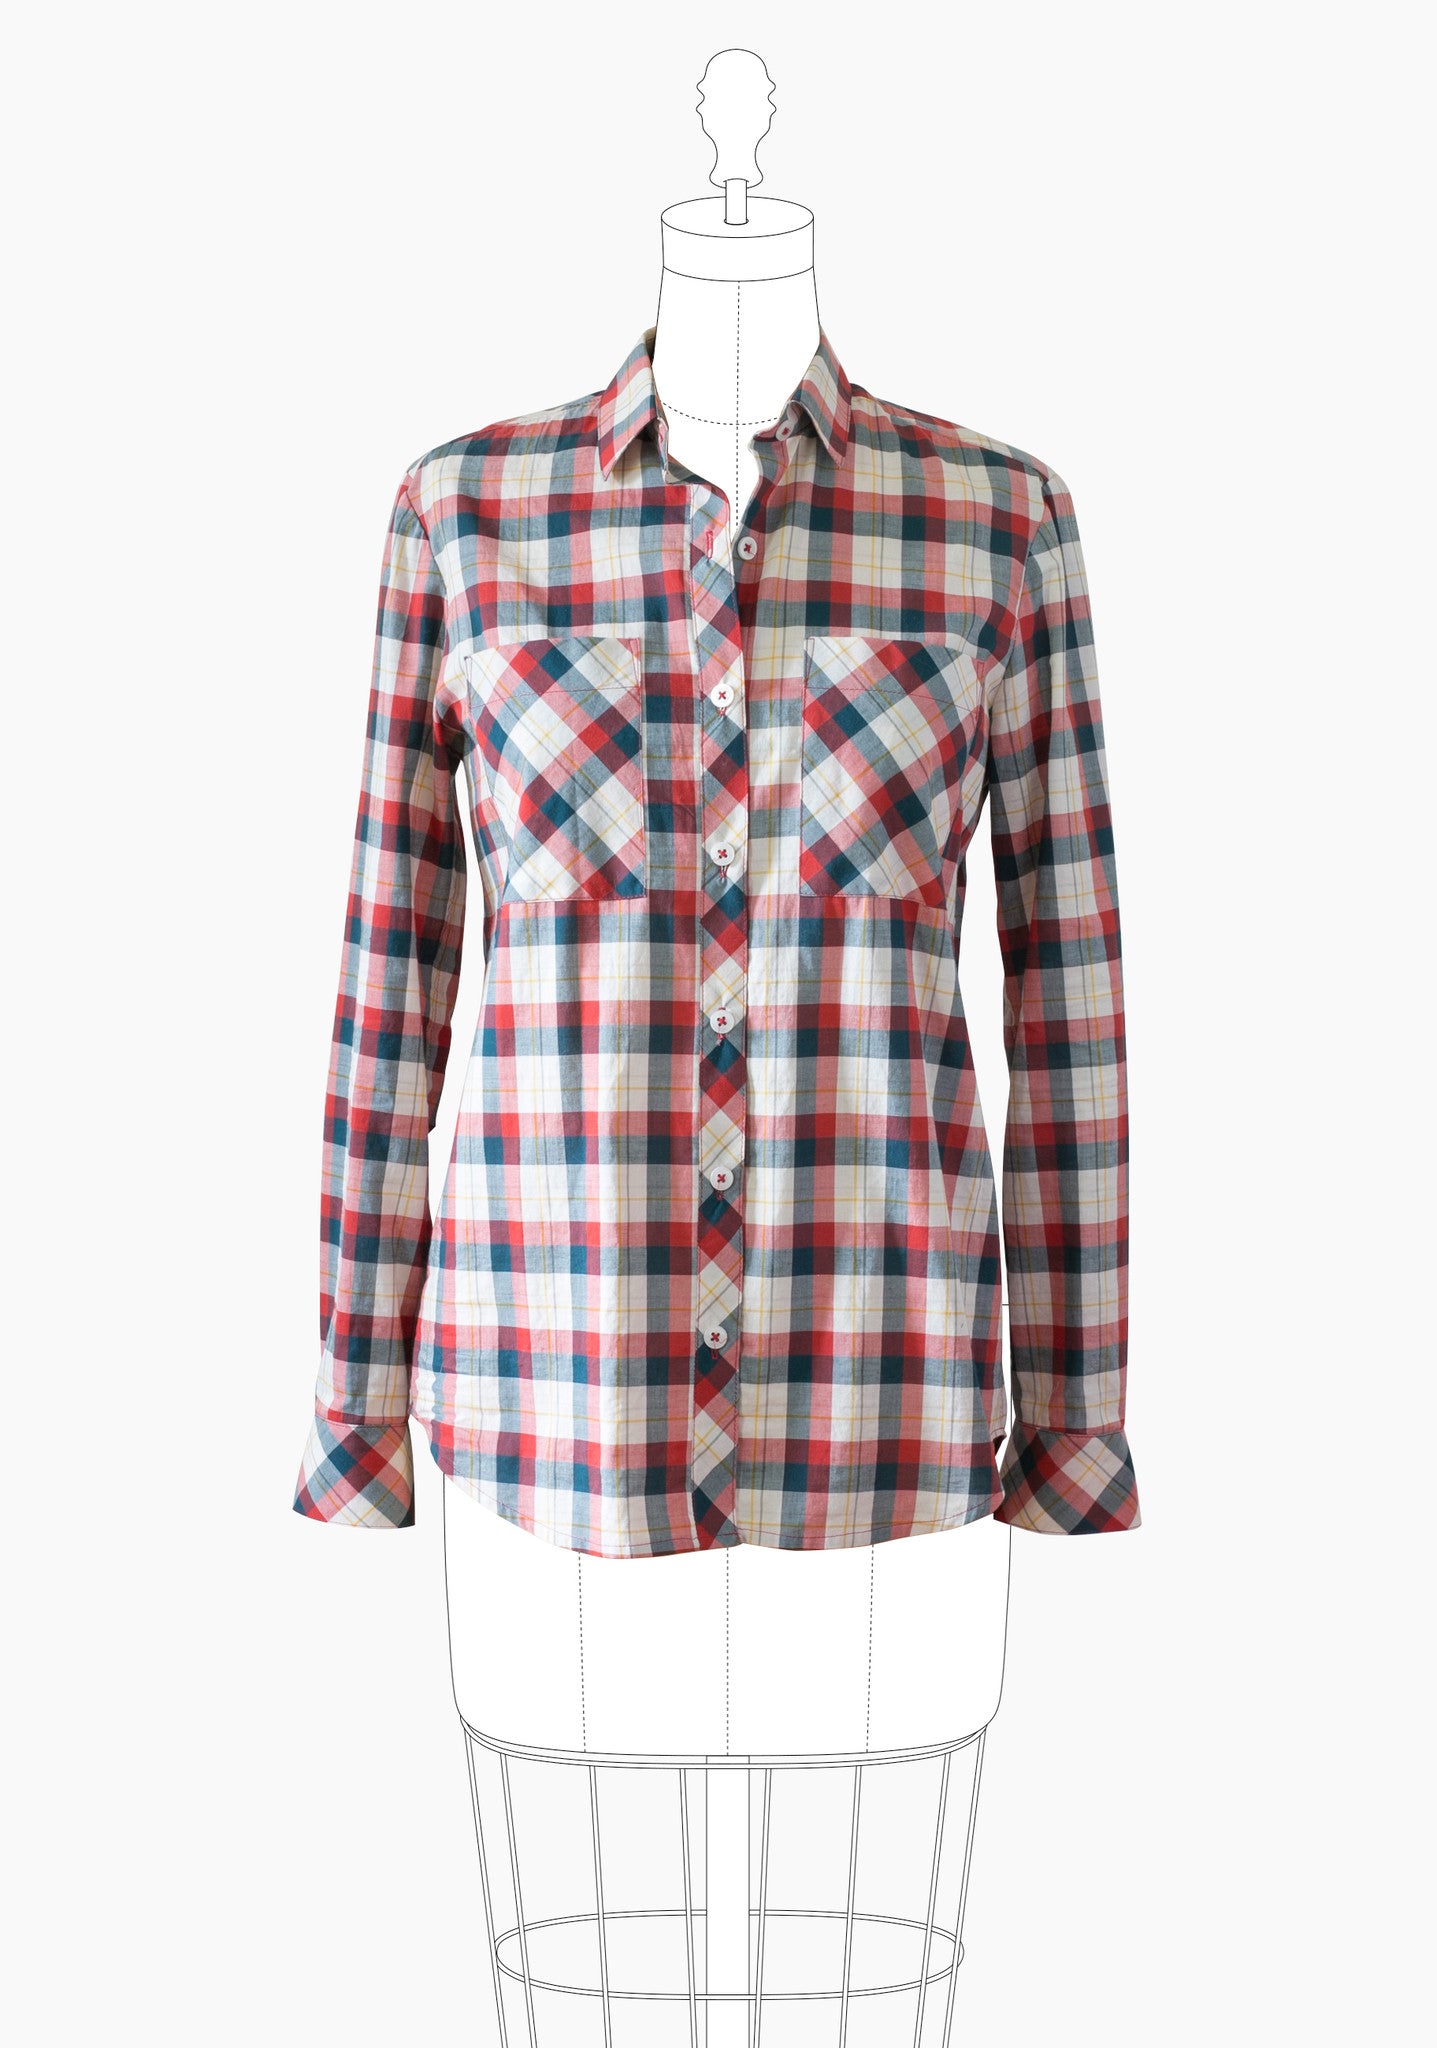
What, the Archer?  Never heard of it?  Well, here is a description from the Grainline site: The Archer Button Up is a loosely fitting button up shirt with long sleeves. View A has angled cuffs and a back pleat at yoke. View B has straight cuffs and a gathered lower back detail.
Techniques involved include sewing a straight seam, setting sleeves, continuous button plackets, adding a shirt collar and buttons & buttonholes. Pattern is nested to facilitate cutting between sizes if needed.
Archer Button Up Shirt

So, since I made this so many times and didn't really need the instructions I thought I ask if you cord your buttonholes.  Well?  I love cording, it is basically nesting a heavier thread between your fabric and thread and it makes your buttonholes look very professional and gives them a little pop!  


I have some neutral thread I use for the cording.  Black, white, red in heavy button twist cotton.  It feels almost as heavy as a denim top stitching thread.  In fact, you could probably use that as well!  

My Bernina has a special little doo-hikey on it that is made for the cording.  I wrap the heavy thread on it, according to the directions in my manual and stitch!  After stitching, you release the extra thread from the foot, pull it snug, and clip!  Tie off the regular thread you used to make the buttonholes functional and viola!  Complete!  

What else did I do?  I added six inches to the Archer in order to make it tunic length.  I straightened up the side edge somewhat so it wasn't quite so much of a curved edge to the side seam.  This made it much easier to hem my top as the wool woven fabric was maybe a little thicker than what the designed intended for this.  


I purchased the fabric from Fabric Mart and it was lovely!  It is all wool and the pattern is woven into the fabric, not stamped on as some flannels look.  It is heavy and warm!  Perfect for South Dakota winters!  So it isn't too scratchy at the neck, I used a piece of what feels like rayon from my stash on the inside collar stand and yoke.  It feels great on my skin!  You can just see it peeking out at my neck.  
I need a lot more practice matching up the plaid patterns.  While the front looks pretty good, the other places it isn't as good as it could be.  I love this with my denim leggings and dark brown boots.  
I plan on wearing this a lot this winter and in the years to come!
Thanks for reading!
Sue 

Sunday, November 2, 2014

TGFP! My Plaid Archer Tunic

TGFP?  Thank God For Pinterest of course!  Where else can you get such fabulous inspiration for new custom garments?

                                   Long plaid boyfriend shirt, leggings, knee socks and boots. Nice Fall weekend outfit.55+ Fall Outfit Ideas, super cute clothing inspiration for fall!... Black boots, red/grey top, skinnies.ISSUU - ShopRedDress.com Christmas Look Book 2013 by The Red Dress Boutique
                                                             Piace Boutique - Small Town Plaid Top $26.99Ralph Lauren Blue Label Plaid Wool Cashmere Maxidress

These are all gorgeous!  I love them all and need some warm pieces for fall/winter which is rapidly approaching.  So...

I purchased this beautiful fabric from Marcy Tilton.  After snooping on pinterest, I had to have a plaid and really wanted a wool or wool/blend and this fit the bill!  Isn't it freaking gorgeous?  Wool has to be one of my favorite fibers to work with.  It practically begs you to manipulate it into any shape you'd like with a hot iron and says thank you--thank you very much.


For my pattern, I pulled out the uber popular Grainline Archer.  I know, I've already made it three times that you can see below, but I figured of all the shirt patterns I have, I like it best.  The fit is fab, the details are perfect so it was the winner for my project.


And, here is a pic of the pattern from Grainline Studios site.


So, for this tunic, I had to lengthen the top by 6.5 inches on the front and back.  Since this is a wool blend, I knew it would get a little scratchy around the neckline so I used a printed cotton left over from another top on the yoke facing and on the inside collar stand.  It gives my skin the little bit of relief I need from the wool.  Mind you, the wool is soft. but after a long day, sometimes wool gets a little itchy, especially around the neck.  I hope to eliminate that problem with the cotton and to give a cute contrast to the fabric.


I kept all the details the same as the pattern is written.  The sleeve length is the same, the neckline, collar, etc.  I cut a size 12 based on my FBA and wanted a looser fitting garment for a tunic.  I also copied the bias cut pockets along with the button band.  I didn't cut the cuffs on the bias, but easily could have and  possibly should have!


So what else can I tell you about the Archer?  It is well drafted, is just the right amount of loose-fitting, has great details, and I love the fit!  The directions are well written and the diagrams all make sense.  I only have two minor gripes that I could easily figure out how to fix.  Can I? Yep.  Have I? Well, one yes, the other--nope!


I think the neckline needs stay-stitched before the collar and stand is stitched on which is super easy to fix and yes, I did that one!  If you have ever had a neckline stretch out and try to make it work, you know EXACTLY what I mean.  It is difficult!


Secondly, I would like both button bands to be separate pieces.  As the pattern is written, only the right is a separate piece and the left is cut on and turned twice.  If I remember, next time I will make this easy modification.


I finished this after the sun went down so I couldn't get any outdoor pictures.  I keep trying to find a good place inside my home to get some picture without shadows, darker walls, etc but am still struggling.  I'll keep trying.  This is just inside my sewing room and while I cleaned it up a bit, DH commented that he thinks it is a disaster.


 I love my tunic and can't wait to wear it.  I love it with my denim leggings, brown belt and boots.  Lengthening this by 6.5" made this perfect for covering everything I like covered when wearing leggings!


Thanks for reading!
Sue
What Pinterest items have inspired you?

Saturday, October 18, 2014

3rd Place! Yay!

I finished third and wow, what fun it was to participate in the Fabric Mart Fabricista challenge!  I ended up with three garments I am VERY proud of and LOVE wearing!  I also win a gift certificate!  My goal was to make it to the top five and I surpassed that so everything else was gravy!  

Here is a recap of what I made!

Round 1--the Scout Woven Tee 


Round 2--all about the fit! 


Round 3--Ready to wear knock off!


Round 4  The Little Red Dress!


Round 5--the mystery bundle challenge!


Round 5--Inspired by art!


Wow, do I love everything I made! 

I learned a lot from participating least of which is to make a muslin if you want a great result!  

I can't tell you how many times I skip this step out of sheer laziness!  

Think, think, think about the fabrics you choose for your garments.  

I typically do this until I drive myself nuts, but the right fabric for the right pattern is essential.  

This is something I will do in the future and that is to try and add a little pizazz to each garment I make--something unexpected, like a super fun lining, just something!  

If I met you through this challenge, I feel doubly blessed!  

If you hung with me throughout--a huge thank you!  

Again, thanks for reading!

Sue :)  


Tuesday, September 9, 2014

My Scout Woven Tee

Ok, so my first challenge with the Fabric Mart Sewing challenge week 1 which you can read about here.  So at first glance, easy peasy, right?  Well, not for miss over-analyzer Sue.  Yep, that would be me!  And that is how I sew....will this work?  Is this just the right fabric for this pattern?  Is this the right interfacing?  Will it fit right?

Sometimes I drive myself so crazy I actually forget to sit and sew but instead contemplate what I am going to do with each pattern and fabric.  Sometimes I actually have gotten to the point of having everything pinned and am ready to make my first cut and then change my mind!  Good thing I am a female!  Truly though, I am working hard to just cut it out and sew something!  So here is my journey with the Scout Woven Tee.

So for the pattern:
 Scout Tee

Should be no problem, right?  Well, if you read the directions to the contest, you need to make it your own by embellishing and altering the pattern.  Anyone can make a pattern as written, but when you take time to fit it right and to have fun and be creative, it is a process!  Albeit a fun and challenging one at that!

So here is my journey with my very own Scout!

First, the fit....oh the fit!  According to my measurements, I should have made a 14, well, I did that once and although the fit was fine, I wasn't thrilled with it.  You can see that top below.


See what I mean?  It is fine, but definitely not worthy of entering into a contest!  So, I made two muslins, why two?  Well, becuse I wasn't happy with the first alterations and wanted to make sure I loved it, so two I made.

Here is the first, which to me looks frumpy and lumpy.  This is a size based solely on my measurements.  Major modifications are needed!  Agreed?


Look at those drag lines at the bust!  I just think that looser-fitting tops look so cute on a different body type than mine.   I feel frumpy in them!


Ok, so major adjustments needed for swayback, addition of bust darts, smaller hips and waist to start. Wow, so I started pinning this how I wanted it to look and couldn't get the bust to stop pulling at various places so I thought maybe I needed to use my high bust measurement and then adjust for a full-bust.

Sounds reasonable, right?  So my second muslin was a size 10, which is two sizes smaller than what I started with!  I added a bust dart and my swayback adjustment was reduced twice to a total of about 1.5 inches--to  me, that is a startling amount!  Although whatever, it worked!  I struggled with over-fitting the top as I really wanted it more tailored rather than swimming-in looking!  So, enough was enough and here is my second muslin--lesson learned, make more muslins  Why am I such a stinker about this?  I so rarely do it and what a tremendous difference it made in this top!


Here were my other ideas for this top:
1.  Button up back, because I am a sucker for any top that has a button back!
2.  Three-quarter sleeves, because well, fall and winter are approaching rapidly and I'd like to wear this once or twice before putting it away until spring.
3.  Bias-bands on the neckline and hems because I love the look
4.  Color blocking!  I love lots of color!
5.  Silk fabric, so it would be floaty....more on that later.

The process:
Oh the process!  So after making my muslins and transferring the markings to the pattern pieces, I set about to find fabrics.  My first thought was to use silks in three colors.  Let me tell you a bit about the fabric choices where I live, we have a JoAnn's and a Hancock.  There are three quilt shops and a Hobby Lobby.  Do you think I was able to find silk?  Don't spend too much time contemplating, the answer is no!  Hancock's selection was closest with 70% silk but in beige.  Argh.  Next decision was to try and hand dye some fabric to the colors I had envisioned.  But my dye from Dharma Trading Company recommends natural fibers.  What was available to me?  Synthetics.  I don't give up too easily and decided to try and dye 100% poly.  What happened?  Well, it is pretty!  I used twice the amount of dye so I could end up with a deep fuchsia red, but got a baby pink....Grrr!  BTW, the dyed fabric is on the far right.


Next thought was to drive to a local thrift shop and try and find some gently used silk clothing I could dye and use.  Smart, right?  Maybe in theory, but in practicality I found only one top made of silk. My Argh's and Grrr's quickly progressed to unrepeatable four-letter words!  While I was looking for the silks I did find some fabrics I really liked and decided to deconstruct and use in my top.   And, I found two colorways and decided to make not one but two tops so I would have a choice of entries.   I like choices, how about you?


Why don't I rescue more unwanted clothing more often?  I made sure I purchased high-quality fabrics and trims and it gave me another layer of the challenge that I took on!  I really loved the colors in the blues and greens and started with those.

Something I hadn't considered with taking apart previously made garments (most of which were brand-spanking new!) was that the seams and such made it impossible to have big pieces that I could straight cut the pattern pieces.  Creative piecing was in order along with dealing with things such as button bands--check out one of my sleeves!

So with the major portions of the top front and back ready to cut, I had to make a commitment on fabric choices and my only option happened to be the dark blue with the white emblems on it.  Is it bandanna like?  Is it just a random print?  Not sure, but since it was a never-worn dress with a background color I liked, I went for it!  Creative piecing was in order and worked well for my overall design.


Speaking of design, it sort of evolved as I went along.  I found that as I added embellishments, I thought of more things I could do and tried them out.  I mean, how many people use all those decorative stitches on their machines?  I try, but with over 100, I have only scratched the surface and tend to go back to the ones I like the best, and are also the simplest.  Trying to branch out can be difficult, but with the main greenish-yellow band on the front (is this chartreuse?) I knew it needed some sort of dark blue stitching on it.  I like the effect.  Super easy, but very creative, amirite?  


I also found this baby and normal sized rickrack in my stash and in the perfect colors!  It had to be used, it is a match made in heaven!  I also used it down the center back seam which was originally going to be a button back, but I thought that might border on too much, and added just the right amount of touch I wanted and felt was needed.

Other parts of the construction process included bias bands on the neckline that flipped to the right side which I show in process here:


Also, I had to use this button band down the sleeve, you would too if you had the chance, right? 
Baby rickrack highlights the seam as well.  


So enough about all this process nonsense, let's see more of the final result!


So, now I am wondering what your thoughts are?  Have you done anything like this before?  What did you think?

Thanks for reading!
Sue