About Me

My photo
Sewing is therapy for me. I hoard fabric, patterns, notions, and spend more time shopping for fabric than I care to admit...
Showing posts with label Jeans. Show all posts

Saturday, December 31, 2016

The Morgan Jeans


It has been a while since I made a classic pair of jeans and I realize how much I missed the process of it all!  Jeans are FUN to create and not that difficult if you have a great pattern to follow.  :) 


I choose the Morgan Boyfriend Jeans pattern by Closet Case Patterns.  If you've been living under a rock, and haven't heard how uber popular the Ginger Jeans are by Closet Case, then you've missed out!  I haven't tried that pattern myself, but the reviews are just amazing with everyone getting great results!  The Morgan is described like this: Featuring a mid-rise, traditional five-pocket construction, contoured waistband, tapered leg and button fly.  Morgan fits snugly through the hip but relaxes and conforms to your curves with a little wear.  Size up for a sloucher, more casual fit.  Choose between a regular or cropped inseam, add an optional leather waistband patch.  

                             Image result for images morgan jeans by closet case patterns

This is my wearable muslin--can you believe the fit I got right out of the gate?  I made only one modification to the pattern and that was to make my usual swayback adjustment.  I did this at the area where the back yoke connects to the back pant leg but only made the adjustment at the center back and tapered to nothing at midpoint.  


With all the Christmas goodies I have been eating, illness, and no time to maintain running or exercise, I found myself between sizes.  I went with the smaller size in hopes that it wan't a poor choice!  Sorry in advance for the butt shot!


Is this denim fun or what?  It has been in my stash for about a year.  I purchased it from Fabric Mart and was waiting for something fun to do with it.  I should note however that the pattern calls for regular denim with no stretch, but I didn't find the stretch had any effect on the overall garment finish.  


I hemmed these as long as I could, given they are designed for a woman that is 5'6".  I am 5'7".  In the cold months I typically wear boots so these would be tucked inside and in the warmer months, I would either have sandals on or roll these up.  I do really like the length.  As with denim, residual shrinkage in the length can occur so I will keep that in mind if these do tend to shrink up.  


I added a few of the fun little details that the pattern mentions--leather patch and rivets. 


The button fly was masterfully designed and super easy to install.  This is my first pair of button fly jeans and it won't be my last!  


For next time, I may size up for that slouchy look, or try the cone denim the pattern calls for that naturally grows as you wear it.  


I had so much fun creating my Morgans!  I hope you'll try this pattern!

Sue  

Tuesday, July 12, 2016

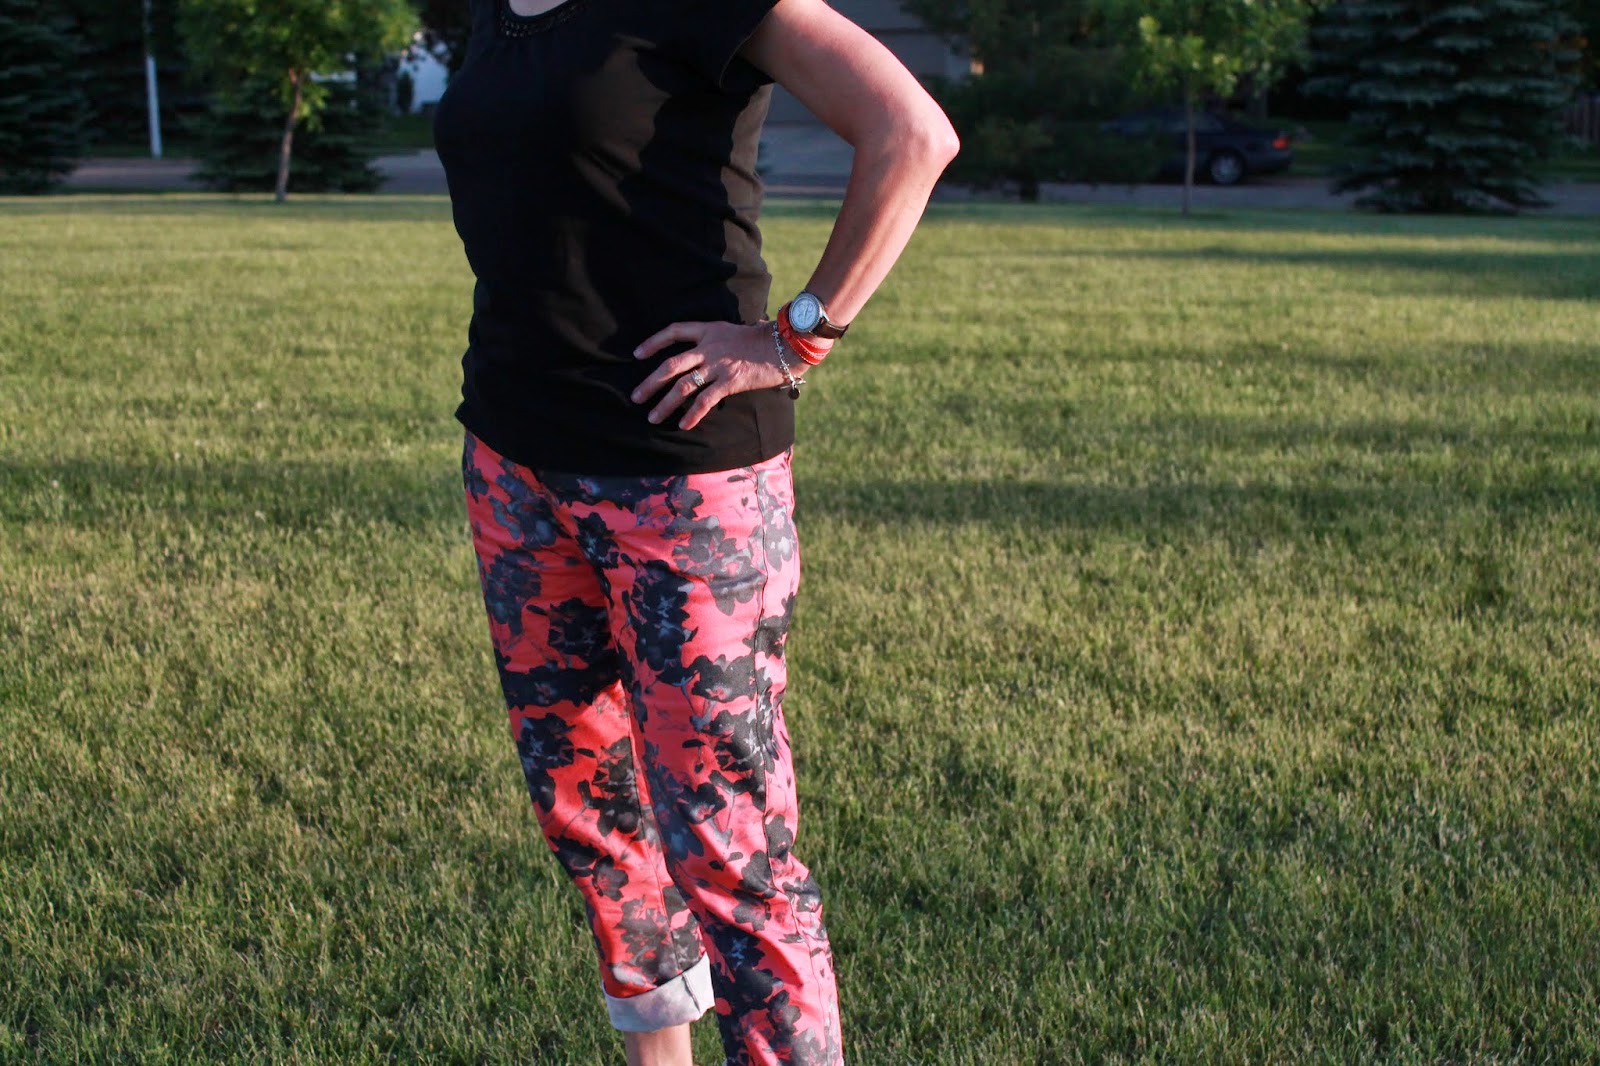
Pink Jeans--screaming summer here!

I'd forgotten how much I love making jeans.  They are super satisfying, especially if they fit well and the process is just different enough from a regular type of clothing--dress, top, knit, etc.

Fashionable narrow leg woven jean

These are described as a narrow leg jean with a contoured waistband and RTW details.  I have to say, I completely agree!


I really, really, really love the fit of these.  They work on my aging body, even though my back end is starting to look like my mother's.  :)  


I really need to do more squats and lunges.  That is on my to-do list.  


We all know that SA's directions are not the greatest and since this is not one of their newer patterns that I believe has better verbage that the older ones, this one was a chore.  This isn't my first rodeo with jeans.  I've made many pairs--probably double digits so this isn't a new process for me.


The length of these is just perfect.  For reference, I am 5'7".  I wash and dry my denim at least twice to take care of residual shrinkage.  


I really love adding rivets.  Other than the six rivets I added, that is all I glitzed them up.  I mean they are PINK!  What more do you need?  


Sorry, I am not sure why this photo is fuzzy but the hubster couldn't be bothered for more photos.  


See what I mean by approaching geriatric butt?  My rather regular jogging isn't enough to take care of this body deformity.  ;)    


Here is a closer up photo of the rivets.  I don't have any fancy equipment other than a leather punch to cut the fabric so it can easily receive the rivet top and bottom half, the rivet setters, and a hammer. Two good whacks and those babies are set.


See how neat and tidy the zipper looks?  I finally dug out a Vogue jean pattern and looked at a previous pair I had made so I could visualize what I needed to do to finish up the fly.
My pocket lining and facing is made of lightweight cotton.  One nice this with the pocket lining is that it extends to the fly.  I sort of feel like you could possibly make that piece from a power net so you had some tummy control.  

This was a fun make.  This denim is so awesome to work with!  I also have some in red and leaf green.  I can't wait to stitch those up as well.  

Did I mention this is how these jeans fit STRAIGHT from the pattern?  How often does that happen?  I love my shocking pink jeans.  What have you been sewing?

Sue 

Saturday, September 12, 2015

Stitch Wear Play, sewing for Simon!

I was so very excited when I WON this adorable book of patterns for kiddos!


After all, I am a grandma and sewing for little ones is great fun!  My first and second project from this book was the Boy's Shorts and the Boy's Shirt.  I love uncomplicated names for patterns.

You may be thinking that these look like pants, not shorts, and you are right!  I lengthened these by about 3 inches as in my neck of the woods, summer is practically over and fall weather is emerging. It was 44 degrees this morning!  Construction was super simple.  The drafting was excellent on these pants with clear directions and illustrations of the steps to put them together.  Easy-peasy!  To dress them up just a tad, I added rivets to one side of the back pockets.


It's interesting that the back pockets are attached after the yoke is stitched on.  I wondered why but then realized the top portion of the pocket overlaps the yoke.  No wonder!

I decided to make the waist band out of the plaid I was using for the shirt.  I attached cotton cording to elastic and that is what will hold the little guys pants up.  He has a rather flat derriere and pants tend to slip down quite a bit.  I thought with the addition of elastic, they would have a better chance of not slipping down.


For the shirt, and BTW, isn't this design adorable?  I changed it up a bit as I realized that I cut it out incorrectly.  I hate it when I do that but I am happy with the end result!  I cut 1.5 inch bands, interfaced, folded, stitched on and viola!  The perfect place for snaps was created!  I like using snaps for children's clothing as you don't have to worry about missing buttons.  Young moms simply don't have time to deal with that sort of nonsense!  The snaps are plastic and came from Got lux.


Since I did cut incorrectly, I added a neck band and again, I cut a 1.5" band on the bias, folded in half lengthwise, pressed, stitched, folded over and caught the underside of the band with topstitching.


The fit is easy and construction is great.  I very much enjoyed putting this outfit together for him and can't wait to see him in it!


Another notes on this pattern book: all seams are 3/8" which makes it easy to sew and there isn't a lot of clipping seams.

Sizing ranges from one to five or a 39.5" kiddo to a 51" child.

I made a size one, which most closely matched Simon's measurements.  I anticipate these to be a little big on him, or rather loose-fitting.  I am hoping they will fit next spring or later this winter.  He can wear a long sleeved white tee-shirt underneath and be warm and stylish!

Thanks for reading.  This was my first foray into Japanese patterns and I have to say that I am impressed!  I will be making more garments from this book.

Sue

Sunday, November 16, 2014

Another pair of Vogue pants!

So, you haven't seen me make a pair of pants for a while and I decided it had been too long since I pulled out my beloved Vogue 8774.  I can't express how much I LOVE this pattern!  While this is my fifth?  Sixth? time I've made these, I still need to make some tweaks until I feel like I have mastered the fit of these awesome pants!  


I like making pants, it is a challenge and sometimes I feel like tops and dresses are sort of a fitting cop-out. Know what I mean?  There are so many things to consider when fitting pants: crotch depth and length, rise, inseam, any sort of swayback adjustment, pulling in any areas, waist-to-hips ratio, the dreaded fly, need I go on? 


So back to my creation that was sorely missing in my closet--a khaki colored pair of pants with jean styling I could wear to work.   


I was very happy with my last pair which you can see below and I tried to tweak further but I am just not totally satisfied and yes, you guessed it!  I'll be making more.  


So, how did I do all this? 
1.  Flatness--I had a suggestion to create a deeper crotch curve to help take care of the pooling I get at the upper thigh.  I'm not so happy with how this made my current pair fit!  I wish I would have tried to fold out a 1/2" at the upper back thighs as I have read on line.  I guess I see another pair of my pants in my near future!   
Because of the flatness, I had to rotate the back inseam to the front by 3/8" to get the inseams and outer seams to hang properly.  


 I don't even want to show you this next picture as I feel like I need to immediately do 1,000 lunges to perk up my derriere!  


I added rivets to dress them up just a bit as they are plain, khaki pants after all!  The rivets were super easy to add.  I have a Awl that I use to punch the holes in the fabric and then a kit from Hancock's I used to set the rivets.  They do give just a hint of something, right?  


Another thing I did was to make a swayback adjustment.  I completed that by 14" in the yoke and another 1/4" at the waistband.  I like spreading the adjustment out as I think it looks better and feels better when you wear the pants!


Wide upper thighs--pretty self explanatory, right? 
Crotch curve issues....ah, the crotch curve!  I get these annoying little lines at the front crotch that I pinched out and took about an inch seamline.  No more lines!
Back crotch curve was a different matter.  With that seamline I made a 'j' seam by taking in an additional 5/8" from the back seamline which you can see below.  Although I did create an even deeper seamline than what is pictured!  I scooped out another 1/2".   


Length is a challenge for me with this pattern.  Being only 5'7", I didn't think I would need to lengthen them but I did by about 1.5". 


Any suggestions for me with this pattern?  I feel like getting the 'perfect' fit is a challenge that I must master!  

Thanks for reading!
Sue :)  

Saturday, October 18, 2014

3rd Place! Yay!

I finished third and wow, what fun it was to participate in the Fabric Mart Fabricista challenge!  I ended up with three garments I am VERY proud of and LOVE wearing!  I also win a gift certificate!  My goal was to make it to the top five and I surpassed that so everything else was gravy!  

Here is a recap of what I made!

Round 1--the Scout Woven Tee 


Round 2--all about the fit! 


Round 3--Ready to wear knock off!


Round 4  The Little Red Dress!


Round 5--the mystery bundle challenge!


Round 5--Inspired by art!


Wow, do I love everything I made! 

I learned a lot from participating least of which is to make a muslin if you want a great result!  

I can't tell you how many times I skip this step out of sheer laziness!  

Think, think, think about the fabrics you choose for your garments.  

I typically do this until I drive myself nuts, but the right fabric for the right pattern is essential.  

This is something I will do in the future and that is to try and add a little pizazz to each garment I make--something unexpected, like a super fun lining, just something!  

If I met you through this challenge, I feel doubly blessed!  

If you hung with me throughout--a huge thank you!  

Again, thanks for reading!

Sue :)  


Tuesday, September 16, 2014

The Fitting Challenge!

So, this week's challenge from Fabric Mart was focusing on fitting and using a solid fabric since you can see how a garment actually fits rather than being hidden from florals or other distractions!  Oh fitting!  While sometimes I am perfectly happy with how I look, other times, like when I am fitting pants, I feel like I need to spend the next eight weeks at the gym working with a personal trainer!  It doesn't help that I am a 50+ woman!    So, here is my efforts at fitting pants....


Personally I like making pants.    And, while some people get annoyed reading reviews of the same pattern someone has created ad nauseum, I strongly believe that repeating patterns give you a chance to perfect the fit.  With that said, I created two pairs of pants for this challenge but ended up settling on jeans for my submission.  I LOVE Vogue 8774 and have created them at least four times and while I intensely worked on the fit (again) I still think I might be able to do some additional tweaking.  Know what I mean?


So back to my creation for this week....jeans!  The impetus for choosing pants was the dreadful pair I pulled from my closet last week to wear to work.  They were grey jeans with some bling on the back pockets.  I love the color but HATE the fit!  And, they are super high-waisted when compared to most jeans that sit on the hip bones rather than the true waist.  I felt like an 80's mom!  So, off those went to the charity pile and I set out making pants that fit me and my challenges.


So what fitting issues did I deal with?
1.  Flat derriere.
2.  Wide upper thighs aka saddle bags--which btw are hereditary--thanks mom!
3.  Crotch curve--yes, everyone's is unique and I had to resculpt it to fit me!
4.  Waistline--no matter how carefully I measure and plan, I have to alter the waistline after I create the pants.  Luckily these days I have to take it in rather than out but it is tedious to get it perfect.


So, how did I do all this?
1.  Flatness--I pulled out three sewing books from my library to figure out how to deal with this issue and was surprised that no one really addressed it!  What happens to me is that I get a little pooling of fabric under my buns that looks like a cowl-neck.  I did manage to find an article on line that suggested making an adjustment by taking a fold in the pattern tissue to eliminate the excess, sort of like when you make swayback adjustment.  Now, why didn't I think of that?  I had to work really hard not to over-fit in this area as I stated before my upper thighs are wider than I'd like so too much fitting accentuates my little pools of fat there.  So if you notice just a little extra fabric, that is a preference for me.
Because of the flatness, I had to rotate the back inseam to the front by 3/8" to get the inseams and outter seams to hang right.  I spent a great deal of time bonding with my seamripper for this challenge!


Another thing I did was to make a swayback adjustment.  I completed that by 14" in the yoke and another 1/4" at the waistband.  I like spreading the adjustment out as I think it looks better and feels better when you wear the pants!
2.  Wide upper thighs--pretty self explanatory, right?
3.  Crotch curve issues....ah, the crotch curve!  I get these annoying little lines at the front crotch that I pinched out and took about an inch seamline.  No more lines!
Back crotch curve was a different matter.  With that seamline I made a 'j' seam by taking in an additional 5/8" from the back seamline which you can see below.


Those were my main fitting issues.  Construction wise, I am very proud of how these jeans turned out!  They are very comfortable and I am very happy with the fit!  I like the addition of the white jeans thread I used to dress them up just a bit!


Length is a challenge for me with this pattern.  Being only 5'7", I didn't think I would need to lengthen them but I did by about 1.5".  Just beware of the length if you choose to whip up this pattern!

Sunday, June 29, 2014

Vogue 8774 (again!)


Fitted, tapered or straight-legged jeans (below waist) have shaped waistband with hook/eye closure, carriers, front/back pockets, back yokes, and binding for front fly zipper closing. Topstitching and narrow hem.

Here is pair 1:

Here is pair 2: 


I had to make this Vogue pants/jeans pattern again. I have worn both pairs numerous times and they are so stinkin' comfortable that I want about 10 pairs in every possible color!  Maybe one of these days I will make them in good old denim blue!  This lovely coral is from Emma One Sock.  It sewed up beautifully!  It has just a little more stretch than I am used to and may have to take these jeans in a little more at the outer leg seam.  I will reassess after washing and drying. 


From cutting out to sewing on the hook and eye closure, it honestly took me only about 3.5 hours to make these. Not sure why they whip up so quickly other than this is probably the best fitting, most well written pattern I have used for jeans.


Cutting out I started with a 16 but with my fabric I graded to a 14 in most places, particularly the legs.  If I didn't mention it earlier, I made view A or the straight leg version, same as the two previous versions I made.


I only added one row of topstitching in all the places shown on the pattern directions simply because I used white jean/topstitching thread.  I thought it might be hard to get everything perfectly straight.

I did decide to add topstitching along the inner and partway down the outer leg seams along with the center back seam or butt of the pants. I also played with the topstitching on the back pockets and had some fun with it.  Rivets were added in the usual places on the front pockets, including the watch pocket.  I find it is much easier to add the rivets when you first use an awl to make the hole for the opening, stick the peg portion of the rivet through the hole the awl made, line everything up and then use a rubber mallet to secure it.  I did make a practice rivet before applying to my actual jeans as it had been a while since I had done one. 


I made these jeans about 2 inches longer than any of the other two I previously made.  They are perfect length wise.


The fly goes together so well and you don't have that annoying gap that shows glimpses of the zipper pull or any of the zipper for that matter.


Speaking of pattern strengths, I still love where this pattern hits at the top of the hip bones rather than the waistline.  When you sit down, no one sees your undies--which is a bonus in my book!


I love my pants.  I wore them all day today and found them extremely comfortable, colorful, and fun to wear.

Thanks so much for reading! 
Sue