About Me

My photo
Sewing is therapy for me. I hoard fabric, patterns, notions, and spend more time shopping for fabric than I care to admit...
Showing posts with label Silk. Show all posts

Sunday, July 14, 2019

Silk Bondi Top

Talk about a fast sew!  This is a review for yet another woven tee.  This time, I made the Bondi top.  

This is a super simple top with very few seams.  I knew it'd be perfect for my double-faced Italian Silk I purchased from Treadle Yard Goods a few weeks ago.


I only purchased a yard of this.  I had no idea which pattern I'd end up using, but what I did know, is that this would be a simple top to layer, or not.   I didn't plan on this for casual wear, but I rather like it with my jeans and sandals!


This fabric was totally a splurge at $40/yard on sale!


I think it's totally worth it.  If you could feel what this feels like on your skin, you'd agree.


This top has a simple back yoke that attaches to a pleated back.  It has a banded neckline that I used the silk for. 

This was a simple fast sew and I love my new top!

Thanks for reading!
Sue

Sunday, February 10, 2019

Silk Orageuse the Prague blouse


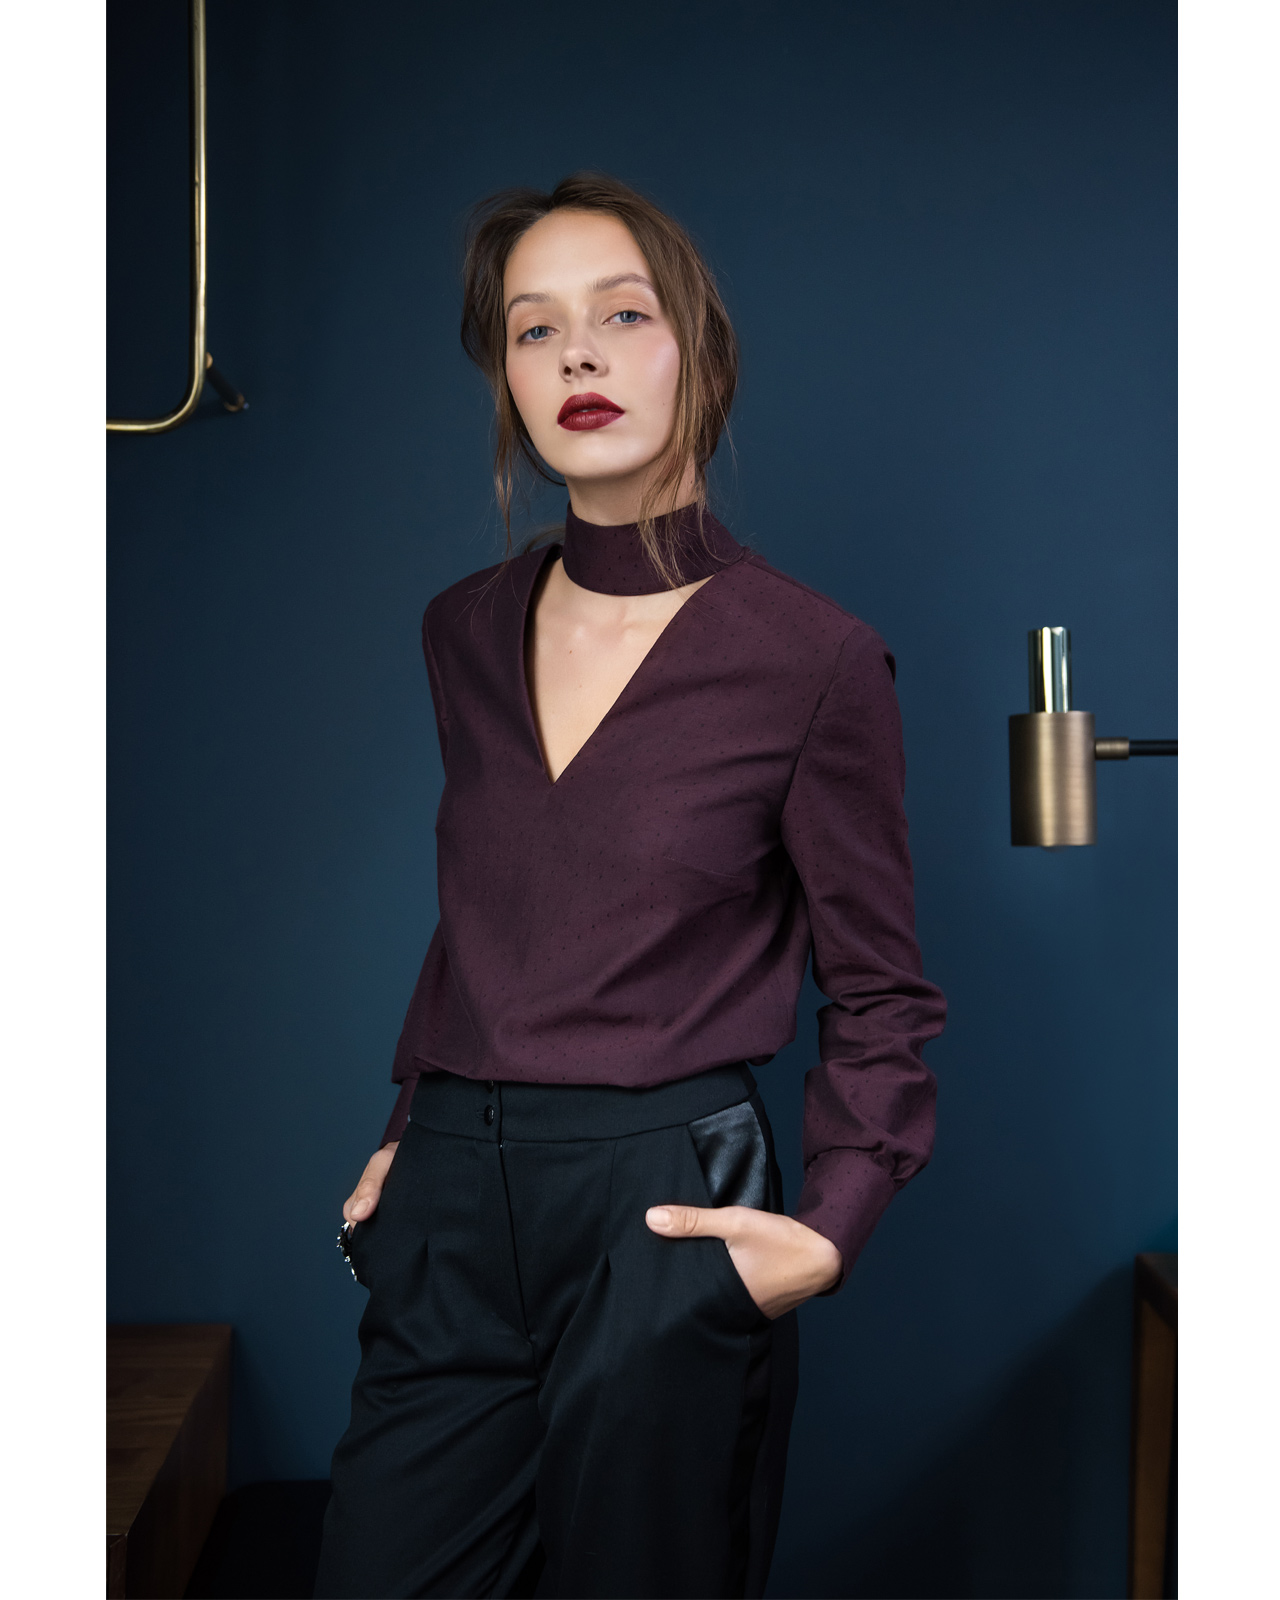
I positively fell in love with this blouse the moment I laid eyes on it.  It's a new to me pattern company based out of France.  The company is called Orageuse and the pattern is the Prague Blouse.  This was fun to make! Instructions are available in either French or English.  They were detailed and easy to follow for this pattern.  

Image result for images Prague blouse

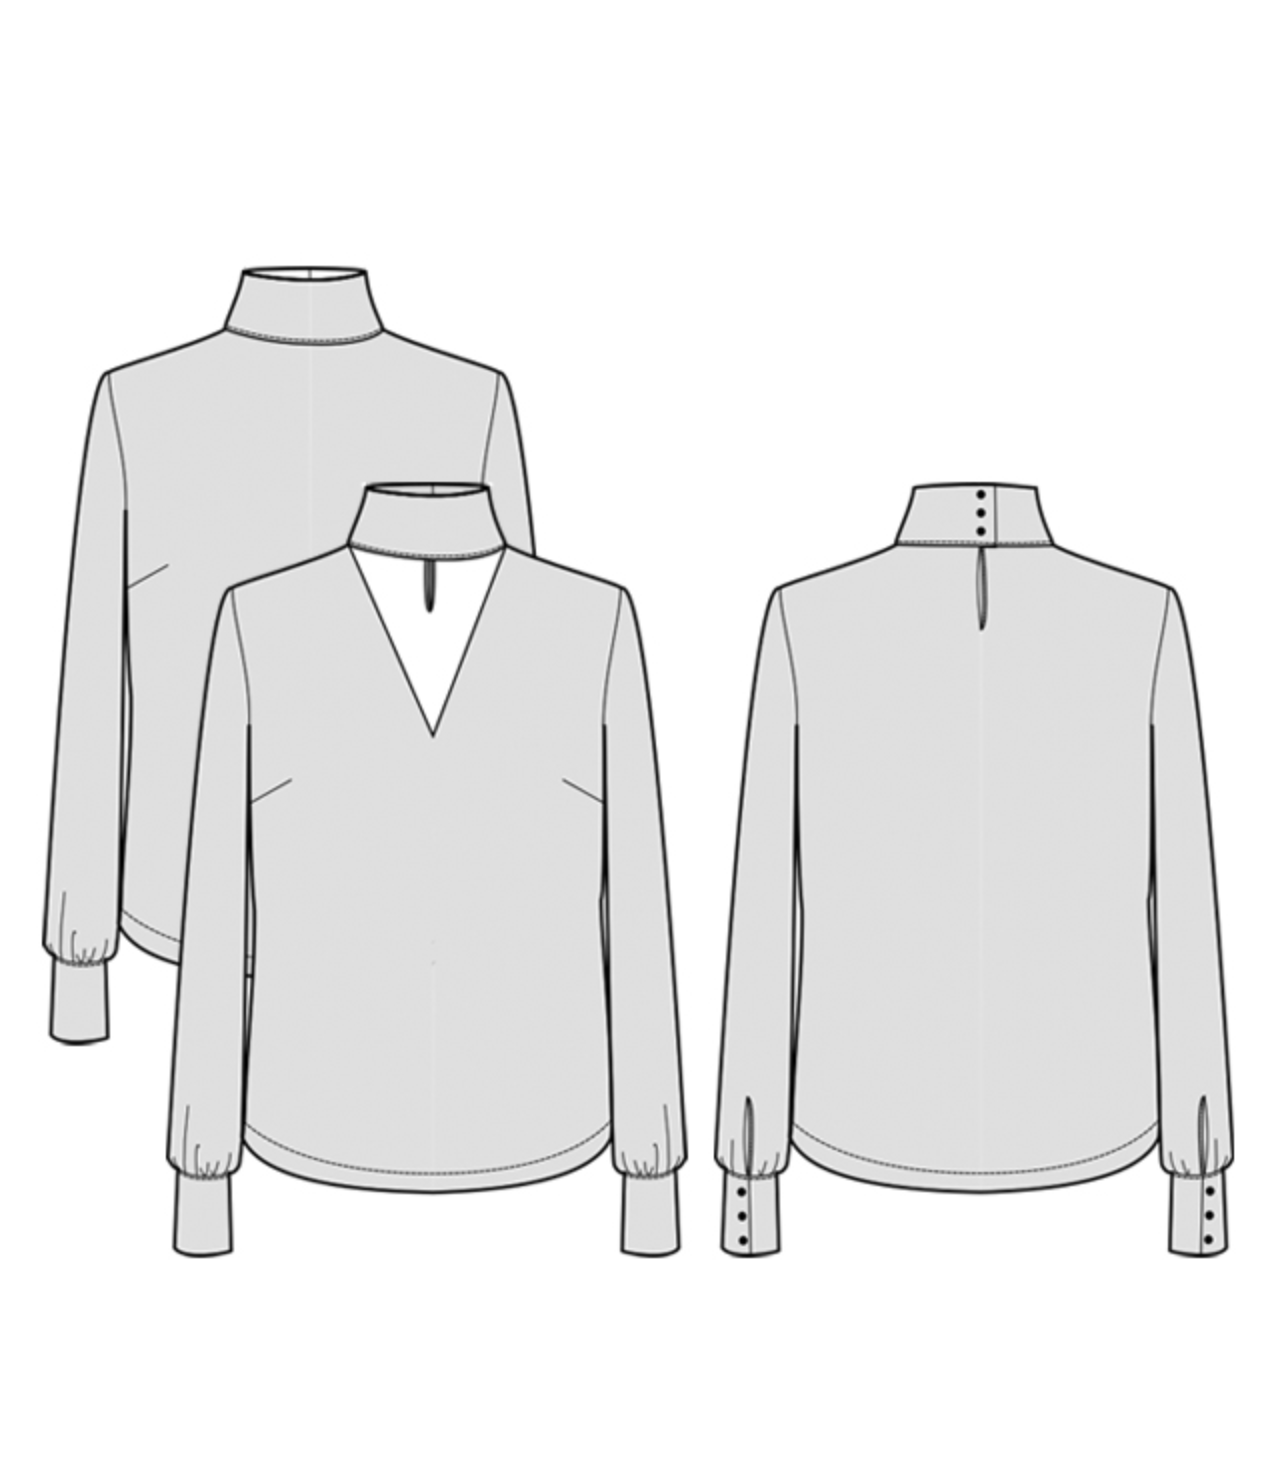
You can vary this pattern at bit at the neckline.  See the line drawings below.  

Image result for images Prague blouse

That front portion can be left open (does that describe this?) or you can have a contrast, or even use the same fabric as the blouse.  I choose to use a silk from Fabric Mart for this blouse.  This creation was for my February blog post.  I really, really love this pattern!  


Since this was a new-to-me company, I made a muslin and am glad I did.  I also flat pattern measured and knew it seemed be developed from a standard pattern block and that my typical alterations would work. 


I was so hesitant to try this neckline and when I was making my muslin, I seriously toyed with the the full-coverage neck.  But then I had a talk with myself and said, just go for it!  Your next version can have the full-coverage neck.  Okay, now just get it cut out so you don't change your mind...again.  Anyone sew like that?


That slit in the back is super cute as well.  For alterations here's what I did.  I learned this from Designer Joi when I took a classroom from her last summer.

Lengthened from the shoulder line to the apex.  One great thing about this pattern company, ORageuse, is that bust alteration lines are marked on the pattern.  Can I get a whoop, whoop?
Lengthened the bust curve area.  This is 2 or so inches below the dart.  It gives you ease for the girls to move freely.  
I typically have to alter across the upper back as I must have broadish shoulders.  I don't have to with this pattern company.  
Lastly, to accommodate the front lengthening I did, I also added to the back across the bust area by about an inch and a half.  This ensures that the front isn't longer than the back.  Make sense?  

I also widened the hips by about a total of an inch.  I just didn't want this too close-fitting in this area.    

V

Here are some detail shots.  This is where the neckband connects to the bodice in front.  Sew precisely here!  


I love these buttons I found.  They were at JoAnns.  I think they add the right amount of glam.  Look how precise my topstitching is!  I get excited about things like that. :)


Here's the back neck slit.  Again, I did some very precise stitching here.  I also only used two instead of three buttons as they were a bit too large to fit three of them.  


I really love this blouse and plan on making another.  As I was putting this together, I thought a sleeveless version would be worth trying.  I should mention that in this photograph, you can barely see the piece of interfacing I used to reinforce the area at the back slit.  I didn't want anything to stress that seam.  

Thanks for reading!  Have you tried any european pattern companies?  If  you have, please share their name!  I'd love to check them out. :)
Sue  



Thursday, April 5, 2018

Vintage style sewing! Simplicity 8460

I was so drawn to this pattern--the style, shape, and probably also the color of the dresses on the front.  That pretty coral-ish red is one of my favorites.  

Simplicity Pattern 8460 Misses' Vintage Dress and Jackets

How cute, right?  Well maybe if you are a size 2 like the model!  

Here is my version:  


I used this pretty boluce-type fabric from my stash.  It was originally purchased from Fabric Mart.  Pink is fresh and screams spring to me.  However, we still have way below average temps and snow on the ground.  Did I mention it is April 5???  Hence the indoor photos!


With this super simple style, I decided to line the dress and use couture methods to finish it off.  I used a floral silk from my stash (and incidentally left over from a pink wool coat) to line the dress.  


I added the lining by sewing all of it in by hand.  It was relatively painless and so therapeutic!  Whoever says sewing isn't therapy has no idea what they are talking about.  Am I right?


This photo is of the inside neckline.  When you sew a lining in by hand you can make a little lip with the main fabric and have it slightly roll to the inside so none of the lining shows at all.  


Here is the zipper edge.  I used an invisible zipper but I believe the pattern calls for a lapped zip.  I enjoy invisible ones because well, they are invisible when you insert them correctly.  


Even with a heavier fabric you can still insert an invisible zipper.  


Seeing this silk I used for the lining just makes me smile.  Silk feels amazing when you have it next to your skin.  


I like how the back neckline is on this dress.  To fit this dress, I sewed the side seams and then pin fit it to me in the dart areas.  I like this technique so much.  I didn't make mine as fitted as the models as I am not a size 2 and I want to be more comfortable.  


Here is the cute little jacket that is part of the pattern.  This is the first cropped type jacket I've made.  I didn't have enough of the pink to have it match so I used this mid-weight denim.  The buttons are covered in pink garment leather.  


Oh yes, I did manage to have enough of the silk to line this.  The jacket does call for a lining, unlike the dress.  


I certainly had fun creating this dress and jacket.  


Thanks for reading!
Sue 


Wednesday, January 31, 2018

A new coat! Butterick 6423

This coat pattern is getting a lot of attention....look at how cute it is!  This is Butterick 6423


I love everything about it.  Here is the description from the back of the pattern envelope: Very loose-fitting lined coat has front shaped princess seam with pocket, curved gusset under arm, lower back seam with pleat.


I choose to highlight some of the design elements, especially the shaped front seam that extends into a pocket!  How clever!  Actually, that is my favorite detail....


I used a heavy wool coating I've had in my stash for quite some time, years actually!  This past Christmas, my two beautiful daughters challenged me to actually sew from my stash--now that's a novel concept, huh?  We agreed to not purchase a single thing in order to complete this challenge--which lasts the entire month of January.  While I am happy with many of the makes I've made, I know to make a dent in my stash, I have to extend this...at least until March!  Do you think I might have a bit of a problem?  I am however very happy that I finally sewed up this fabric.  And, I made a very colorful lining with a floral 100% silk that I've also had for several years.  I think this coat is a match made in heaven for fabrics!  


Construction of this coat is straight forward.  My only deviation from the instructions was when I inserted the leather piping I used...yes, this was also from my stash!  I decided to sew together the piping, insert the piping on the princess seam, and then proceed with the directions.  If I was a brand newbie, I would wait before trying this coat, despite the 'easy' rating.  There is a lining to insert, inseam pockets, lots of hand sewing, etc.  Make sure you have a bit of experience before you try this pattern.  It isn't difficult, but it does require a bit of precision and there are a lot of steps.


Fitting this coat is a bit of a challenge, and I could have done better...I may end up taking it apart a bit...or I may end up just enjoying the easy fit.


I made a sloping shoulder adjustment along with a swayback adjustment and that's it.  I looked at the finished measurements for the bust area and decided it should fit fine and it does.  


With this big old collar, I highly recommend under-stitching it all the way around until you get to where the collar roll stops.  Since my wool is so very heavy, I decided to topstitch 3/8" from the edge. 

This was a fun coat to make, and I received some nice compliments today about it.  Isn't it great when someone comments on your me-made makes?  

Thanks for reading!
I love your comments....
Happy sewing!
Sue


Monday, July 24, 2017

Simplicity 1467 top made with some precious silk!

Hello all! I have been sewing up a storm lately and one of the projects to complete this summer was to use this silk fabric my son and daughter-in-law brought me from their trip to Thailand.  This gorgeous silk was a pashima.  It is very delicate and required some care to work with.


I had made a different top with the other portions of the silk that was a total wader even though I had made a muslin and worked out the fit details.  Again, it was due to this fabric being super delicate.  I managed to have enough left over to put together this top with a contrast back.  I am so much happier with this!  


Here is the pattern I used:

                        Image result for images Simplicity 1467
I like the clean lines of the top and the fact it is sleeveless.  


This fabric is also somewhat iridescent.  See what I mean when you look at the photos?


I really like the pink back!  This isn't the most precise sewing I've ever done but I knew from previous experience working with this fabric that what ever happened, was going to stay that way, much like when you sew with leather.
   

I did my best to sew very carefully but this was the 'shiftiest' fabric I have ever sewn with!!!


I did have to cut the front yoke on the bias.  I think it is fine given the jumbled way the elephants are strewn on this fabric.  

I enjoyed sewing this!

Thanks for reading!
Sue

Thursday, December 31, 2015

Woodland Stroll Cape--another Indy!

I am on a roll with Indy patterns!  This one from Liesl and Co has been on my radar for a while  now and I finally dove in to create it!  It really is a simple make and I really, really like my finished garment.

 digital woodland stroll cape sewing pattern

I ordered this as a PDF and it didn't have too many pieces--yippee!  There are a lot of pages of directions and helpful illustrations to assist you along the way.


I made a size medium and the sizing is from XS to XL.  This pattern isn't a fabric hog, in only needing 1.5 yards of the main and lining fabric.


It does need a fabric with some body such as wool coating, wool melton, velvet, moleskin or corduroy.


I used a pale yellow wool suiting that wasn't heavy enough so I remedied that by using two layers of the wool and quilting the sandwiched layer to the lining which is silk.  This process added about an hour to the total project.  Not too bad!  Both fabrics have been in my stash for a while and I purchased them at Fabric Mart.

This is such an easy fitting garment and unless you are uber busty, I would recommend using your hip measurements to find your right size.


I made zero alterations to this cape.


I decided to try and find the little buckles just like the photo of the pattern uses and was successful!  I found the ones I used, from Dritz, at JoAnns.


An easy project that yields fun results!  I really like this cape and plan on wearing it a lot!


Thanks for reading!  And I hope you all have a Happy New Year!
Sue