About Me

My photo
Sewing is therapy for me. I hoard fabric, patterns, notions, and spend more time shopping for fabric than I care to admit...
Showing posts with label Burda. Show all posts

Tuesday, July 19, 2016

Burda--welcome to the jungle!


This is such an unusual top for me to make, but know what?  I like it!  It is unique and really out there!


115a-052016-b_large

This is Burda, 115 A from 05-2016.  I downloaded it from BurdaStyle.com.  IT is called a cape T-shirt and that sort of fits.  


I had this fabric left over from another project and I thought the cat print would give this top a different sort of vibe.  


See how the sleeves are not really sleeves?  
115a-052016-b_large

Above you can see the line drawing.  This is very, very cape like in the manner in which the top of the garment is formed and cut.


And yes, the back does really cross over to the front as much as it looks.  I like very much how this 'sleeve' treatment hugs your arms.  


There isn't a center back seam on the pattern but I had to squeeze my top out of this so I added the seam.  I don't think it detracts from the overall design at all.  


There wasn't a direction on how wide to make the neckband, so I cut mine at 2.5 inches wide, folded it in half, and used a 1/4" seam to attach to the neckband.  I wanted a nice thick band so this didn't dip too low in the front or back.  

If I decide to make this again, I will need to make a swayback adjustment.  

What are your thoughts on this unusual garment?  Should I keep it, wear it?  

Sue :)

Sunday, April 26, 2015

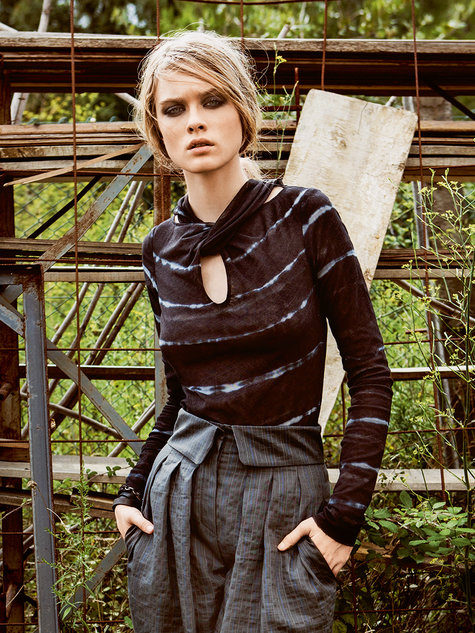
Burda 'Scene Queen' Top or 130-A-11-2014

I really wanted to be a quality participant in the Burda challenge.  I mean, I put a badge on my site and everything.  I But to date, I haven't made very many.  I think I've come to the conclusion that Burda doesn't fit my lifestyle as much as I'd like it to.  

130_0214_b_large

Here is my review for the top from the Winter 2015 issue. 


This top is from the Dark Nights collection and the unusual neckline really drew me to this pattern.  From the magazine, it is described as: This stylish twist-neck top looks even more intriguing sewn in eye-catching tie-dye fabric.  I didn't have tie-dye fabric, but I did have a very lightweight poly blend knit in my stash that worked pretty well.  


This top takes quite a bit of yardage as it is a double layer of fabric, front and back which is nice as the mesh-weight the top calls for isn't exactly opaque.  I didn't have enough fabric to make it a double layer.  In fact, you really need a double layer to make the scandalously low cut out piece.  I didn't but I had enough to make a partial facing which works.  


I pretty much followed this pattern verbatim--however I could tell this top was ridiculously low and I raised it 2 inches.  It's still silly low cut.  Please pattern designers, we don't all want to flash our navels when we bend over to the world!  We also don't want to always wear a cami underneath. Am I right?


One thing I found a little head-scratching was the dimensions of the scarf-type piece that runs from the back shoulders around to the front and to the other shoulder.  I winged it and feels like it works.  I ended up edgestitching the keyhole opening to keep the facing from rolling out of place.  


I sort of like this is a fitted top but the length is really long and so are the sleeves.  Both of which are easily remedied.  In fact, before I wear this, I must chop off at least six inches from the bottom as I don't like how it hugs every lump and bump on my over 50 body!  


If you decide to create this,  use a very light weight fabric so it all lays nicely.  I tried to make another with a more substantial knit and it just doesn't work.  The scarf portion won't lay right and it is just a mess!  I won't even show it to you is't so bad!  


All in all, this is okay for me.  I really am trying to get on the Burda bandwagon but I'm just not sold yet.  I'll try several more just to give them a fair shot.  


Thanks for reading!
Sue  

Friday, April 17, 2015

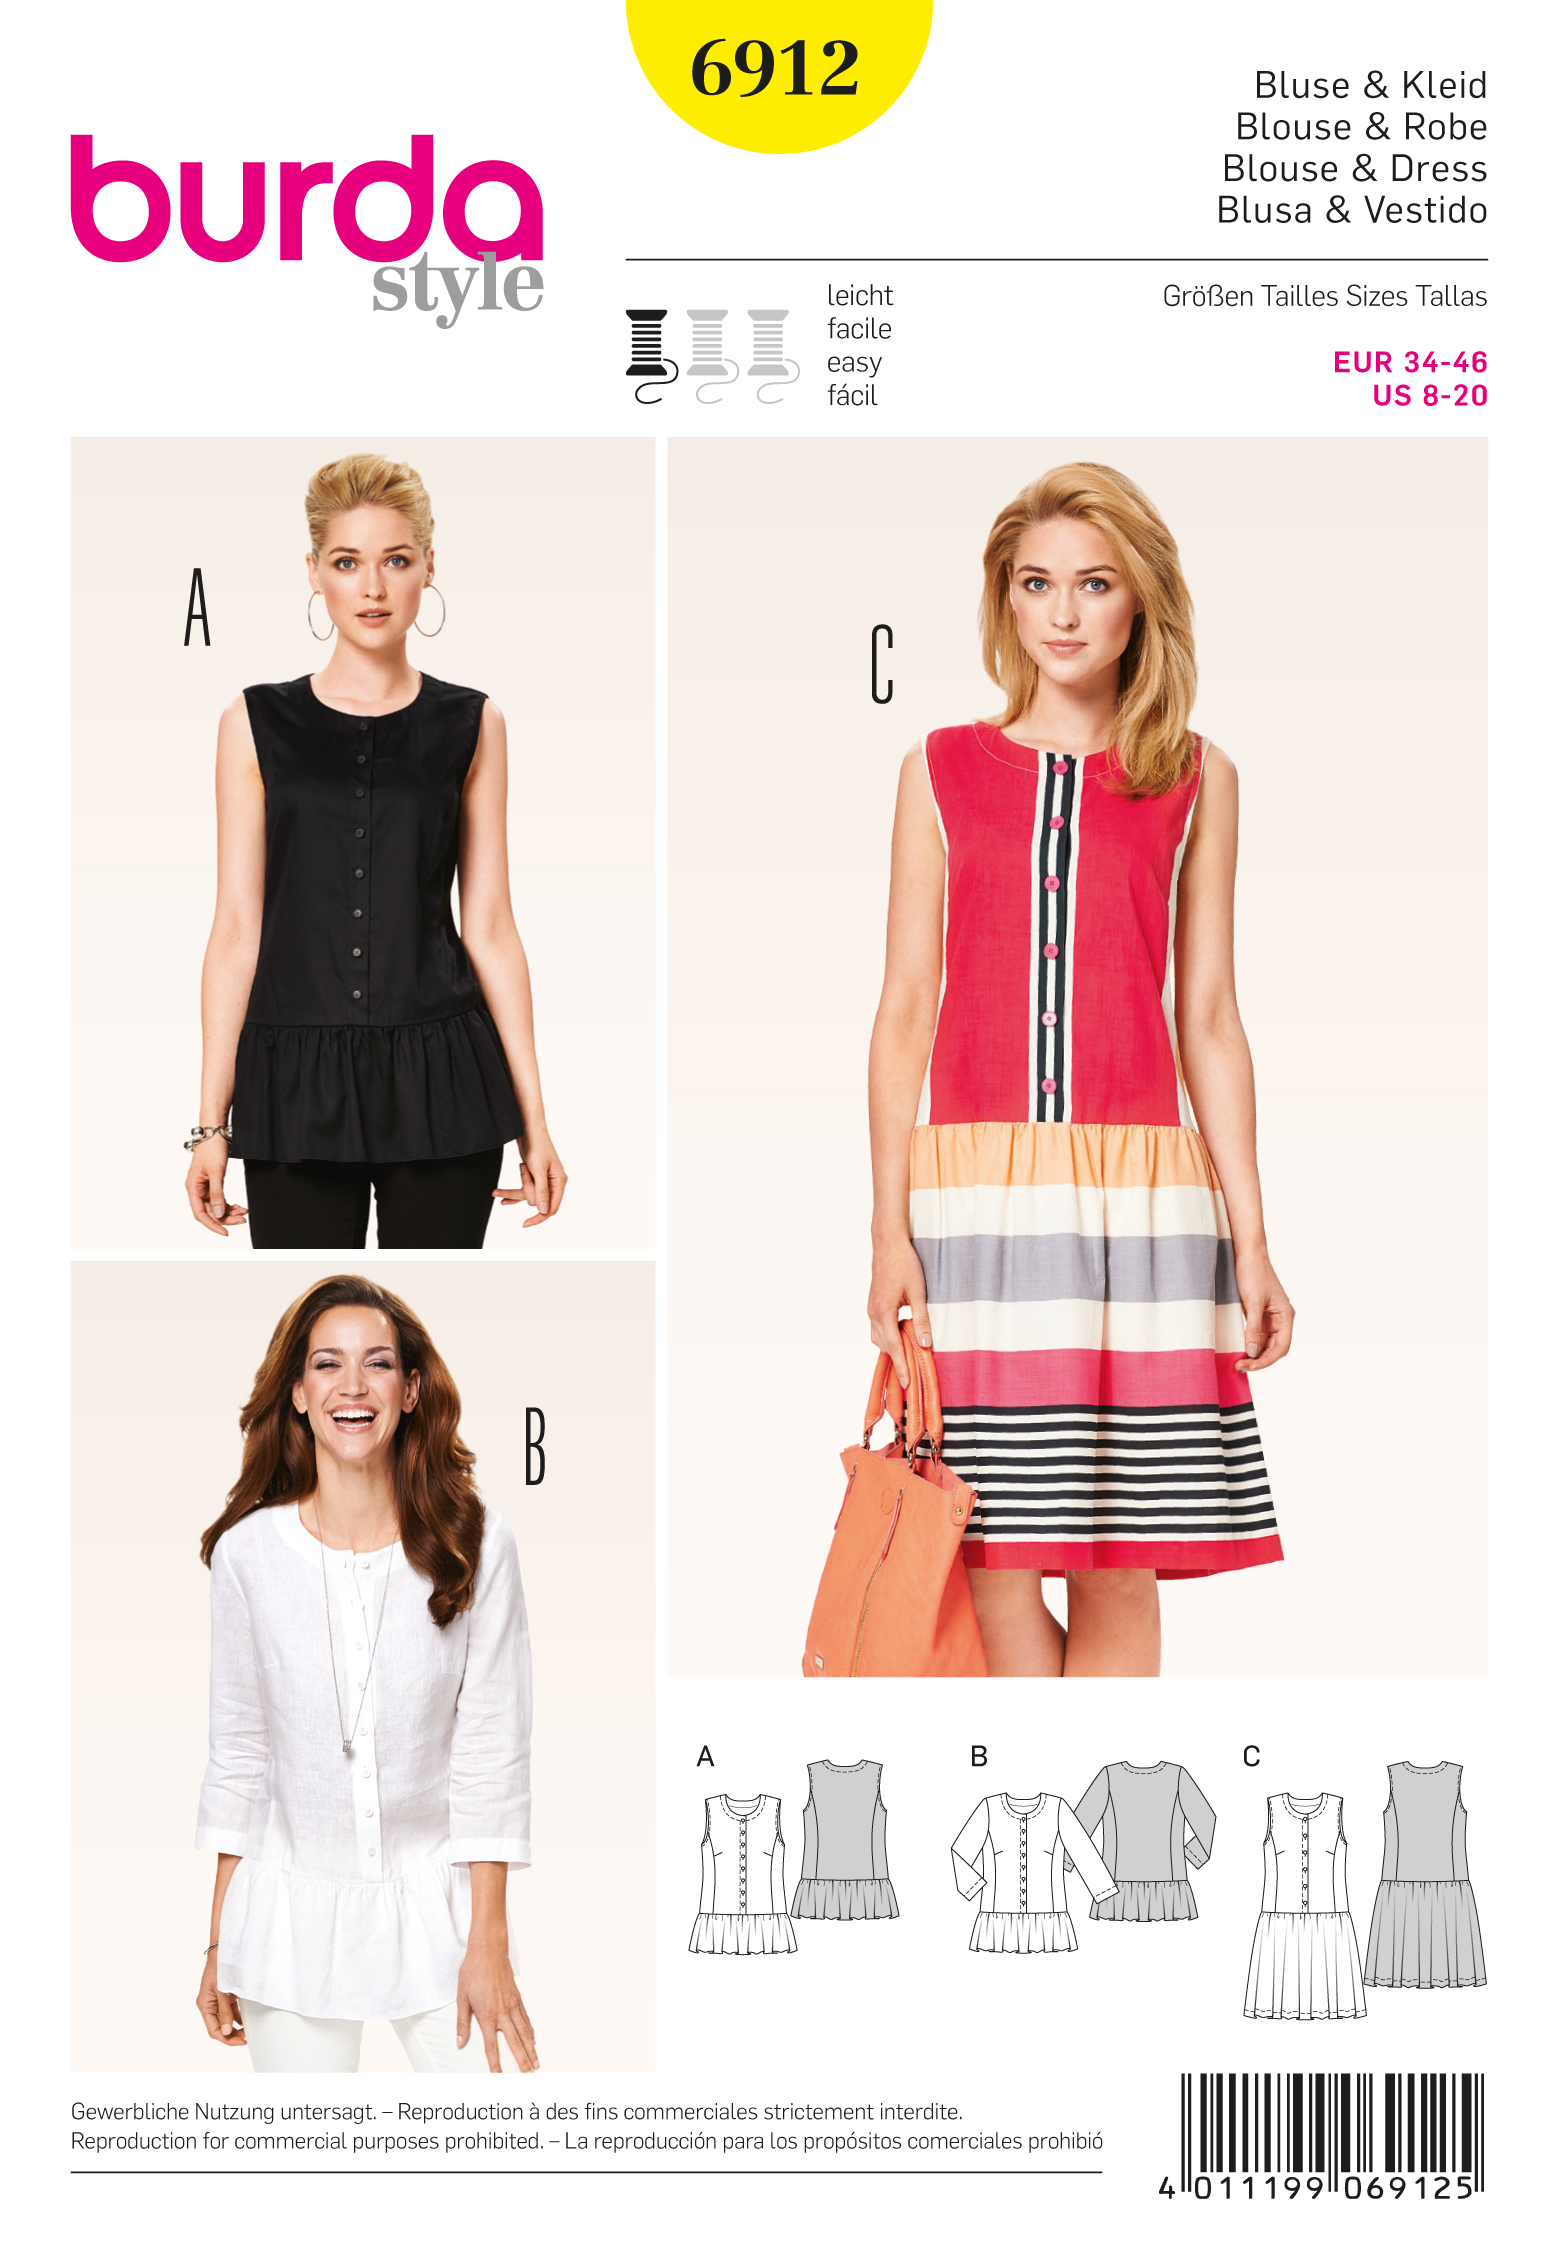
Spring and sprung Burda 6912 top!

Are you sick of your winter clothes like I am?  Not that I don't love my clothes, but sometimes you need a change whether it is a new color, texture, style, or all of these!

I found myself needing some new shapes and textures in my life.  On a recent trip to Louisiana to visit DD1, we HAD to find a fabric store...that is a real, live fabric store, not a JoAnn's or Hancocks and we did!  I found two patterns I really liked and so of course I purchased them!


Burda and I have struggled in our relationship.  There have been a few Burda's that have been good for me but I'm not sure why I don't like the finished garments.  It could be the style is for someone much younger and hipper than I am or it could be a lifestyle thing however, when I came across View B of Burda 6912 I thought it was a match.  I love the simple lines and the cool looking shape and peplum.

So, back to my stash I went and found a floral print Swiss dotted Voile I purchased from Fabric Mart. It is a nice quality fabric with great texture, thanks to the dotted Swiss.  I like the lightness of it and thought it would be a great candidate for this top.


The description is simply a semi-fitted blouse and dress.  As you can see, it can be sleeveless or three-quarter sleeves or a dress.  You need less than 2 yards of fabric for the top with sleeves.


All sizes are in one envelope.  I made a size 14 or 40 and am happy with the fit.  


Instructions are minimal but more than adequate for this easy pattern.  There are adequate visuals as well.  This top/dress would be great for beginners as there really isn't anything difficult nor is the fitting tricky.  I made an FBA at the dart by expanding the pattern tissue and lowering the apex by about 1/2".  


Sorry about the back wrinkles, I wore this to work today and should have taken it off and ironed it before taking photos, but it was a long day and well, I really don't like ironing all that much!  


I still have some drag lines at the bust so if I do decide to make this again, I will need to adjust the bust again.


I'm not entirely sure about the proportions of this top.  I feel like the peplum needs to be lengthened or higher up on my waist or something.  


I really didn't feel like making eight button holes, so I used my Kam snap pliers and Got Lux snaps in spring green to create closures on the front.  I like the green and it adds some color and makes the green in the fabric stand out a bit more.  Besides, green is a favorite color of mine! 


See how nice and neat the inside is finished?  I simply serged the edges of the facing at the neck and front edges, turned, pressed, edge stitched to prevent the facings from flipping to the right side, turned, and topstitched with two evenly spaced rows the first being 1.5" from the edge and the second just slightly inside that or closer to the edge of the garment.  I was a little concerned about show through to the right side of the fabric, but for some reason it works with this top--or am I delusional?

I am trying to decide if I like or will be willing to tackle more Burdas but first I need some honest opinions.  What do I do about the proportions?  Is this top okay and just something different than I am used to?  Should the peplum be lengthened?  Shortened?  Help!

As always, thanks for reading!
Sue 

Saturday, February 28, 2015

Burda--a wadder of epic proportions!

Let's clear something up, I am a big fan of Burda patterns.  They are edgy, fun, creative and some regular bloggers I read have made some amazing garments!  I have quite a few Burda Style magazines and hardly ever made anything...why?  Not sure but I do think tracing off the pattern pieces has a lot to do with it.  However, when I think about the cost, it is a little silly of me to have these sit around gathering dust so, when I saw the Burda challenge, I was on board!  This is my first of the 12 I will make. I jumped on this bandwagon a little late, but I'll get there!

I immediately fell in love with the design of this tunic.  The overall shape is great fun and I am a sucker for striped fabric.


This tunic is from the winter 2015 magazine.  The collection is High Contrast and all are black and white.  The top is called the optical illusion and is shirt 122-112014-US, just in case you are wondering!

I still really love the lines but I do believe my fabric, a striped ponte, is just too heavy to pull this off in a way that it floats on your body, just as it does on the model shown.  This pattern is also one featured in the back of the magazine and there are detailed instructions.  You HAVE to see the shape of the pattern pieces!  They are crazy but necessary for the overall shape to work out.  At first, I thought I really messed this top up with how mine turned out, especially the back.  See the stripes?  I just couldn't imagine how I cut so poorly and then I looked again at the shape and there is no way to get these stripes to run horizontally, but it's okay!  They don't have to!

I based my sizing on my measurements and cut a 42.  This ended up being HUGE on me!  I won't even show you what it looks like as I just can't hardly stand to look at it!  Through the shoulders and waist it's large but snugger through the hips.  I took it in quite a bit but still can't get a workable fit.  I'll either give up on it and wad it or see if I can make it into something else I like better for myself or my 19 month old grandson.


The description is pretty accurate: Asymmetrical gathers along the raglan sleeve and side seam give this top a unique and compelling edge, especially when sewn in a striped fabric.  Wear it with any basic pant or legging for stylish flair.  This isn't included in the directions, but the sleeves are four inches longer than your typical sleeve length to give them a little gathering look at the bottom.


Since there are step-by-step directions, they are very good and complete with visuals.  The side seams are gathered and then elastic is sewn to the gathers to keep them nice and tidy.  The neckband is an easy way to finish the whole thing off!

If I find the right fabric, I may try this again but I am a little turned off by it.  I do hope I have better luck with my other 11 Burdas I am going to create this year!

Thanks for reading....any suggestions for this top?

Sue


Sunday, June 8, 2014

Burda 7250 Take 2!

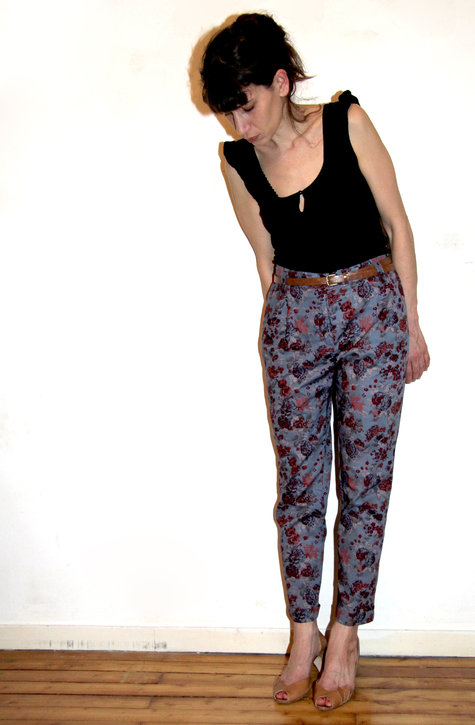
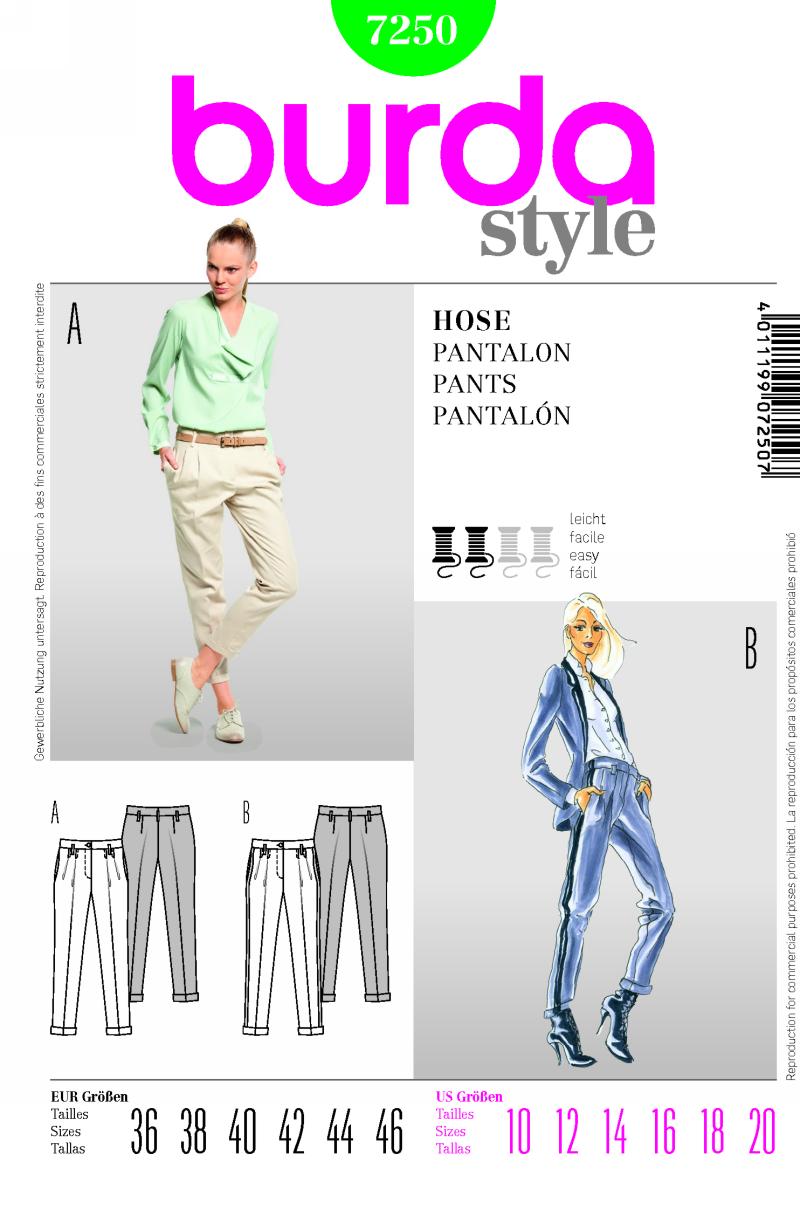
After making my khaki pants, I realized I had to make a  floral pair just like this picture I posted above.  How cute are these?  I simply love them!  


I ordered fabric from Emma One Sock and it arrived just in time to make another pair of Burda 7250.  This is the first time I've ordered from this site and it won't be the last!  My fabric came in individual packages that had tissue paper inside, sort of like when you buy a garment from a better clothing store or department store.  Well, one of the fabrics was this adorable linen print.  I had to make these pants again!  


These look a little wrinkled and they are.  We just got back from church and I had DH snap some pictures.  


Burda doesn't give much of a description for this pattern other than semi-fitted.  There is a view A and B.  The only difference is that B has a stripe of other fabric, ribbon, or what have you down the outer leg seam.  I choose view A. I purchased 2 yards of this almost 60" fabric and have a little bit left over, perfect for the cuffs or inside stand of a collar.
 

I think my finished garment looks quite a bit like the pattern envelope.  I did make a couple of changes which I will highlight below. 

Likes/Dislikes:
Love the styling.  The front pleats are different.  The ankle length cuffed pants are darling, perfect for showcasing cute shoes!  If you are tall, you may want to check the length.  I am 5'7" and I wouldn't want these any shorter for ankle-length.      

I like the fit of these pants. They are very comfortable to wear.  I made very few changes to the pattern straight out of the package.  More on that later. 

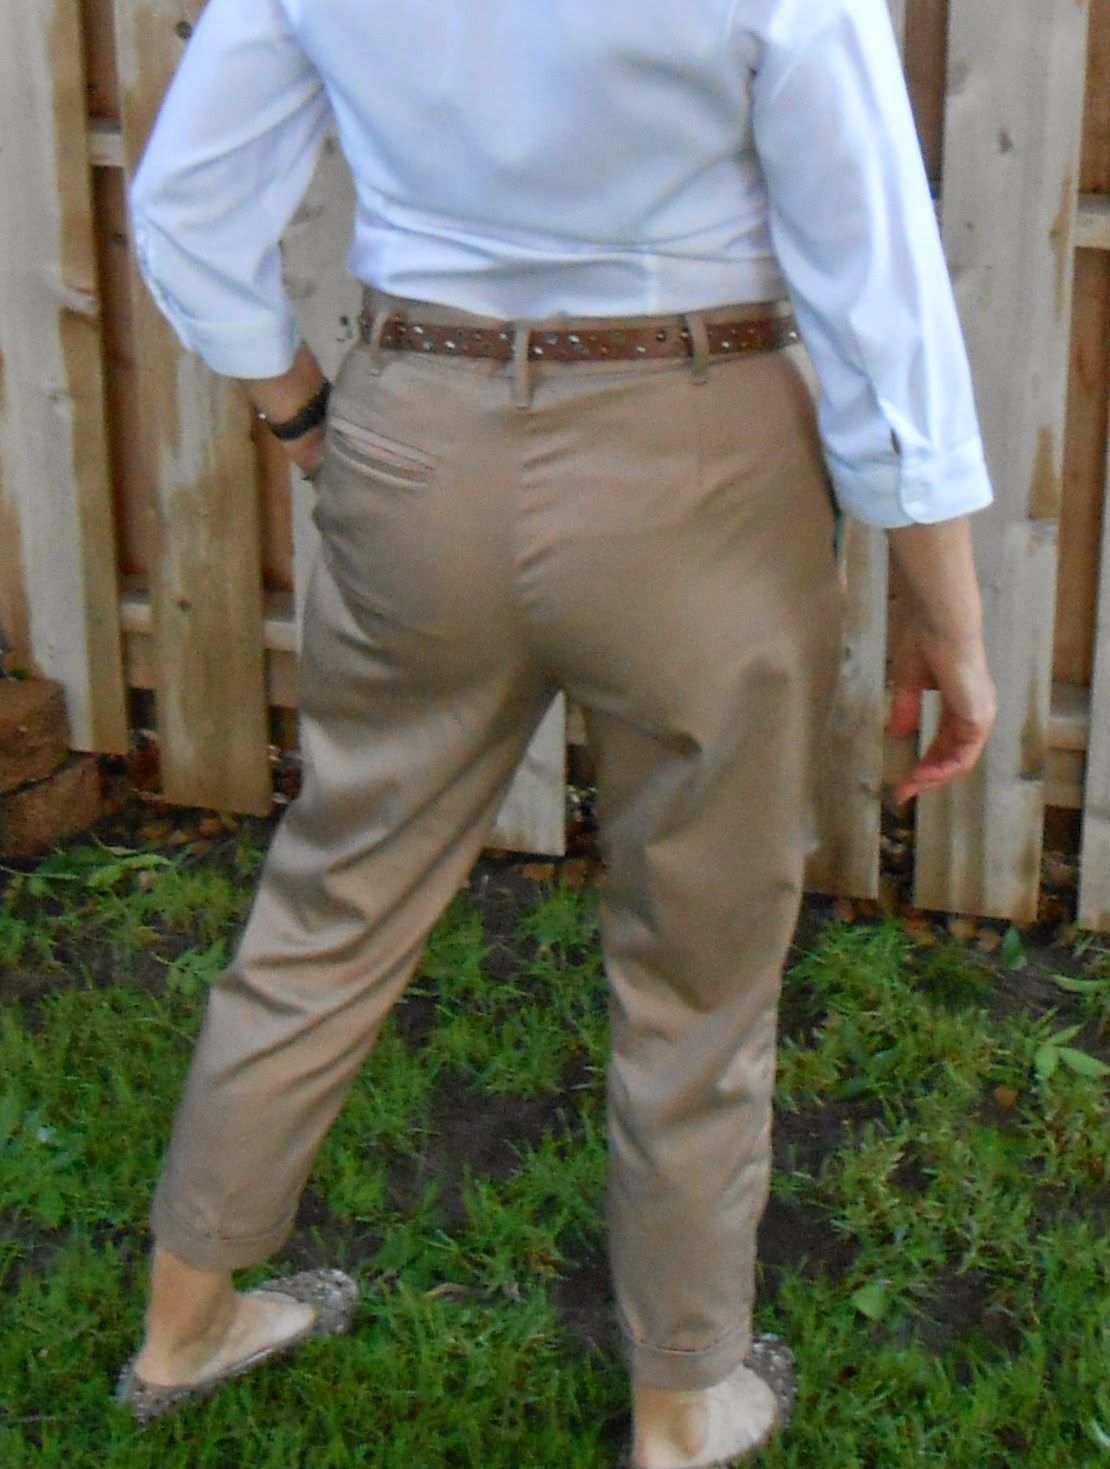
Dislikes: Since this is my second time making this pattern, I worked out my dislikes which were the back waistline being a little too big which you can see here in my khaki pair.  Part of the problem was that I used a pretty stiff interfacing for this and also reduced the waist in the back by about a 1/2".  It helped tremendously!  


Directions:There are 25 steps to these pants including putting the ribbon/fabric trim on the outer seam.  The fly is super easy and isn't a true fly but works great for this pattern.  I know that many reviewers remark that Burda's directions are minimal, and they are, however I read through every word and found them to be clear, concise, and the visuals helpful. If you have some sewing experience, you can put these pants together with few, if any problems! 


Modifications:
1. This time I lowered the waistline but about 3/4".  I'm still not sure this is where I want the waistband to hit, but it is comfortable and on me about 2 inches lower than my waistline.   
2. I added a welt pocket on the right for aesthetics only.  It is a true pocket and I doubt I will use it but I didn't want a plain back.  My derriere is too flat for that!    


3.  Because my fabric is a little lighter in weight, I attached stay-tape to the crotch seam just to help keep them from splitting when I move around a lot.  Does anyone have any ideas for using a lighter-weight fabric for pants?  What do you do?  
Recommendations:  
I enjoyed making these pants so much!  I cut them out and put them together in about three hours.  The zipper insert is super easy.  I love the cute cuffs and the pleats are great.  I think I am in love with my new pants and so glad I made a cute floral pair.  I hope you'll try this pattern.  I love it!  DH thinks these are super loud.  What do you think?  

Thanks for reading!Sue
Thursday, June 5, 2014

Burda 7250 Cuffed pants!


I seem to be on a pants kick lately due to my recent success with Vogue 8774--which was a recent blog post.  
 

I really love these pants made in a non-traditional fabric.  I've worn these about 5 times already so I decided to mix it up a little bit and find some additional patterns I also like.  My co-workers may get tired of seeing me in the same pants if I don't!  

I was looking around at Hancock while I was waiting in line to get my fabric cut and found this wonderful twill to make pants.  Ok, one decision down, next to find a pattern.  I snooped around on-line and came across this pattern and saw this unbelievably cute pair sewn up which was on Burda's website.  And lucky me, the next time I was at JoAnns, Simplicity/Burda patterns were on sale!  Yippee!


Burda doesn't give much of a description for this pattern other than semi-fitted.  There is a view A and B.  The only difference is that B has a stripe of other fabric, ribbon, or what have you down the outer leg seam.  I choose view A.  I used almost all of the 2.5 yards I purchased for this along with a zipper and some interfacing from my stash.  Total cost, about $12.


I think my finished garment looks quite a bit like the pattern envelope.  I did make a couple of changes which I will highlight below.


Likes/Dislikes:
Love the styling.  The front pleats are different.  The ankle length cuffed pants are darling, perfect for showcasing cute shoes!  Had it no rained about 3 inches today, I would have worn my red heels or my dark python printed heels.  The ground is so wet it started soaking into the neighbor's fence!   

I like the fit of these pants.  This finished garment was my wearable muslin.  I made very few changes to the pattern straight out of the package.  More on that later.

Dislikes: My only dislike is that the waist line is a little bigger than I'd like. I will remember that for next time.  See how it bunches just a bit at the back waist? 
  

Directions:
There are 25 steps to these pants including putting the ribbon/fabric trim on the outer seam.  The fly is super easy and isn't a true fly but works great for this pattern.  I know that many reviewers remark that Burda's directions are minimal, and they are, however I read through every word and found them to be clear, concise, and the visuals helpful. If you have some sewing experience, you can put these pants together with few, if any problems!


Modifications:
1. I lowered the waistline but about 1/2".  I found it a little higher than I wanted.
2. I added a double-welt pocket on the left for aesthetics only.  It is a true pocket and I doubt I will use it but I didn't want a plain back.  My derriere is too flat for that!   
3. I stitched very close to the edge of the crease that runs length of the front.  I avoid ironing as much as possible and I hope this helps.
4. I took the waistband in about 1/2 to 3/4 of an inch.  It's still a little big, but since I will be wearing a belt with these, it's fine.  I 'll just remember for next time to reduce it some more.   


Recommendations: 
I enjoyed making these pants so much!  I cut them out and put them together in about four hours.  The zipper insert is super easy.  I love the cute cuffs and the pleats are great.  I think I am in love with my new pants and want a cute floral pair.  I can see making these up in a wool (lined of course) for fall and in an adorable print or even plaid.  I hope you'll try this pattern.  I love it!  And, DH gave his stamp of approval--always a plus!

Thanks for reading!
Sue