About Me

My photo
Sewing is therapy for me. I hoard fabric, patterns, notions, and spend more time shopping for fabric than I care to admit...
Showing posts with label jacket. Show all posts

Wednesday, March 25, 2020

Another opportunity to test for Sinclair! Sinclair Alba Jacket

I was so excited to be able to test again for Sinclair Patterns!  I am so smitten with the designs, fit, styles, etc.  
Here's the Alba Jacket.  

I just love that asymmetrical zipper! Those pockets!  That collar! This is my second version and probably my favorite because of my fabric choices.  The main body is a scuba knit from JoAnns that I have had for quite a while.  Glad I saved it for this as I think it makes a fun jacket! The mustard that you can see is from Sly Fox Fabrics. I just love this color and this fabric!  It's a double brushed poly that feels like butter!  The ribbed knit has been in my stash so long, I have no idea where I purchased it.  Does that happen to anyone else?  


I made this twice and the fit changes were very slight from version 1 to 2.  One of the changes to the pattern that I was very pleased about is the top-stitching of the pockets.  If you made the version with the pockets, you'll want to top-stitch so they don't flop around.  


If I make this again, and I most likely will, I'll interface the facing/lining portions, especially when there is a big difference in weights of my chosen fabrics.  This scuba is hefty while the DBP is almost a mid-weight.


Since I love the mustard color peeking out so much, I will most likely wear this with it unzipped a bit.  You would too, right?


Here's the back.  It's rather plain design-wise, which is just fine!


One more view!


This was my first version.  For this one, I again used a scuba, but this one was a lighter weight.


The contrast bands are double-brushed poly from Sly Fox Fabrics.  I used the same fabric for the lining and facings as I did the body.

While I love both, I am quite smitten with the gray/mustard/white.  There's just something about that fabric that makes me smile.

Thank you for reading!  In case you are interested: 

Affiliate link: 

Monday, November 11, 2019

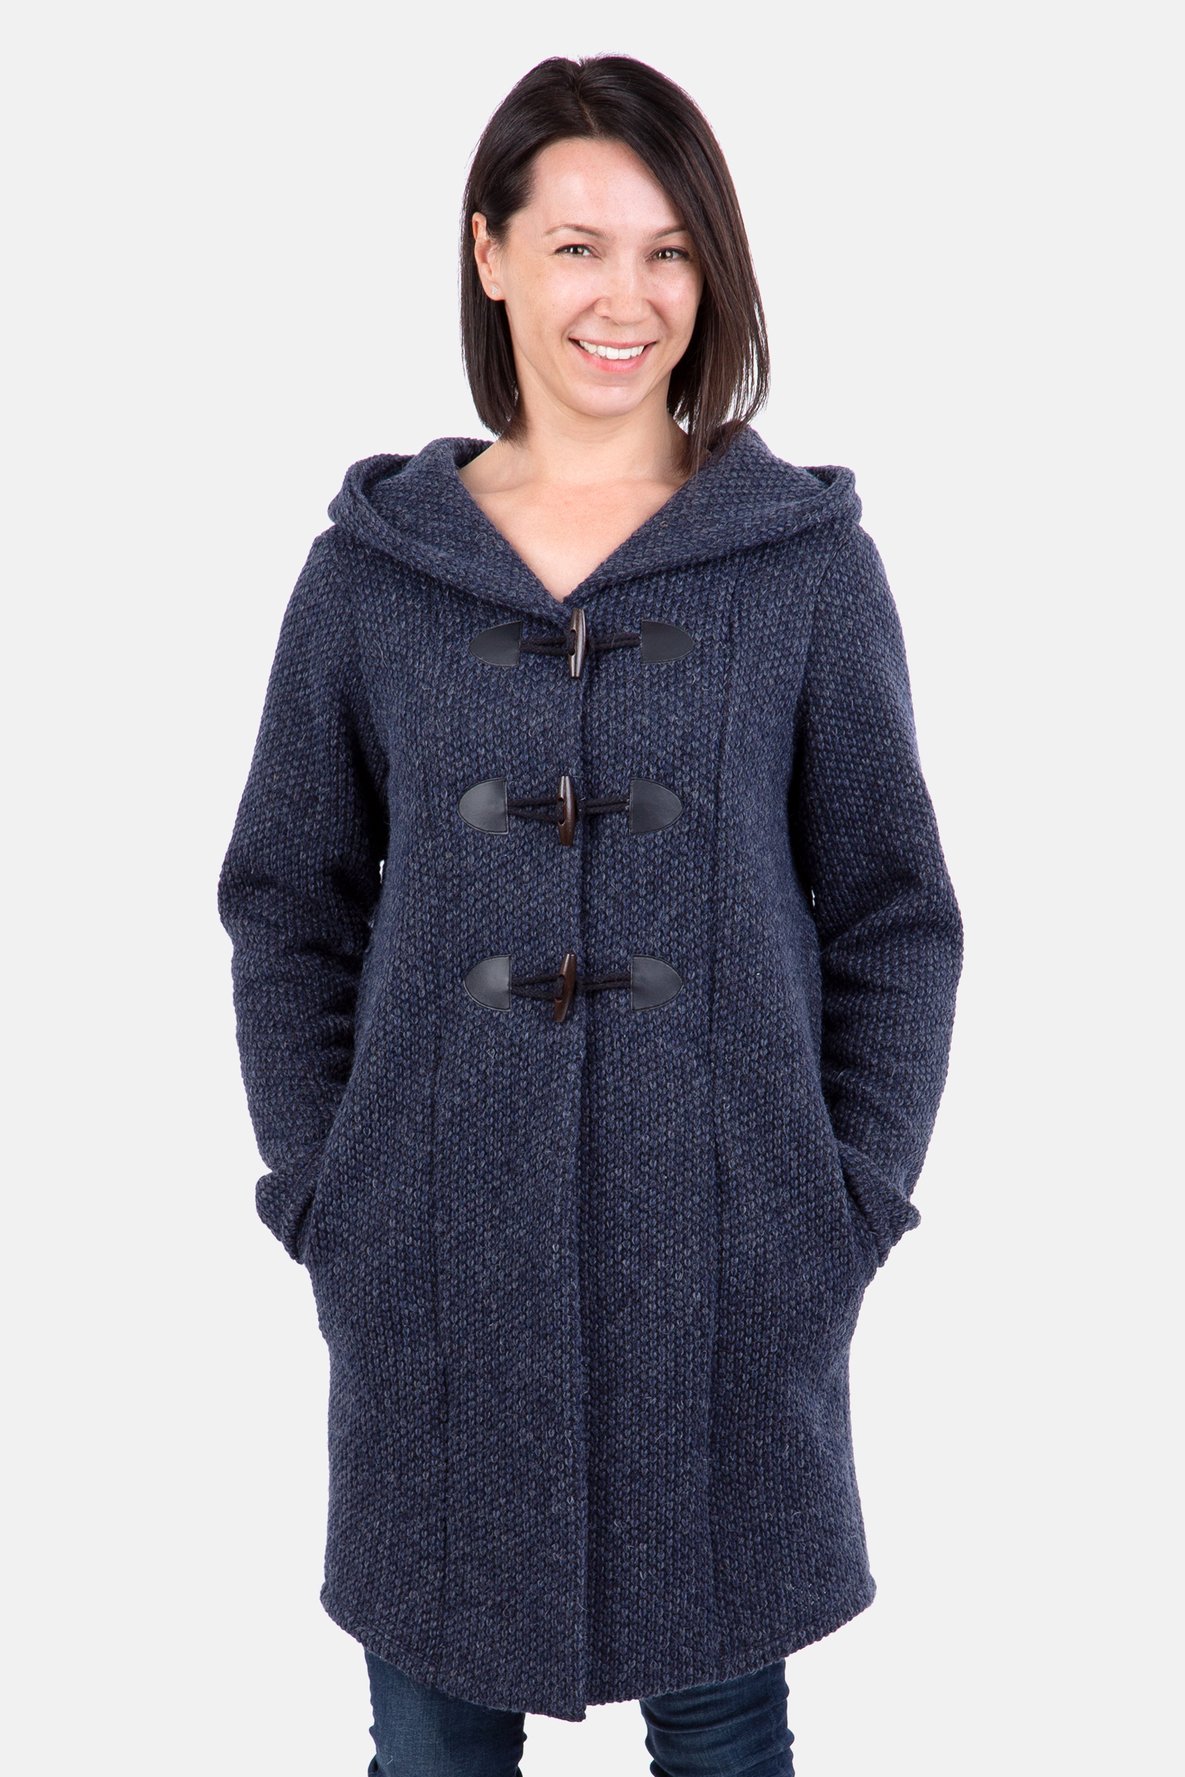
More from Pattydoo! The Nora Coat

Today, I have another Pattydoo review for you!  This time, I made this adorable 'coat'.  My muslin was made from a wool blend plaid and my final garment was made from Telio sweater knit.  

Sewing pattern Ladies coat Wool fabric Duffle coat Sew on closure

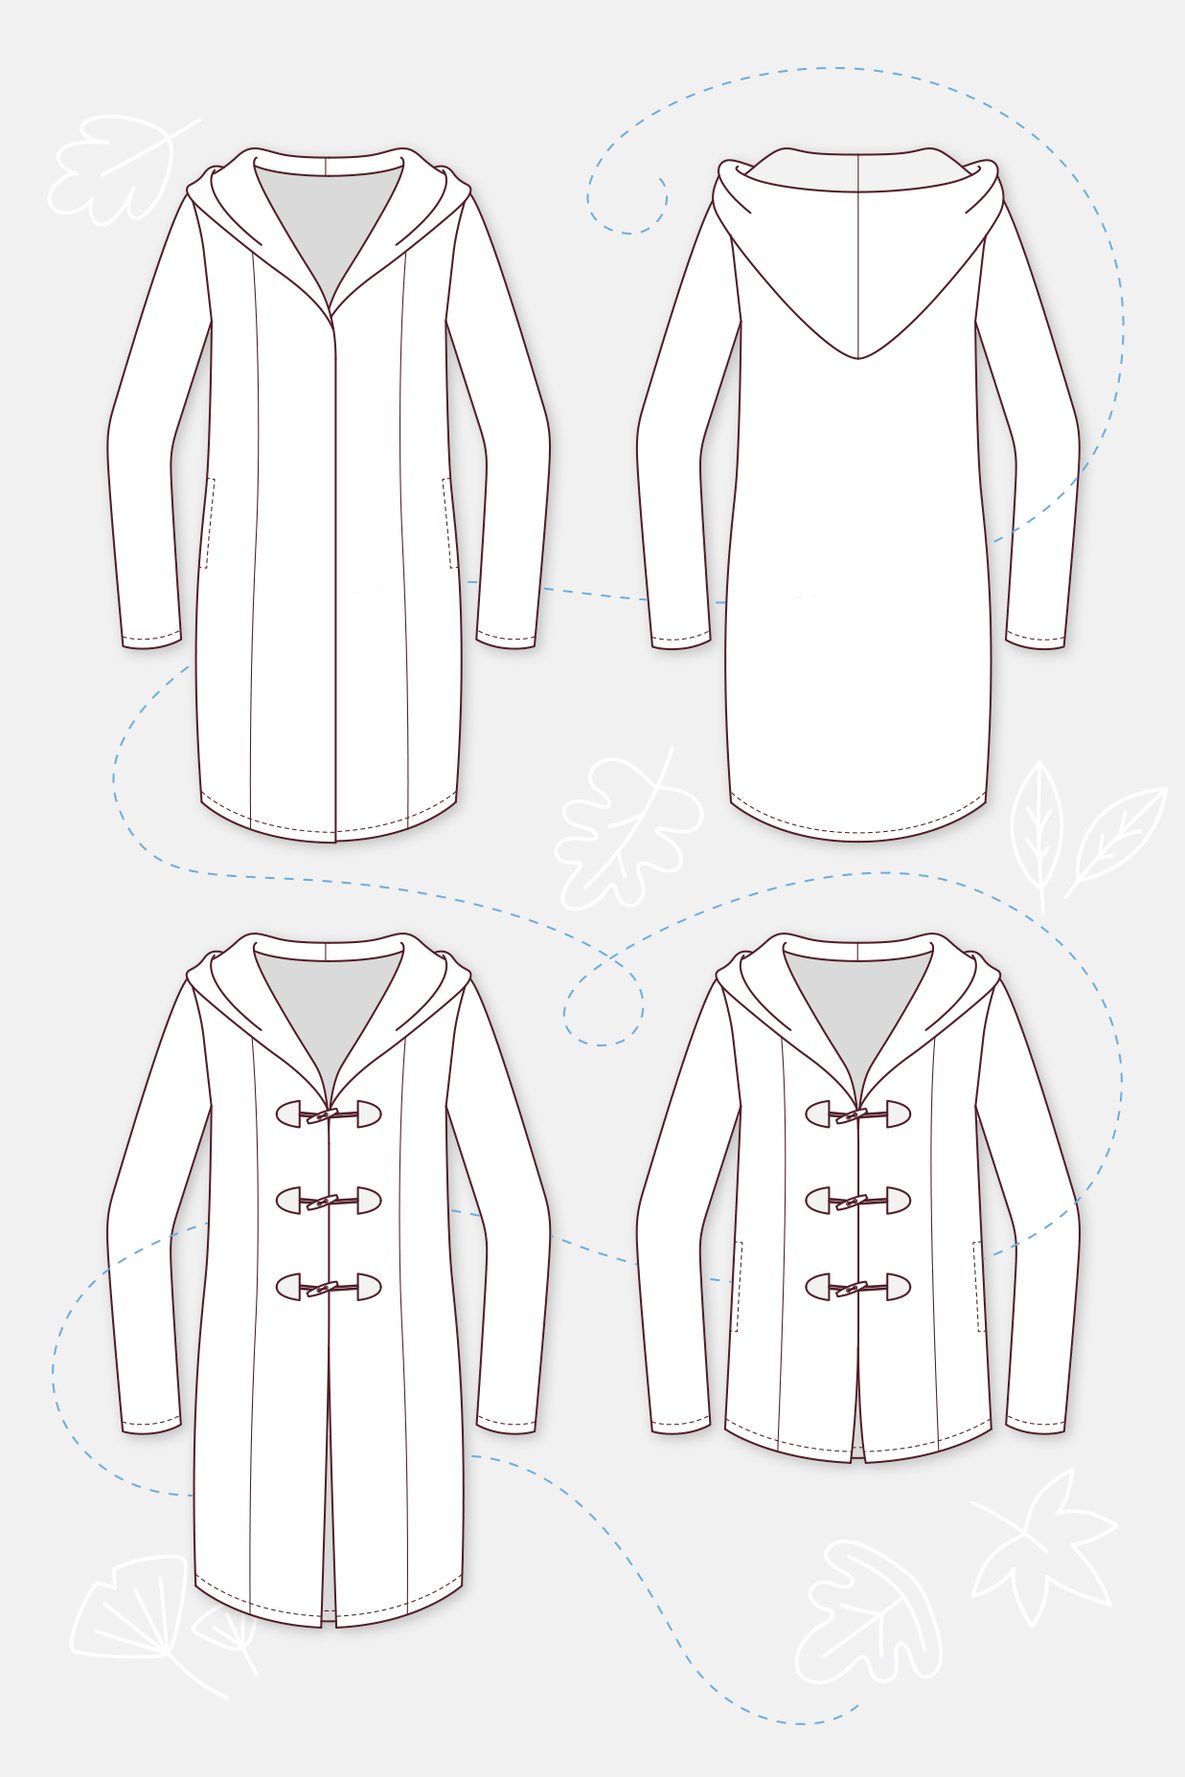
I just love the design lines on this and the fact that the hood is lined.  As with the first pattydoo pattern I tried, the drafting is exceptional.   If you are interested, a link to the pattern is below.


Schnittmuster Damenmantel Varianten Zeichnungen

I chose to make my 'coats' more jacket-like with no closures and with a lighter weight fabric.  


So, here is my muslin.  I thought I had matched up the plaid on the front band area, but apparently not!  I didn't have enough fabric to recut, so I am living with it.  You can also see, my band facings are made from a solid black.  In hindsight, I should have cut the black as the piece you'd see on the right side.  


At least my plaids match across the front band area!   You'll notice too that the sleeves are a tad short.  I corrected that on my final garment.  I am hoping this fits DD2.  She's shorter than I am, so this sleeve length is hopefully perfect. 


I really like that the hood is lined on this.  It gives a very nice finish.  There are no printed directions for this and there are videos, but they are in German.  Although, you can see the steps so if you have some experience, you can simply follow along and create this with no issues.


There are also side seam pockets that are very nicely drafted.  I do believe it you lengthened the finished width by about 1/4" or so, you could catch them in the band seam and then they would't flop around at all.


Here you can see those pockets.  I did tack them down to the band at the top and bottom.


Here's my second version.  I used this blush colored Telio sweater knit.  This fabric is so amazing and lucious!  If I can sew about 10 more things without purchasing additional fabric, I am going to treat myself to a few more colors of this sweater knit.  I just love it! 


Here's the inside of the jacket.  No judgement on the sewing room please! You can see the band facing is cut in two pieces. This saves on fabric yardage for sure.


I just love the fit of this.  I lengthened the sleeves by about 2 inches.  With this knit, I did leave the pockets off as I wasn't sure how the fabric would behave with the pockets constructed per the directions. 


I really took my time with this and stabilized the front band area, the shoulders, the back neckband and of course the hemlines.


This might seem a bit weird, but I starched each cut edge prior to sewing together.  I think it made the fabric a bit easier to handle.  


I did edgestitch the facing so it wouldn't roll to the outside.  


The directions have you add a piece of bias to the back neckline, which I forgot to picture.  I highly recommend this step, especially if you are using a knit.  There's a lot of weight on that part of the garment with the two piece and layer hem.


I think I have a new layering piece this winter!

Thanks for reading!
Sue


Friday, November 8, 2019

Violet knit jacket by Style Arc.

Winter is rapidly approaching, and I wanted a few cozy pieces to layer up and keep warm.  

Image result for images StyleArc violet

On IG, one of my favorite reviewers is @birdy_sew_obsessed.  She recently made this in a textured white and I was instantly in love!!!  Do you know the feeling?  I simply had to make this.  

I ordered this lovely, thick knit from Fabric.com.  The manufacturer is Telio and this is just lucious!  


It's thick, warm, and that texture!  


Since I knew this was exceedlingly big, I sized down one size from my usual SA. 


This pattern is well-drafted and goes together easily.  I made a few mods to the construction to give an overall cleaner finish on the inside. 


Would you just look at that fabric? 

Thanks for reading!
Sue

Monday, November 12, 2018

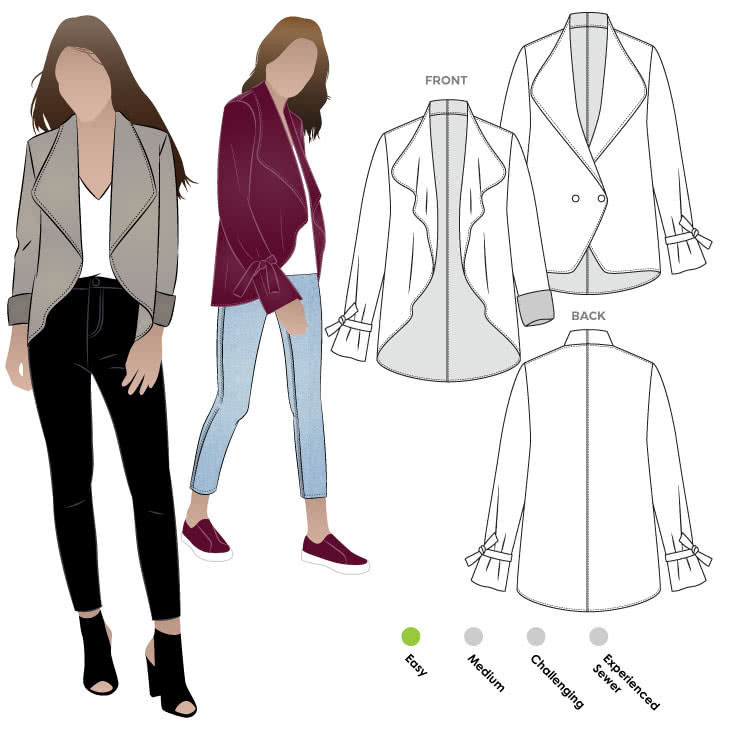
Meghan Jacket by Style Arc

This jacket--so simple but so much fun to create and wear!  This is a fast and easy sew and if you use the correct fabric, no hemming is required!  
Image result for Images StyleArc Meghan jacket

See what I mean?  Here are the deets: This jacket has long sleeves with cute little ties, felled seams and a wide, floaty collar.  You can choose to put buttons/snaps at the front.  


This pattern calls for a stable knit or a fabric that doesn't require hemming.  I had a beautiful faux suede that my Daughter-in-law purchased from Mood.  This is such lovely stuff to work with!  I really love the color as well.  It just screams fall/winter to me.  


I made just a couple of alterations, mainly to adjust for a non-stretch fabric.  I lengthened the bust curve and added a bit across the shoulders.  I also added to the sleeve tabs as they seemed rather short to me.  

That's it!  This whips up quickly.  I can see making this in a ponte--a suggested fabric.  I can also see making one for spring/summer in a white or light colored ponte with short or 3/4 sleeves.  


I also made the tee that I am wearing underneath the jacket.  This fabric was from my stash.  It isn't the best quality (JoAnn's is printed on the selvage) but the colors work.   I used the Jalie newest Tee for it.  


Thanks for reading!  
Sue 


Sunday, October 14, 2018

Sewing with Leather: The StyleArc Lorie jacket

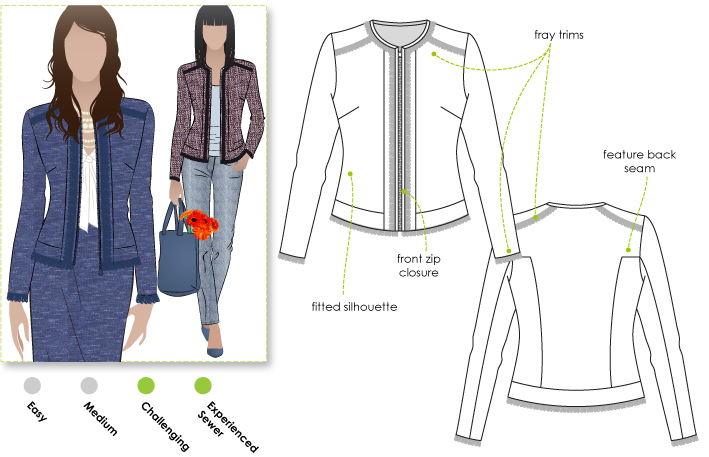
I've made this pattern numerous times and since they are all a bit different, I knew I had to try this same style in a completely different fabric choice: leather!  If you are wondering, here's what the pattern looks like: 
Image result for images StyleArc lorie jacket

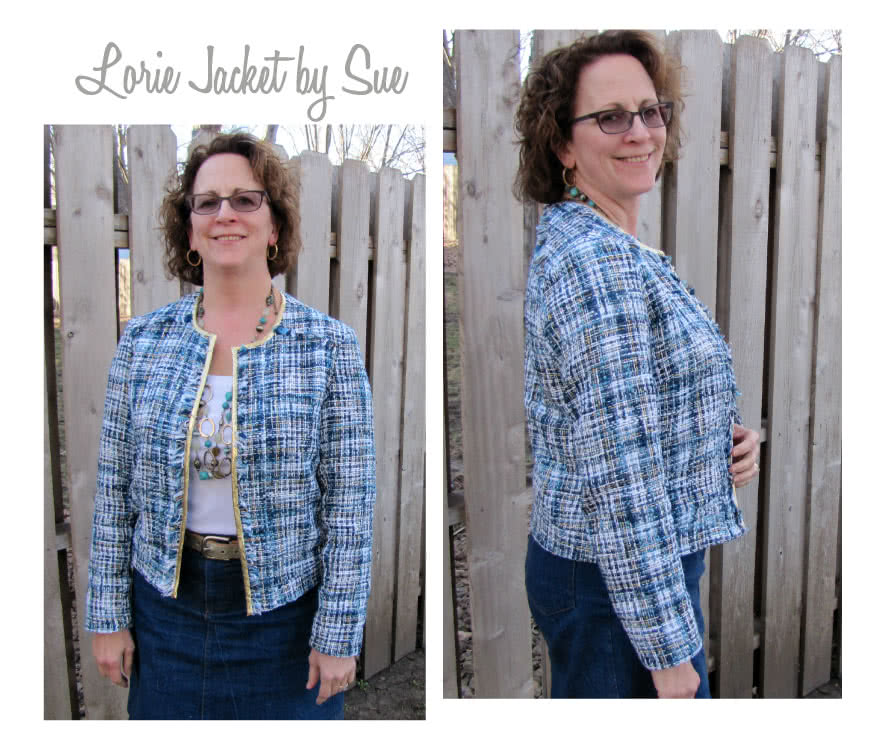
And here are some previous makes from this pattern: 

Image result for images StyleArc lorie jacket


Related image

This pattern is simply fun to make!  

I've taken some fitting classes since I made these two jackets and I put my skills to work!  I also knew the leather would have zero forgiveness so fit from the start is so important!  To simply this make a bit, as you can see I eliminated the frayed trim and the zipper.  I never, ever zip a jacket such as this and didn't want to wrestle with it to insert a zipper I'd never use.


Sorry about the indoor photos on a rustic wall project that's nearly done, but it snowed about 5 inches today and was cold, damp, and windy.  Not the best or most pleasant place to take photos!  


What I did differently based on my measurements and comparing the fit to my other two jackets was the following: 
I lengthened the bust curve by 1"
I added 1" for a broad shoulder adjustment
I added 1" to the mid back length to match the adjustment to the front bust curve area


Based on previous results with this pattern, I decreased the shape of the shoulder area of the sleeve by 1/2".  I consider myself a master at easing sleeves into the shoulder area, but with this pattern is simply isn't possible.  


It's a little tough to see, but for my facings, I used light blue denim.  You can see that in pictures below.


Leather isn't forgiving at all, so if you make a mistake, you have to live with it as needle holes are permanent.  I had a few super tiny mistakes that I won't show you! 


Now that I've tackled this jacket in leather, I have a few other leather garments I really want to make!


Not the best photo in the world, but you can see the light blue leather for the facings.  I also used a designer lining from Fabric Mart.  It was Mark Jacobs (I believe) and it is luscious!  Glad I picked up 10 yards of it!  

Thanks so much for reading!
Sue  


Thursday, April 5, 2018

Vintage style sewing! Simplicity 8460

I was so drawn to this pattern--the style, shape, and probably also the color of the dresses on the front.  That pretty coral-ish red is one of my favorites.  

Simplicity Pattern 8460 Misses' Vintage Dress and Jackets

How cute, right?  Well maybe if you are a size 2 like the model!  

Here is my version:  


I used this pretty boluce-type fabric from my stash.  It was originally purchased from Fabric Mart.  Pink is fresh and screams spring to me.  However, we still have way below average temps and snow on the ground.  Did I mention it is April 5???  Hence the indoor photos!


With this super simple style, I decided to line the dress and use couture methods to finish it off.  I used a floral silk from my stash (and incidentally left over from a pink wool coat) to line the dress.  


I added the lining by sewing all of it in by hand.  It was relatively painless and so therapeutic!  Whoever says sewing isn't therapy has no idea what they are talking about.  Am I right?


This photo is of the inside neckline.  When you sew a lining in by hand you can make a little lip with the main fabric and have it slightly roll to the inside so none of the lining shows at all.  


Here is the zipper edge.  I used an invisible zipper but I believe the pattern calls for a lapped zip.  I enjoy invisible ones because well, they are invisible when you insert them correctly.  


Even with a heavier fabric you can still insert an invisible zipper.  


Seeing this silk I used for the lining just makes me smile.  Silk feels amazing when you have it next to your skin.  


I like how the back neckline is on this dress.  To fit this dress, I sewed the side seams and then pin fit it to me in the dart areas.  I like this technique so much.  I didn't make mine as fitted as the models as I am not a size 2 and I want to be more comfortable.  


Here is the cute little jacket that is part of the pattern.  This is the first cropped type jacket I've made.  I didn't have enough of the pink to have it match so I used this mid-weight denim.  The buttons are covered in pink garment leather.  


Oh yes, I did manage to have enough of the silk to line this.  The jacket does call for a lining, unlike the dress.  


I certainly had fun creating this dress and jacket.  


Thanks for reading!
Sue