About Me

My photo
Sewing is therapy for me. I hoard fabric, patterns, notions, and spend more time shopping for fabric than I care to admit...
Showing posts with label chiffon. Show all posts

Saturday, April 11, 2020

More spring separates

Hello all!  I hope this finds you healthy and safe!  We in the northern plains are experiencing  CoVID19 at a much slower rate than other parts of the country/world, but it is rearing it's ugly head,  

Enough!  No one wants to hear more about this, right?  


My original plans with these two lovely fabrics was to make a super girly dress with a dark slip underneath.  I began working from home recently so that didn't seem practical.  After looking through my patterns, I came up with this combination of patterns to match these two lovely fabrics.  


First, let's talk about the chiffon.  Chiffon used to be a fear fabric for me.  I avoided it at all costs.  However, there are so many lovely, lovely garments made from chiffon that I decided to master some techniques to use it in a way that it works and is no longer fearful.  Why didn't I think of this sooner?  

If you are new to working with chiffon, use a simple pattern.  The one I used is very simple to construct with a looser overall style and I've taken the time to fit it to me so I know it will work.  


Bondi Top Class

See what I mean?  Very simple with clean and classic lines.  

What did I do to make the chiffon work?  I am a HUGE fan of Best Press.  I buy this stuff by the gallon.  I use it after I cut the fabric out on all the rounded edges such as the neckline and hems.  Every seam I press, I use Best Press.  


For the back yoke, I cut two layers, instead of one like the pattern suggests.  


This created a lined yoke which is not only sturdier, but also creates such a pretty finish on the inside.  


I cut  bias tape from the chiffon using a sharp rotary cutter and a ruler. And, I starched that as well.  The curved hemline also has a bias finish.  


Side seams have a french seam finish.  

For the cardigan, It's a super simple sew as well.  I used a lovely ITY knit, again from Fabric Mart.  The pattern I used, is FREE!  It's from Sinclair Patterns and you can find the link here: Sinclair Patterns Harper Cardigan

If you are wondering what it looks like, here's a photo: 


This comes in several lengths as well as sleeve variations.  I made the duster in a tall size.  Oxana Sinclair offers her patterns in petite, regular, and tall.  Since I am 5'7", I love using the tall sizing.  


You'll see more of these cardigans from me!  


 Thanks for reading and I hope this finds you and your loves ones safe and healthy! 

Sue 

Thursday, April 2, 2020

Another floral kimono--McCall's 7790

Hi all!  I hope everyone is well and healthy!  I don't know about you, but if I didn't have a few distractions such as sewing, exercise, and cooking, I think I'd go over the edge right now with the chaos of CoVID19.  But that's not why you are here, right?  


This garment was for my March Fabric Mart post.  The minute I saw this evergreen floral chiffon, I knew I had to have it.  Evergreen is all over the place right now.  It's such a lovely, fresh, and fun color and I so glad that it has emerged this spring!  

See what I mean about a fresh and vibrant color?  Plus, it is a floral and I just love floral prints.

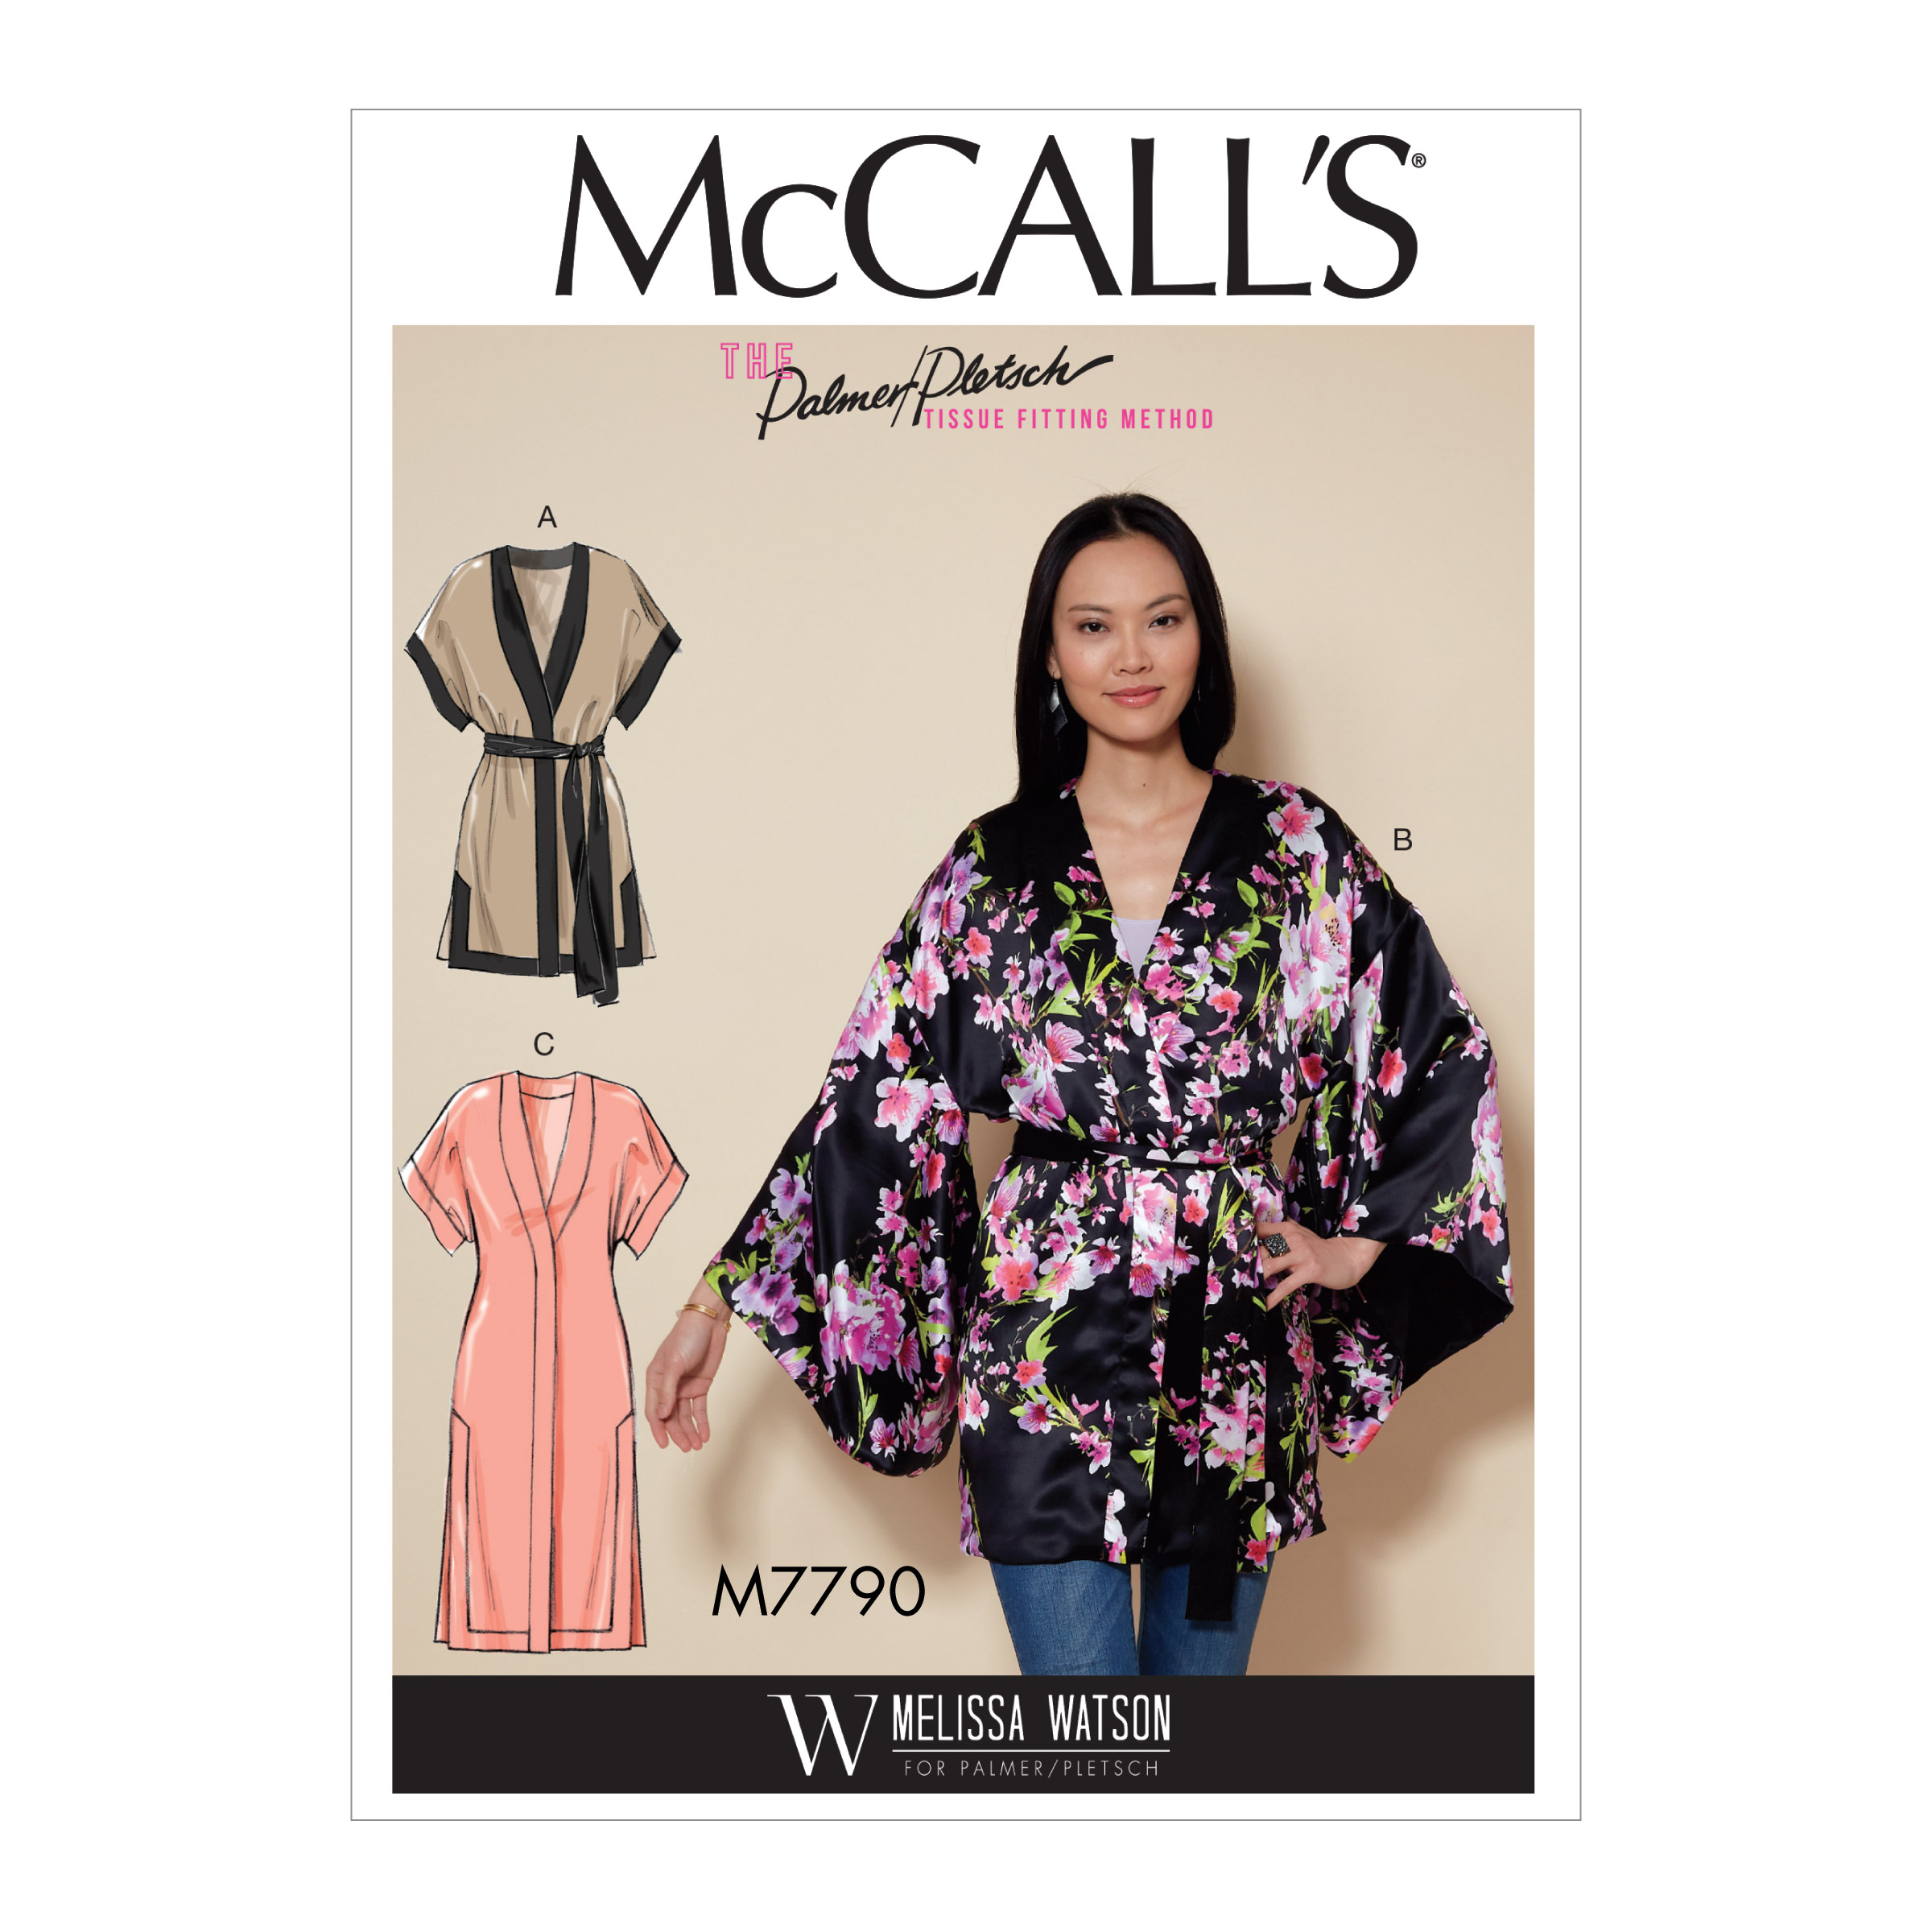
Here's an image of the pattern I used.
McCall's 7790 Misses' Jacket and Belt

I can't even remember the last time I used a pattern from the big 4.  It's been a while.  I chose this because I knew I wanted a longer kimono with some options.  What I didn't realize was is that this is a lined kimono, I had no intention of lining this as I cut it out.  For one thing, I didn't have a suitable lining fabric and 2, I didn't want to put two layers of this together.  So, I did what any adventurous seamstress would do and modified this so that it was unlined and I also modified the bands.  Did I also mention that I modified the hemline? Well, I did.  I didn't want to add all those facings so I eliminated them. I like the result.


I cut the bands on the bias with a rotary cutter and a ruler longer than I needed and then adjusted it so it fit along the front edges and the back neckline. I also added some staystitching along there and used quite a bit of Best Press to further stabilize the edges.  


Basically for this pattern, I used the front and back pieces.  That's it. Since this is a big 4 pattern, I also had to make an FBA and lengthen from the back shoulder to back waistline. 


Yes, I know this is super simple but sometimes you need a sew like that! 


I didn't do much of anything special for this.  I turned the bottom hem twice and topstitched it down. I had the perfect color of serger thread so I used that to finish my edges.  


Here's an inside look at the sleeve bands.  To simplify things, I simply turned the edge to the inside, pressed carefully, and topstitched.  

I hope this finds you well and healthy!  Thanks for reading!
Sue


Saturday, September 22, 2018

This time, its the Kobe dress!

 Here's the dress pattern I couldn't stop thinking about!  This is the Kobe Dress by Papercut Patterns.  I recently made the top and just love it so I knew the dress would be soon to follow. 


I used an embroidered chiffon by Telio.  I knew from making the top that the fabric had to be light and floaty.  This Telio fabric did the trick!  I love how unusual it is.


And here is the showstopper part of the dress...the back!


See what I mean?  That drape is unbelievable!


This is a closer view.  You can see the bias tape made from the fabric I used to finish off the front and back neckline.


You can see my bra level as well.  I raised the back neckline by about 1 inch so I wouldn't expose my bra to the world.  I was also concerned this fabric may stretch a bit out of shape so I used black SewkeysE tape.  It worked like a charm!


Here's the dress without the belt.  I will wear this belted as I believe it looks better on me belted.


I love a lot about this dress!  It's so floaty and this fabric is cool!  


Thanks for reading!
Sue

Thursday, July 6, 2017

Love Notions Rhapsody, take 2

Wow do I love this pattern!


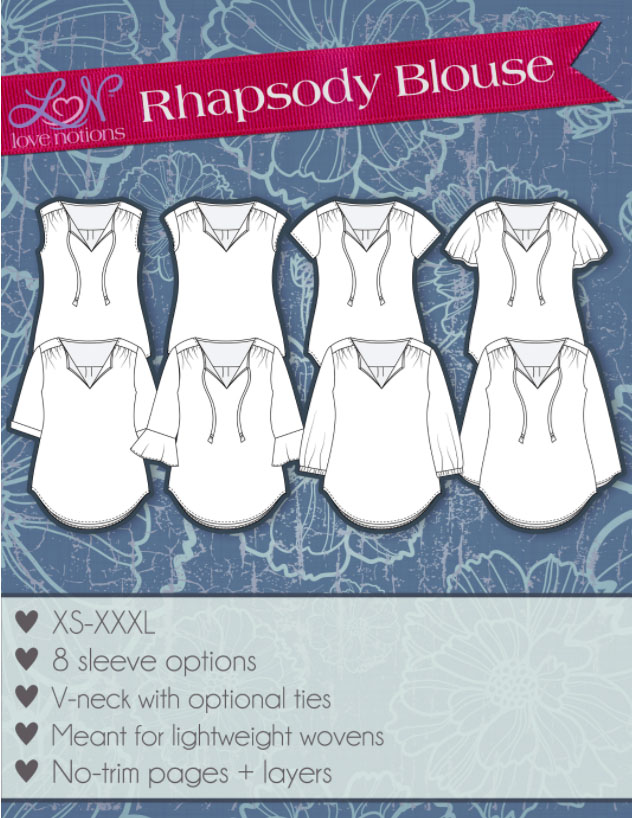
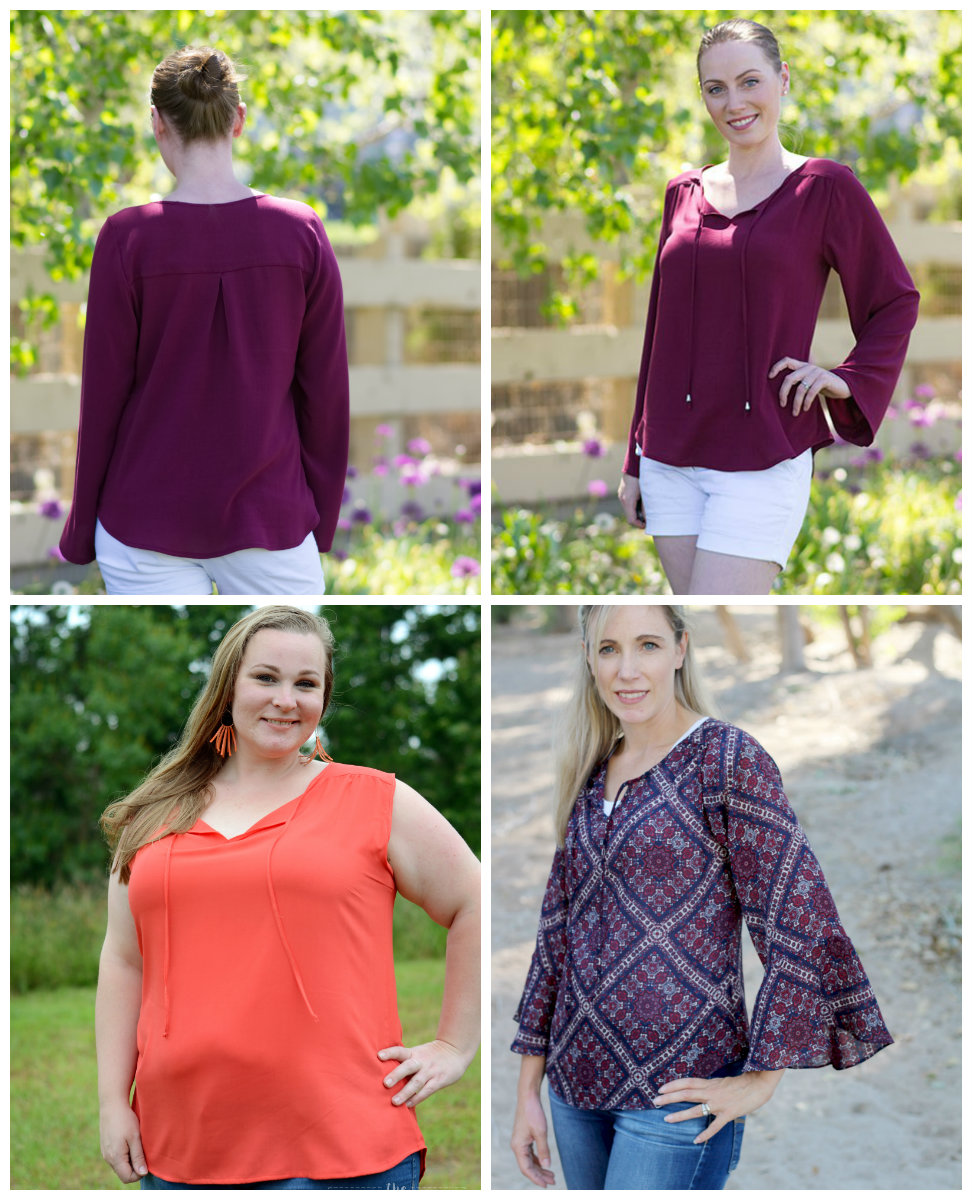
As you can see, it is the Rhapsody top by Love Notions.  Below you can see versions made up.


Every version I've seen looks great!  My first try with this was made in a striped linen.  I've worn that thing several times already!  I am so smitten with it, I decided to make it again in a chiffon.  I love the vibrant colors of a chiffon but feel very inept when I sew it.  I am getting better and more confident but slip, slide, and shimmy is what that chiffon does!


I am wearing a cami underneath as this fabric is very sheer and will show the world what you've got.


I made only one design change and that was making the inverted pleat a gather that matches the front.  


Here is a closer look.


I even made my own bias tape to finish off the neckline.  That was probably the trickiest part!


I made a narrow hem at the bottom bodice and the sleeves.  


I also made french seams throughout, even at the armscyes!  


Pretty nice and tidy, if I do say so myself!


I love, love, love this top!  And, I love the fabric.  It came from Fabric Mart.  I am going to put this pattern away for a while, but when I come across the right fabric, it is out on top of the pile again!

Thanks for reading!
Sue


Saturday, June 11, 2016

Overcoming your fear fabric


Do you have fabric you shy away from, not just look past when shopping but actually either walk faster if you are there shopping in person or if you shop virtually like I mainly do, you click, click, click past it so you can ignore its existence altogether?


For me, very light weight fabrics such as chiffon that I used for this top are my fear fabrics. However, if you use a few tips from online bloggers or if you purchase some additional tools for your machine e to make the experience more pleasant and make you feel like yes, I can manage a fear fabric and get a result that will make me try again!


Here is my journey using lovely chiffon.

My first plan when I first spied this fabric was to make a dress, not just any dress but a fitted-in-the-bodice maxi dress.  Well, even though I made muslin, I hated the dress on me and since this was my blog post fabric, I was so very disappointed!  I knew I had to create something so I salvaged what I could and made a cute little summer top. When I put it on, it feels ethereal, not because I didn't make it sturdily but simply because the fabric is so flowing and well, summery!


So, how did I overcome my fear of this lovely fabric?  I used my tools that I had and also I used the internet to find some additional hints as well.


Here is what I found helpful via the 'net.
1.  Use tissue paper in between the layers of fabric when you cut.  This keeps the two layers from slipping and sliding all over the place.  An additional tool I highly recommend is to tape your layers to the surface you are cutting from.  I used ordinary scotch tape and it helps tremendously when trying to keep layers straight and on-grain rather than cutting something off-grain and having a huge mishap!


2.  If you have to turn a tube as I did with the back ties, I thought that tool Julie and Melissa used in the wrap dress sew along was just brilliant and I went straight to Ebay and purchased a Fasturn myself.  It was worth every single penny!


Those ties turned out so nice!


3.  For loop and shank buttons, use an elastic pony-tail holder instead of a very narrow fabric tube.  It works like a charm and when I secure the elastic to the fabric, I use scotch tape.  It holds the elastic much better than a few pins and also tears away after securing it to the fabric. Since you can't see the 'tube' I thought it would be fun to use purple, one of my favorite colors!


4.  And for heaven's sake, use a rotary cutter with a fresh blade or a very sharp pair of quality scissors.  For this fabric, I like my smaller Olfa cutter that many quilters use.


Here is what I used that were machine based:
1.  Sewing machine tools included a single hole throat plate.  This is so essential so that your fabric doesn't get sucked down into the bobbin case.  If you've ever used one, you will know exactly what I mean. If you don't have one of these, just use tissue paper, the kind that you put into gift bags and sandwich it between the throat plate and the fabric.  It works awesome too!


2.  Use the proper sized needle.  I used a size 60/8.  I also used that size in my serger.  How often do you change your sewing needles?  I do with every project and I never regret it.  If you try and use a needle that is too large, it will likely cause big holes in your fabric and worse yet, it will snag the fabric.


I couldn't leave this cute little top unembellished, so I used this dainty pom-pom fringe on the hems at the sleeves and lower blouse.  I think it adds just a little sort of something unexpected.  What say you?


This pattern is a New Look and the number is 6395.


I was attracted to the fact this pattern called for lightweight fabric and its simple design.  There is so much room to embellish this top that I hope you'll try it and make it your own!


Thanks for reading!  I love hearing your thoughts and I hope that next time I try chiffon I will have a dress to show for you all!  Remember, with the right tools and know-how--


Happy sewing!
Sue