
About Me

My photo
Sewing is therapy for me. I hoard fabric, patterns, notions, and spend more time shopping for fabric than I care to admit...
Showing posts with label Bamboo. Show all posts

Saturday, April 15, 2017

Flowers anyone?


Yes, you've seen me make this pattern before but I wanted so badly to make it again!  I had to make one with that super cute drawstring waist.  In case you missed round 1, this is the Vanessa fluid pant from Jalie.

Jalie 3676 - VANESSA - Fluid Pants in Tencel Lyocell

Choose your size based on your full hip measurement.  There is a bit of ease there and you don't want these tight at all.


I love the pockets--just the right size!  I stabilized the curved seam of the pocket with stay tape--just in case.  After all, I did purchase this stretch denim from JoAnns.  I hope it doesn't disappoint me in the long run.


See those fun grommets?  They aren't difficult at all to insert.  I ended up stabilizing that entire front band piece--it's about six inches across with fusible interfacing.  I do wish I could have found a better cord.  This was also purchased at JoAnns.


When I tried these on for photos, and asked the hubby if he thought these were as awesome as I do, he replied they were something.  I don't think he likes them.  :)


I almost didn't add the elasticized bottom but I thought they might be a tad short if I didn't.


Aren't these just so fun and colorful?  


So now for the top.  The pattern is New Look 6246.  I purchased it for the pants but haven't gotten to those yet.  I do really like the shape of the tee.
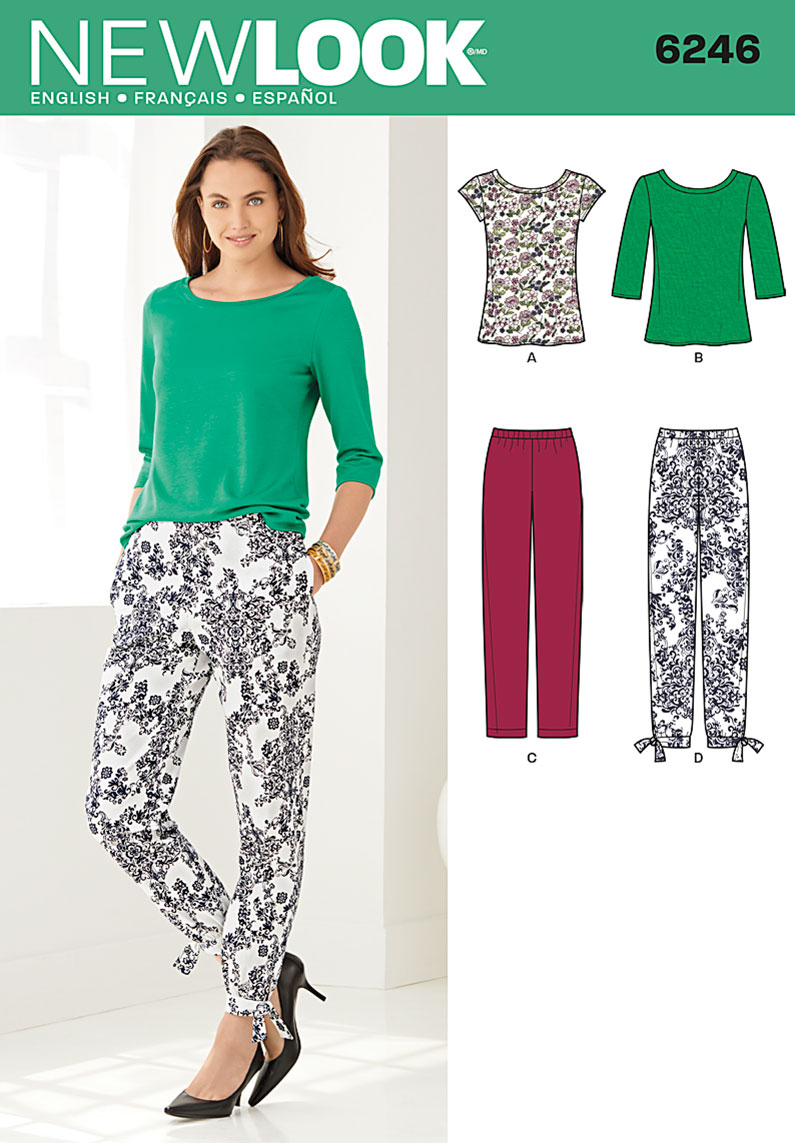
                           New Look Misses' Tapered Ankle Pant and Knit Top 6246

And that is what the purple is made from that pattern.  I am really stoked about the neckline.  Check it out!  This is a bamboo knit that was in my stash.  I used it on another project and had just enough to eek out this top.


I want to show you the steps I take to make a good looking neckband.  


I stabilize the area with stay tape.  One side is nubbier than the other and that one I put next to the wrong side of the fabric.  With this pattern having a 5/8" seam allowance, you can see in the photo above how I line everything up. The stay tape is about 1/8" over the seam allowance and will be covered by the neckband when finished.  


Next, serge the seam in the neckband.  Yes, I meant to clip that seam.  As long as you don't go all the way through the left needle thread, it will never fail you!  Now you can press those seams in opposite directions so you don't get any annoying bumps.


Sew your neckband on.  You can sew it wrong side up if you'd like but as you can see in the picture, I did not.  I do like to baste first using a straight stitch before serging.  


Here is what is look like prior to pressing and topstitching.  


And this is what it looks like afterwards!

Thanks so much for reading!  I hope you all have a blessed Easter!
Sue


Some of you have asked which stitch I used for my topstitching.  I used #22.  Which you can see above.  

Happy Sewing!
Sue 

Monday, December 8, 2014

Coco!

It's been a while....hopefully I am done traveling for work for a while and can get some sewing (therapy) time in!

On one of my recent travels out of town, I ended up finding the Coco pattern.  This pattern has been reviewed all over the blog sphere and I was so pleased to purchase it!

Isn't it darling?  The photo below is taken from Tilly's site called, Tilly and the Buttons.  You can make a top, dress, or funnel neck top.  I made a modified version of the dress.

COCO

This is a pattern designed for knits and the directions and visuals are excellent.  If you haven't sewn many knits, you'll find the directions easy to follow and simple to understand.  


didn't find anything missing from the instructions--which I usually like to add a few things!  For this, I used this lovely bamboo and organic cotton jersey from Fancy Tiger Crafts in Denver.  WOW, this is an amazing shop with equally amazing fabric and some great Indy paper patterns for sale!  I wish I had brought a bigger suitcase so I could have taken more fabric and patterns home!  


So, back to the pattern...this is an instant gratification project.  I added ribbing to the neckband and used it at the cuffs as well.  I love the length of the sleeves.  Being 5'7", sometimes they are a tad so short but this is perfect!  My only minor complaint is the neckline is simply folded over and hemmed. That isn't my preferred method of hemming necklines and I didn't have enough fabric to make a neckband to add so...I found this black ribbing at Hancock's.  I also thought that I needed to break up the stripe a bit so the pockets were necessary.  


I added the double pocket at the chest simply because I made a stupid error when sewing.  My first pocket placement was too high and I made a small hole in the fabric <insert frown and maybe a few four letter words> so I added the smaller pocket under the larger one to cover the hole and allow me to continue to wear this. 
  

It is so comfortable, I love the fit, and it's awesome with leggings and boots! 
I only made my usual 5/8" swayback adjustment--that's it! Otherwise it fit perfect out of the envelope based on my measurements.  Hurrah!  
I see many more of these in my future!  I love this pattern!

Thanks for reading!
Sue