About Me

My photo
Sewing is therapy for me. I hoard fabric, patterns, notions, and spend more time shopping for fabric than I care to admit...

Friday, June 5, 2015

Sewaholic pattern Alma Blouse


I've had this pattern for a while, as this is one that I thought I must have a while back, purchased it, and promptly filed it in my stash.  Argh. Why don't I have a better system? I'll come up with one, I hope!

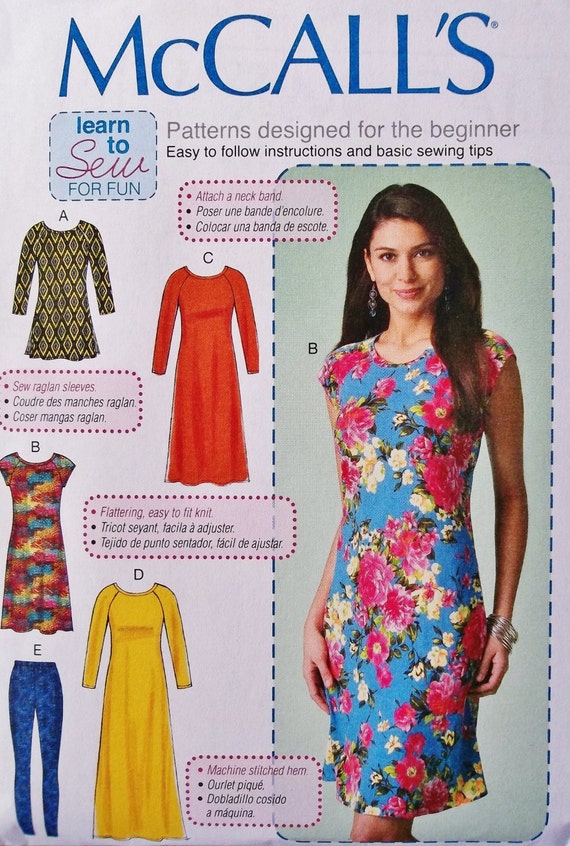
This is a very simple, semi-fitted pull over blouse with neckline and sleeve variations.  There are a lot of variations with this top, so if you love sewing with woven fabrics, this is for you!


Sewaholic patterns are made for pear-shaped women.  That translates into a smaller bust but wider hips.  Well, I am typically an hourglass or borderline rectangle which means that I have to make some modifications to the fit.  :)


I started with a size 14 but made an FBA as well as taking this in at the waistline and hips. Both of these alterations didn't surprise me in the least so I was well-prepared to make quite a few adjustments to the top prior to taking photos for this blog and more importantly, wearing in public!


I made the body of view C, with modified sleeves of B which I shortened by about 4 inches sans the belt.  I tweaked the fit quite a bit which I'll detail.  Can you see my invisible zip?  I am very proud of how well I put it in!  SCORE!!!  Hint, it's on the side I have facing the camera on the above photo!


My high bust measurement is about 36.5 inches.  In the past, I'd use my full bust to make a garment and would swim in it!  It is MUCH easier to make an FBA and I highly recommend it!  I typically use two resources for this: The first is a Craftsy class I took with Kathleen Cheetam (hope I spelled that right!) called Adjusting the bust and the second it a book called Fitting for Real People.  Both are equally helpful when it comes to making an FBA and both have similar methods.  One thing that I figured out is that I only need the adjustment in the bust not lengthened to the waist as a lot of classes and books recommend.  So, my FBA stops at the waistline.


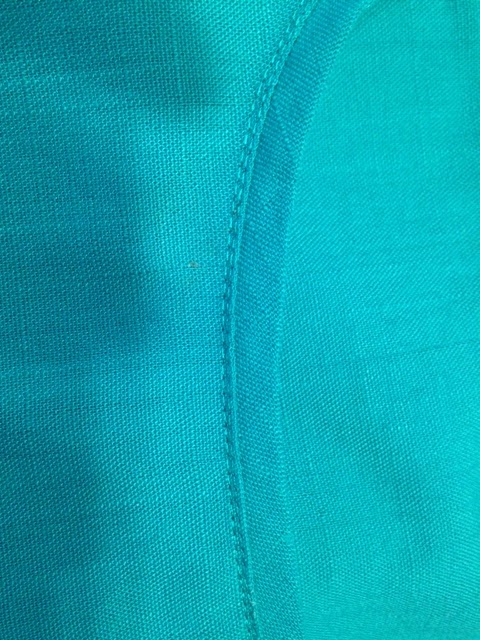
I have been working to rid my sewing of facings, that is if I can without compromising on style or function so with this blouse, I used Lynda Maynard's book on Sewing with Couture Techniques to make banded neckline.  The technique has you measure the length you need, add four inches, and press the fabric to allow for shrinkage.  You also figure out the width of the band by adding the seam allowances, multiplying by two and adding an inch.  Don't gasp when you think of how wide this is, see how small mine ended up?  This is a great ratio!  Just make sure you staystitch the neckline before applying the band so nothing stretches out of shape.  I ended up making a double row of topstitching at the neckline to keep the seamline stay put, plus I like how it looks on the outside of the finished top.


Typically I lower the bust apex by an inch on the big four patterns and did this on this top but I was so wrong in assuming that I needed it!  I had to resew the darts to a higher apex placement, which is very unusual for me!


With the sleeve length, I like the length of the elbow, but wanted one shorter as it was so stinking humid today that I needed some breathing room--if you know what I mean!  I do think I will make a straight-up view B soon as I love the collar and sleeve length.


I used this super pretty linen-blend fabric from Hancocks.  It washed beautifully, pressed well and was on sale, so this was a very economical top to sew.  I had leftover fabric from the 1.5 yards I purchased so this is a top that you could splurge on some very nice fabric if you felt like it!

The invisible zipper was the most challenging part of the top and I spent the most time working on perfecting it.  I purposely used an ivory color just to show you that if applied correctly, you don't have to have a perfect color-match.  I used the newest issue of Threads Magazine for tips on how to insert this without ripples or having it show.  The only thing I will invest in is some nail polish the same color as the top so I can paint the zipper pull so it doesn't stand out so much!  Can you see it below?  If you insert an invisible zip correctly, you shouldn't be able to!


All in all, I like this top.  I most likely will sew again, especially since I spent so much time fitting it and fiddling with the details.  I am very pleased with the color as it beautifully coordinates with this lovely scarf my son and daughter-in-law gifted to me!

Thanks so much for reading!!!
Sue


Wednesday, June 3, 2015

Revisiting a favorite pattern and mixing it up a bit!

Without a doubt, this is one of my favorite patterns.  It is super easy, super stylish, and so many variations!


See what I mean?  I love the raglan sleeves.  Depending on the fabric this dress can be casual or more formal.  I've made the dress twice and this time I had to make the tunic.  Oh, and I MUST try the leggings!  

 Here are my first two versions:


This pattern is designed for a beginner but that doesn't mean that an experienced sewer can't use it as well!  When I find a pattern like this, I just love playing with different fabrics to see how many looks I can create.

In case you are wondering, this is a pullover tunic and dress that is close-fitting through the bust that has a neckband--YAY! and narrow hems.  The leggings have no side seams and a stitched hem along with an elasticized waist.
  

For this pattern, it's very important to get the fit right through the shoulders, neckline, and chest and I like dresses/tunics such as this to also give me the illusion of more of a chiseled waistline than I probably have and this one fits the bill!  It also skims over the hips and outer thigh.  I feel pretty good about how I look when I wear clothing from this pattern!  Also, I purposely didn't match the stripes at the shoulders.  This way I think it highlights the raglan sleeves.  


Will you just LOOK at this freaking cool fabric?  It is a "white/multi abstract art print made from Rayon and Lycra".  I purchased it from Fabric Mart when they were having a sale on knits.  I snagged up 2.5 yards of this for $4.50 a yard!  It was even prettier in person when it arrived at my door step so I couldn't wait to make something cool from it.  It sewed beautifully and washed and dried like a champ.  If it wasn't so distinct, I wish I would have gotten more!  


So I pretty much made view A but the sleeves were a little longer than I would have liked.  I am 5'7" with my extra length in my legs so if you are shorter you'll want to shorten the sleeves or if you have longer than normal arms, you'll want to lengthen those.  Typically sleeves are just about perfect on me when I make up a pattern.  Back to the sleeves--I turned them under a good three inches, hemmed and then cuffed them.  I like this length a lot!  


Did I mention that neckband?  I cut that on the cross grain rather than lengthwise so the stripes ran perpendicular to the top's stripes--just to change things up a bit.  What I didn't take into account was the fact that there isn't as much stretch on the cross grain so I had to cut the neckband about 2 inches longer.  That worked MUCH better!  


With this being a tunic, I just hate tugging them down and I was a tiny bit worried it might be short so I went ahead and lengthened it an inch and it was a great call!  


Wow, wow, wow do I love this pattern.  I can't wait to make it again!  

Thanks for reading!
Sue 

Summer white with a bit of black lace just for fun!

I. LOVE. white. summer. tops.  Yep!  I stood in front of my closet and wondered why on earth I haven't made many of them?  I gravitate towards them if I am in a department store such as Younkers, Macy's, and Target but when I was evaluating my creations as part of MMM I realized I don't have any white summer tops that I've made.  The time had come to change that...


In pops McCall's 7093 a cute little number that is basically a woven tee with some oomph and in a good way!  I love the color-blocking options, sleeve length variations, and hemline playfulness you get with this pattern AND at a recent trip to Hancock's it was only $1.49.  It was destiny, I had to have it!


I also purchased the white rayon I am made the top from on sale and the 1.5 yards I purchased cost me a total of 5 ish bucks.  I figured even if it didn't wash well, as a muslin it would work. Well, it washed beautifully, presses well and is perfect for creating a breezy top for the high humidity and summer temps that will hopefully eventually arrive!


I made a 14 with an FBA and no other adjustments.  I had the black lace fabric on my cutting board to use for another project and thought, why not?  I had enough to add to the front piece so I basted both pieces together and treated it as one.  Both are machine washable, and the black lace I've use in other applications and it washes beautifully so I took a chance on it with this top.


Construction is super easy.  There are five pattern pieces and if you include the pockets, six.  To create the sleeve shaping you sew darts where the shoulder seams would be.  My darts are much longer than the pattern originally called for.  I would have to make this again to figure out if the pattern is incorrect or if it was due to my fabric.  Guess I will have to make another one in order to figure that out!


One detail I LOVE is that with this new McCall's pattern you create a bias binding from the main fabric and sew that to the right side of the neckline, fold to the inside and topstitch in place.  The facing is now a design element, lays beautifully, and is so much easier to apply and make look good rather than using purchased bias tape.  Kuddos to you if you can make that application look nice!  Not sure why my eyes are closed but we'll roll with it...


I really love this top.  I am wearing it with black capris that are Not Your Daughter's Jeans that are awesome and one of the very last RTW purchases I've made.  I'd love to make a copy of them!

Thanks for reading!
Sue

Sunday, May 31, 2015

May wrap up and sewing plans for SUMMER VACATION TIME!

Yahoo!  It's summer break for me and that means lots of time to sew!  I have other projects too such as painting the exterior of our home but what I am most excited about is to sew for the pure pleasure of it!

Back to May...I fully intended to post photos of MeMadeMay but life just got too busy and I simply forgot!  What I did do however is to look through my closet for clothes I've made and haven't really worn or barely worn and tried to figure out why...the big conundrum of my life!  I spend so much time, as I am sure the rest of you do as well, picking the perfect pattern for a cherished piece of fabric to create a garment I am just ecstatic to wear!  So, here is what I discovered:

1.  I am w-a-y to hard on myself when it comes to critiquing overall fit, shape of a garment and wear-ability.  For example, one of the tunics I had made but hadn't worn finally saw the light of day and I received no less than ten comments on how cute it was and how well it fit me.  Huh, maybe I should have worn it sooner!  And actually, this happened more than once with clothing I hadn't worn yet!

2.  I need to make some wardrobe plans as I sew.  I was very disappointed I wasn't able to participate in SPR mini-wardrobe challenge in April and May as I need a challenge like that to help me coordinate some pieces.  I had three work related trips, a retirement party at my home for a dear friend and colleague, teaching an on-line college class with over 40 students (BTW, don't ever agree to do this!), and also working full time.  Not much time was devoted to sewing let alone coordinating all the pieces!

3.  I really need some basic pieces such as tee shirts, blue jeans, and camisoles in colors I wear all the time.

And...every day the month of May, I wore clothing I made!  In fact the gals I work with want me to take a photo of an outfit that I haven't made and show them if I ever do wear such a thing!  Ha!

I did make some stuff that I really, really like!  Dresses, a jacket, and some cardigans were all appreciated!  I even made two tops I haven't gotten around to blogging about, so watch for those soon!

Currently, my cutting table is cluttered with a project for Fabric Mart.  I am making clothing for the men in my life: Husband, two sons, two son-in-laws and a super cute 21 month old grandson.  That is a lot of men!  I'll fill you in more later...it is quite hysterical talking to men about their clothing and even with five that have opinions, they were all very much the same in their approach to choosing clothing styles.  :)

So here is a list of my May-makes!


Vogue Dress with pretty linen fabric.  


StyleArc Maxi Dress modeled in the rain!  


My favorite make of the month--StyleArc Ziggi Biker Jacket in white denim.  


A colorful top and skirt!  Kwik Sew top and StyleArc skirt.  Both made in super stretchy knit from Hancocks.  


A McCall's raglan sleeved dress in a beautiful watercolor print from Fabric Mart.  This was a Julie's pick fabric and I love it!  


A linen knit cardigan with no buttons from a McCall's pattern.  


Same McCall's pattern but in a poly crochet-look lace.  


Thanks for reading!!!

Sue


Tuesday, May 26, 2015

Very Easy Vogue CustomFit Linen Dress

Do you ever feel like you picked an easy-peasy project only to discover that a--it was more involved than you thought it would be and b--very easy doesn't always translate into fast?  

I picked up this linen when I was visiting DD1 in Baton Rouge, LA.  She swore there weren't any real fabric shops but I found a few after a brief search :).  She probably should have said she hadn't really looked yet.


Sewing with natural fibers is always such a pleasure because they sort of mold how you want them to remain...darts remain crisp, pleats as well and topstitching looks sharp.  Why don't I use linen more often?

My eye was on this Vogue pattern for a while, mostly because of the lines of the top.  I like the overall shape and the front slits are a cute detail.  I'm not crazy about function-less flaps so I left those off.


This is one of those custom fit patterns and I made a 14 with a C-cup.  I am loving the fit!

The photo is much cuter than the drawings.  I couldn't find any reviews of this pattern, so Vogue, maybe use the photo on the cover of the envelope?  

What made this much more time consuming for me was I wanted to make a garment that was finished very well, that fit well, and had an amazing invisible zipper.  While this isn't exactly perfect, I am certainly proud of my fit, zipper and the slight changes I made to to the design.


The June issue of Threads discussed invisible zips and how to make them well, invisible!  I spent a great deal of time lining everything up and carefully sewing so that zipper was nearly impossible to spot.  How do you think I did?  Perhaps there is a tiny bit of pulling at the center back and I am hoping that with a few more clips in the zipper tape, it will lay flatter than it is now.


According to the pattern directions, you were supposed to use bias tape to finish off the neckline and armholes.  While I don't dislike that finish, I wanted something nicer so I made my own bias tape and sewed it to the right side of the dress, folded it to the inside and hand stitched in place.  I topstitched the front side skirt pieces, just like the directions indicate along with the waistline seam.


Only a few alterations were necessary.  The first was to very slightly let out the waist seam (by a total of 1/2") and also make a deeper bust dart (about an inch) on each side.  I found the neckline too high and lowered it by 1.5 inches in the front and a half-inch in the back.

Just because...I staystitched the neckline before attaching the bias tape.

That's it!!!


One of the things I checked out before saying this was done was inspecting how the waistline seam lay.  Was it horizontal of did it dip slightly front or to the back?  I think that if anything it may very slightly, less than 1/4" towards the back.  If I make this again, I'll check that more closely.  Right now I think I'm being too critical.  I also checked the hemline and that seemed very straight and parallel to the floor as well.


This pattern is a winner for me!  I can totally see the 3/4 sleeve top and pants in a ponte and you could eliminate the zips.


Look, no gaping armholes either!!!

Thanks for reading!  I love hearing from you!!!
Sue :)  

Sunday, May 24, 2015

Jacinta Knit Maxi--LOVE!

My love ot StyleArc continues and here is a recent download from Etsy.  I made a 12 with zero modifications.  

Here's a description from the StyleArc site: 

This sought after look is style arc’s interpretation of the current maxi dress trend. This design is comfortable, yet so stylish. Front and back angled yokes give this dress a slimming effect. The pattern provides for a sleeveless or a short sleeve version. This pattern is made for a knit fabric.Maxi length dress with V-neck

Isn't this cute and comfy looking?  I just love the design lines with this one!  This is my wearable muslin and yes, I'll make another, although I will use a fabric or embellishment that compliments the design lines.

'

It's Memorial Day weekend and it's raining in South Dakota....although we need the rain, wouldn't it have been nice to wait until 11 pm for it to show up?  


I do love how you can see the raindrops in the above picture!  

My fabric is a poly-lycra blend from Fabric Mart.  It was purchased earlier this winter and I love how the dots are scattered rather than in neat little rows.  
It is very light weight so this dress will be cool and comfortable in the summer.  


What I wish you could see is the front and back yokes and how they add dimension and shaping to the garment.  Although, I will say the shaping on this dress is slight--it is more semi-fitted rather than fitted or close-fitting so don't let the line drawings showing how it fits the 'model' fool you.  :)  

You can also see my cami--this is rather low cut and since I make clothing I can wear for everyday and also to work, cleavage just isn't appropriate, hence the cami!  


Here is a glimpse of the back.  It fits well.  I could take it in somewhat so I can ditch the belt, but I will wear it a few times before I decide to make that change.  


I wanted you to see what I did with the neckline.  The neckline as cut following the pattern directions was a tad too big and I felt like it didn't lay very nice as in it rippled somewhat so, despite the fact that I had stitched, serged, and topstitched, I rippled it all out...and even though I was very careful I still managed a small hole or two.  Rather than trash the whole thing, I remember I had these iron-on silver discs that I applied strategically to cover the holes.  


This dress is a very nice length.  I didn't alter anything with this pattern and I am 5'7".  If you are taller, or plan on wearing this with heels, you'll want to lengthen it.  I am wearing flat white sandals with this.  Sorry you can't see the complete length but my photographer insisted on staying inside where he remained warm and dry.  


From cut out to final stitching, even with ripping out my mistakes, this took about 3 hours total.  A great project and I am sure it will look equally cute sans sleeves!  


Is it clearing up??? 


Nope...rain is forecast for the entire day!  


Thanks for reading!  I love my new dress and DH gave it a huge thumbs up!  I so love StyleArc!
Sue