About Me

My photo
Sewing is therapy for me. I hoard fabric, patterns, notions, and spend more time shopping for fabric than I care to admit...

Sunday, April 28, 2019

Daisy Designer Tunic by Style Arc

Here's a pattern I've had for literally years but didn't sew until today.  Why?  No idea.  

Image result for images Daisy Designer tunic

Now, having put this together, I wish I'd taken the plunge so much sooner.  

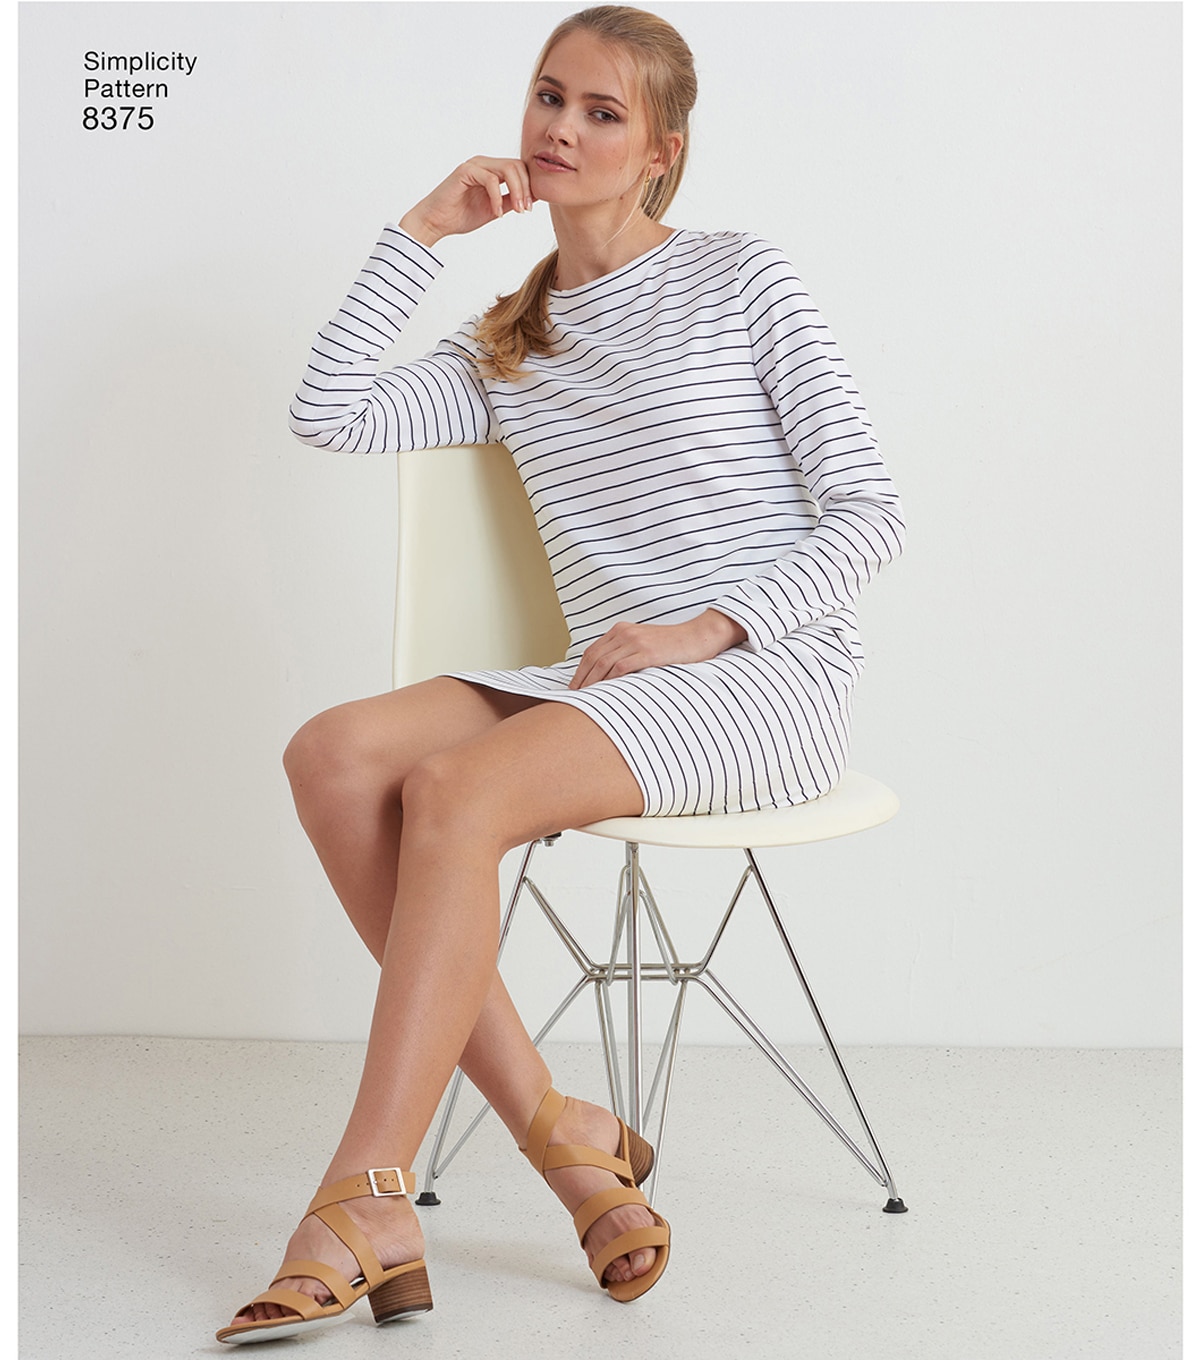
This goes together fast and easy.  It's better than an ordinary tunic that's just a straight hem at the bottom.  It has this fun double hem that's faced on both the upper and lower deck. 


I of course didn't plan well enough and find out too late that I didn't have enough fabric for the sleeves.  And, since God has a sense of humor, it snowed yesterday so sleeveless didn't make a lot of sense based on the current weather pattern. 


I did however have some fun lace fabric that matches really well so short lace sleeves it is.

I supposed if I change my mind I can always make this sleeveless. 


The drafting on this pattern is typical for SA: stellar!

Directions are a bit cryptic but if you study the diagram and follow the letters to match where the lower hem and hem bands attach, you won't have any issues.  This is listed as a medium difficulty pattern but in all honesty it's easy.


I will be making more of these.  I have some lovely Telio rayon floral blends that are just screaming to be made into this fun tunic.  It's almost long enough to be a dress!  Double duty, love it!


Thanks for reading!
Sue


Thursday, April 25, 2019

Bright orange and Mimi G: Simplicity 8889

Hi all!  
Today I want to share with all of you this cute top from Mimi G.  The styling on this is just darling!  


Image result for images Simplicity 8889

Here's my version: 


This pattern is very well drafted.  It fits me so well.  I barely made any alterations to this, other than my usual which I will describe below.


I am loving this bright orange linen from JoAnns.  I hope it holds up!  It's always so hit and miss with them.  This did wash and dry well, so I am hopeful.


First, let's talk about the pocket that I modified.  I added a self-fabric tube or flat piping to the right side of the pocket facing.  I had a bit extra of the fabric, so I decided to add this non-functional loop to the pocket so I could use this pretty pearl button.  I had two and knew it would be difficult to use just one on another project.  After sewing on the loop, I added the flat piping.


Then I turned the facing to the right side of the pocket so it would show.  Fold back the side edges and bam!  You are ready to stitch this onto the garment. 


There is a hidden placket for the buttons.  I love hidden plackets.  They are fun to make.  


I made clean finish hems on the sleeves and bottom edges.  


I matched the rounded edge of the hem facing to my top stitching. 


And, for the final picture, he's the back.

I almost forgot to mention my alterations!  I lengthened from the shoulder to apex, the bust curve and the back from the shoulder to the waist.  My total length adjustment was 1.75" for each--front and back.  Had I not lengthened this, I would be belly-bearing and that isn't a good look for me at this point in my life.  ;)  

I really love how this turned out!  I am wearing this with my McCall's 7432 dress pattern.  This is another fav of mine!  
Image result for images McCall's 7432
Thanks for reading!
Sue 


Monday, April 22, 2019

Kielo Wrap Dress by Named

Ever feel like you are one of the last people to create a pattern?  I am typically late to the party, but I do eventually arrive.  Here's the uber popular dress I am referring to:


Here's the description from the website:
  • Very simple maxi dress with an interesting shape
  • Sleeveless design, you can download a free sleeve add-on for the dress here!
  • Wrap tie closure at the waist
  • Slim skirt and a vent at the back
  • Choose a light and drapey fabric with approximately 20 – 60% stretch. For example jersey or stretch chiffon. The sample is made up in a silk chiffon with some elastan (Eurokangas).
I totally agree with this description.  Very simple with a totally interesting shape.  You don't feel sack like in this at all.  

Here's my version: 


Sorry about the indoor photos.  The day I took these, we were having a raging blizzard.  It was technically spring, but school ended up being called off for yet another day. Blah.


Here's what the dress looks like upwrapped.  


This dress is so light and comfortable to wear.  


I RARELY shorten anything.  This dress was shortened by about 2 inches.  For reference, I am 5'7".  


This fabric is a designer jersey knit by Halston from Fabric Mart's site.  This was so wonderful to work with.  This is a 'go-to' color for me.  It will work with so many jackets and sweaters I have.  


I do love this.


You need a super drapey knit for this to look right.  Anything that doesn't drape will throw off the look of the front.


I made my usual alterations for lengthening between the shoulder and apex, and bust curve. 


Here you can see the shaping the back darts give and that cute walking slit.

I can't wait to wear this dress!

Thanks for reading!
Sue


Sunday, April 14, 2019

A Dress for spring! McCall's 7381

Mustard has to be my new favorite color to sew with.  Coral will always, always be my most favorite color ever but Mustard ranks up there very high!  


I used McCall's 7381 for this dress.  I love this pattern.    Image result for images mccalls 7381

I previously made view A only maxi length with short sleeves.  So I guess it really isn't view A at all, but I think you get my drift.


This time, I made a straight view B.  This dress is really low cut and I decided to embrace it and knew this navy cami I have would work great and it does.  One of the benefits of clothes hoarding is that you might eventually need that one thing you keep in your stash.  Right? 


This fabric is by Telio.  I so love Telio.  It washes well, dries well, sews well, everything well.  This is a rayon and it feels like silk on your skin.  Plus, it doesn't cost an arm and a leg, bonus!


I made covered buttons for the bodice.  I carefully chose what parts of the flowers I wanted to use on my buttons.  I love them!  


Also, I didn't line the bodice.  I chose to make bias bands to finish the edges.  I love the feel and look of the bodice.  


There are pleats at the front waistline as well as the shoulders.  You can also see the sleeve cuffs here.  Typically sleeves fit me really well or are slightly too short.  With this pattern, I had to shorten the sleeves by more than an inch.  I still feel like they may be slightly too long, but I will wear it a few times before deciding.


Here's a peek at my hem.  I fold the seam in twice to the inside, press well and topstitch close to the edge.  I like to see how precise can get it.


Here's a close up of the back elastic waist.  


Here's a back of the dress so you can see the elastic waist.  It slightly blouses which is cute.  

Thanks for reading!
Sue

Saturday, April 13, 2019

Helen's Blackwood Cardigan--I finally made one. :)

Honestly, I must be one of the last sewist to make this pattern.  Why did I wait so long?  When a pattern blows up the internet, I really need to pay more attention.  That translates into purchasing the pattern sooner, rather than later.  


Have you seen this?  It's classic.  It's classy.  It's easy to sew.  What more do you need?  

Blackwood Cardigan PDF Sewing Pattern

There are two versions of this pattern, this one shown is longer with longsih sleeves that scrunch up a bit.  There's a shorter version as well.  What makes this pattern so awesome is that its an easy to sew knit.  There isn't any hemming (unless of course you use the patch pockets).  All the edges have bands which makes it super fast and easy to sew.  


A week or so ago, we had an exceptionally beautiful day with sunshine and no snow.  I took the opportunity to take some photos outdoors.  This is my first blackwood cardigan.  I of course, made the longer version.  I love this length!  


This covers everything you want covered.  I think this would work well with leggings or on any day where you swear the dryer shrunk all your pants four sizes too small.  Anyone else ever have a day like that? 


I did end up shortening the sleeves by about three inches.  I knew they were designed to be slouchy and I compensated.  After all, I hoped to wear this for spring with some garments that I am hoping I will need to pull up my sleeves with because I am too warm.  That's probably a few weeks away.  


Here are some close ups.  I love the bands.  I ended up stitching a little more than an 1/8" from the edge with topstitching to secure the seam.  


Here's a better photo of the band and the topstitching I did.  I really love this color.  It's actually darker than this photo shows.  


Make sure your seams line up precisely and you'll love your finished garment.  BTW, I used a Telio knit for this and it feels amazing.  I can't wait to wear this to threads.  

Thanks for reading!
Sue 

Sunday, April 7, 2019

Lacy Tee Shirt using Simplicity

Up again, is another Simplicity 8375 hack.  That's what this pattern is made for!  

Simplicity Pattern 8375 Misses' Knit Dress or Top-Size A (XXS-XXL)

This is a pattern for a very basic knit dress/tee/tunic with numerous hacking options printed on the pattern pieces.  Hack Away!  


I used this pattern to create the lacey sweater knit I made to go with my floral skirt.  This knit has been in my stash for a while.  I don't even remember where I purchased it from.


This is so easy to play with, sew, and let your imagination go wild!  Here's what I did that cost me less than one hour to create.  


I made the simple top using another fabric for the neckband.  

I left the sleeves and lower hem raw.  I can hardly believe I am typing this, let alone doing it!  


That's it.  The part that took the longest was to pin the neckband to the top.  I didn't even topstitch the neckband in place from the right side like I normally do. 


I hope you'll do some hacking on a pattern that fits you well and you enjoy using!

Thanks for reading!
Sue