About Me

My photo
Sewing is therapy for me. I hoard fabric, patterns, notions, and spend more time shopping for fabric than I care to admit...
Showing posts with label Colette. Show all posts

Sunday, August 20, 2017

The Penny by Colette

I love the lines of this dress--it is classic in its styling but also has a bit of a modern twist, if you know I mean.

Here is an image of both view of the pattern.  I did a mashup of views 1 and 2.  Right?  I do love to do my own thing.

Image result for Images Penny dress by Colette

I used the bodice of view 1 without the pockets and the skirt of view 2 without the belt feature.  Think about that for a minute.   This is a fairly new release.  In fact, I couldn't find a review on Sewing Pattern Review prior to me starting this project.  


My fabric choice was a precut yardage from Fabric mart.  This is a challis that I purchased for the bold pattern and print in deep navy and white.  


It almost reminded me of a super wild bandanna print, but more sophisticated.  Is that an oxymoron?  


I made a few changes to the pattern based on the manner in which it was drafted--or at least I think that was what it was due to.  I did some flat pattern measurements and found the bodice, waist, and hips would fit great.  


Pattern placement was fun to play with for this dress.  The front and back bodice were the easy parts to match the pattern.  However the skirts were not based on the grainlines the pattern requested.  


Honestly, based on how busy the design is, pattern matching only really needed to happen on the bodice and collar sections.  The skirt and sleeves would have to be an afterthought, unless you had a solid and a lot of yardage.  Mine started at over four yards and I didn't have enough to make everything match.  Fight it or let the dress design win.  If you only have so much yardage, then the dress design has to win.  


The skirt has a lot of movement, even though I made the less full skirt.  It still has a lot of body, twirl, and flow as you move.  Also, it was super hard to get an even hem, despite leaving it be on the dress form for 48 hours.  


I do like the overall fit. Colette patterns seem to be made for girls with a bigger than b-cup bodice.  I didn't need an FBA.  I only needed a sloping shoulder adjustment and swayback adjustment.


For the sleeves however, it wasn't so easy.  The ease and length of sleeve cap is absolutely ridiculous.  I followed the directions to a T and there was no way on God's green earth easing the sleeve cap would work.  In case you are wondering, I do know that if you make a sloping shoulder adjustment, you also need to adjust the lower portion of where the sleeve attaches to the bodice.  It wasn't operator error in this case.     


What I ended up doing was to take an inverted pleat at the sleeve head to accommodate the massive amount of ease.  I just hate it when I can't get everything to work together.  I put in three rows of ease stitching about 100 pins to facilitate the amount of ease needed.  Neither was no way near enough.  After five tries, I gave up and went for the inverted pleat at the top of the sleeve cap.  It works.    


I am so proud of my pattern matching on the bodice.  May I say it looks fantastic?  I hope so as I think it does!  


I decided to wear a belt with this dress.  Here is the reason why.  The lower portion of the facing that accommodates you putting on the dress as well as taking it off had zero buttons.  There is at least a six in span of fabric that needs something there otherwise you will get gaping. In the photo below, you can see the bottom portion of the dress where I added two button and buttonholes.  The buttonholes  do need to be functioning in order to get the dress on and off.  


My pointer finger is at the waistline and my other fingers span the area between it and the second buttonhole I added.  That isn't even the bottom of the placket.  That is a pretty large span if you ask my opinion.  At some point in time, someone will see whatever you decide to wear as undergarments.  Don't think it won't. You will be disappointed.  


I really like the lower sleeve detail as it is fun but hard to see based on my busy print.  I really like my finished dress.  It wasn't difficult to sew by an means but if I can be completely honest, I am disappointed in the pattern.  I expected a better fit in shoulder and sleeve area.  I am however happy with my finished result.  

Thanks for reading!
Sue  

Monday, December 7, 2015

unselfish sewing week

I love sewing for myself but there is something special when you make a garment for someone else. Even though I work for precision and a beautifully executed finished product, I seem to work harder when I am making something for someone other than me.  So I have to say I am super proud of the finished result.


I made this Albion coat from Colette Patterns for my baby, Daniel, who happens to have just turned 25, is a third year medical student and how has been married for two years.  Doesn't sound like much of a baby, huh?  Well, he will always be mine!  Daniel simply is not a big guy and due to some health issues, he can't eat much so he most likely will never be much bigger than he is now.  I think he always looks cold so momma came to the rescue with a wool duffle coat in a cozy brown wool.  


From Colette Patterns site, this is how the Albion is described:
"Invest some time in Albion to create a classic duffle style coat (version 1) or jacket (version 2). Each version features toggle closures, tailored two-piece sleeves, yoke details, and a stylish three-piece hood.
Version 1 is a mid-thigh length coat with patch pockets, in-seam pockets, a detachable hood tab, and flannel lining. Version 2 is a hip-length unlined jacket with a combination of felled and bound seams, in-seam pockets, and interior pockets.
Albion is a versatile, simple shape that transitions easily from menswear to women’s wear."


I made version 1 in a small.  I will also add that it fit me perfectly though the shoulders and bust, so one of these may be in my future as well!  


I wish I would have added a flannel as the lining but I didn't think about it until I was completely finished.  Maybe next time!

I made a muslin since I don't use many Collette patterns and wanted to make sure it fit great before cutting into the wool.  The fit was spot on, with zero alterations. I LOVE it when that happens!

I had barely enough wool to create this so I used some clever layout to get all the pieces on and had about a 12"X 12" chunk left over--whew!

The directions are logical and well thought out and I followed them while making this coat and lining.

I did decide to 'enhance' the coat with a few what I call upgrades.  Here are those!
1.  Interface the tabs and the pocket flaps
2.  Stitched the neckline with a 5/8" seam rather than the 3/8" called for in the directions.  I thought it was a bit strange that the directions have you staystitch at 5/8" but the finished seam is 3/8",  I didn't want to rip out the staystitching, so I just stitched a deeper seam allowance.
3.  I interfaced the hems with fusible interfacing so they had just a bit of body and would hold a nice crease.  The interfacing worked beautifully.


I also made my own toggles.  Had I purchased toggles at Hancock's, it would have cost me $30 and that was more than my fabric!  Did I fail to mention that both fabrics were on clearance and I picked them up last year at the end of the season?  The coating was $6 a yard and the lining $1 a yard.  Both were very nice quality as well!  To make the toggles, I purchased suede elbow patches and cut them into my desired shapes.  I found brown leather strips (for lack of a better word) and wooden buttons.  Making the toggles took about 15 minutes and I think they look just a good as the purchased ones but at the fraction of the cost.


Daniel loves his coat.  He looks great in it and I hope it will keep him nice and warm this winter!
Thanks for reading!
Sue


Sunday, April 19, 2015

Colette Moneta round 2!

I really love the feminine look of this dress, in fact, all Colette dresses are super girly and it's nice, know what I mean?


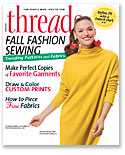
I've already made one version of this dress, but on the cover of the latest Threads, there was such a beautiful version made with a simply divine fabric from Marcy Tilton.


Marcy no longer had that stunning fabric so I searched high and low and found this lovely floral from Gorgeous Fabrics.  I think it is just about as pretty!


So I made pretty much the same version this time but used the elbow length sleeves.  I hope I don't regret those sleeves this summer!


I took so precautions with the collar, to keep it from stretching out of shape.  First, I interfaced with a sheer and lightweight version from Fashion Sewing Supply.  I really love this stuff!  Next, I staystitched the seam line and then I stitched stay tape to the seam.  This might be overkill, but this fabric was pretty stretchy.  Then I stitched the undercollar to the collar.


This kept everything from shifting and shimmying across my machine.  Since I didn't line the bodice, I stitched the undercollar to the wrong side of the garment.  I flipped the collar to the right side of the bodice, edge stitched to keep it from rolling to the wrong side and viola!  No neckline hem to deal with!  You can see how it looks in the photo below.


I really like the overall fit of this dress.  It is designed with negative ease, so measure carefully what size you need.  Oh and I almost forgot that I stay taped the shoulder seams as well.  


Just for reference, I made a medium, which in the Big 4 is my typical size.  


The cross over collar detail in the back is a nice little touch.  You could eliminate this if you wanted. In fact, on Colette's site, there is a free download for more versions of the little collar so you can be as creative as you'd like with contrasting fabrics and such.  If I remember correctly, there are eight additional versions!


This dress is very comfortable and with the right knit can feel like you are wearing ultra comfortable pajamas and who doesn't want to feel like that when you are working or at an event where you need a pretty dress?


I put this dress together in about 3 hours from cutting to stitching the hemline.  It helps I had made it once before but it is such a simple to make pattern that any beginner would have great success.  Even if you are experienced, this dress is just fun to make!

It was chilly today, so I am modeling it with black leggings.  I do like it with the belt! It was also very windy so of course I am having a bad hair day! 


I used my serger on all the seams and to hem, I used steam a seam and folded the lower hem twice to create a nice, neat edge.


 One deviation from the pattern I made was to eliminate the elastic at the waistline.  Why, well, let me back up a bit.  The cover of Threads shows an ultra gathered skirt and I couldn't get my first one to look that way with the elastic I used so I just skipped that step, gathered the skirt and attached it.  It is still pretty gathered but not nearly as much as the cover.


I am thinking they made the skirt extra wide so it gathered so much.  Oh, and I almost forgot, I eliminated the side seam pockets.  In a knit dress, I don't like them at the side seam as it seems to weigh the dress down when I put my phone, lip gloss, driver's license inside.  To avoid that temptation, I don't even mess with them.

Thanks so much for reading!  What are you sewing lately?
Sue

Tuesday, March 10, 2015

My first Moneta!


Here is a review for the Colette Moneta dress.  This pattern was featured on the latest edition of Threads magazine and I just drooled over it!  90% of the appeal was the fabric used to create this simple but classic dress and the other 10% was that is was a dress!  Sorry the picture is a little blurry, but I think you can see what I mean!

Current Issue of Threads magazine

So I used fabric from my stash which was from Fabric Mart and is a Maggie London knit with four-way stretch.  Perhaps it is a little light weight, but for assessing fit and such, it worked fine.  


This is a versatile pattern in that you can use multiple sleeve lengths, neckline variations (there are several to download on the Colette site for FREE!) creating a multitude of possibilities.  


Belt?  No belt?  The choice is yours!  


I did not make an FBA as this was my muslin and it worked out fine--I don't see any pulling, wrinkles, etc.  My fabric is rather lightweight, so perhaps on a mid-weight I may have to make an adjustment.  


This dress is comfortable and I do like the print!  I made the little collar that crosses slightly in the back.  The directions call for interfacing the collar and it is a wise move.  I tried to make the collar without interfacing and it didn't work so hot.  My interfacing is almost always from Fashion Sewing Supply.  I used the lightweight couture and it is the perfect finish for the collar.  


Sorry about the pasty-white skin.  Winter decided to take a hiatus this past week and now that we can bear a little skin without having it freeze off our bodies, mine is in dire need of some sun on it!  Let's just say that winter has been l-o-n-g.  

I plan on making more of these dresses.  This pattern is as well drafted as the Lady Skater by Kitchy Koo.  

Happy Sewing!
Sue 

Friday, August 8, 2014

Colette Sorbetto top


From the Colette Site: 
"With its ultra simple construction (just two pattern pieces plus some bias tape, and no closures needed), elegant loose cut shaped with bust darts, and the box pleat detail down the front, Sorbetto is a pattern you can throw together in a huge range of fabrics for summer.
You could use a patterned bias tape, or just use a contrasting color. Or you could sew just about any embellishment you want down the center. This blouse is a true stash-buster and a great way to use some pretty buttons or trims."
This is a freakin FREE pattern from Colette.  Since I have never tried a Colette pattern before so I naturally had to try this one and I am so pleased.  This is a great pattern that doesn't take a knit.  It's perfect for those pieces of fabric you have that are too small to do anything with but you feel bad tossing.  So, the fabric I used was from my first Archer.  I used red bias tape trim on the front pleat but I am wondering if I should remove it?  Not sure.....what do you think?  

I used kona cotton for the trim around the neckline and armholes.  I cut 1 1/4" bias bands, pressed them in half lengthwise and sewed them to the wrong side of the top, flipped them to the  right side and edge stitched in place.  I am super happy with the result.  I also stitched on three shell buttons down the front.  

I plan on making making many more of these tops.  I have some many weird fabric stash pieces that this will be perfect for!  
If you haven't tried this pattern yet, what are you waiting for?