Hello all! I hope this finds you healthy and safe! We in the northern plains are experiencing CoVID19 at a much slower rate than other parts of the country/world, but it is rearing it's ugly head,
Enough! No one wants to hear more about this, right?
My original plans with these two lovely fabrics was to make a super girly dress with a dark slip underneath. I began working from home recently so that didn't seem practical. After looking through my patterns, I came up with this combination of patterns to match these two lovely fabrics.
First, let's talk about the chiffon. Chiffon used to be a fear fabric for me. I avoided it at all costs. However, there are so many lovely, lovely garments made from chiffon that I decided to master some techniques to use it in a way that it works and is no longer fearful. Why didn't I think of this sooner?
If you are new to working with chiffon, use a simple pattern. The one I used is very simple to construct with a looser overall style and I've taken the time to fit it to me so I know it will work.
See what I mean? Very simple with clean and classic lines.
What did I do to make the chiffon work? I am a HUGE fan of Best Press. I buy this stuff by the gallon. I use it after I cut the fabric out on all the rounded edges such as the neckline and hems. Every seam I press, I use Best Press.
For the back yoke, I cut two layers, instead of one like the pattern suggests.
This created a lined yoke which is not only sturdier, but also creates such a pretty finish on the inside.
I cut bias tape from the chiffon using a sharp rotary cutter and a ruler. And, I starched that as well. The curved hemline also has a bias finish.
Side seams have a french seam finish.
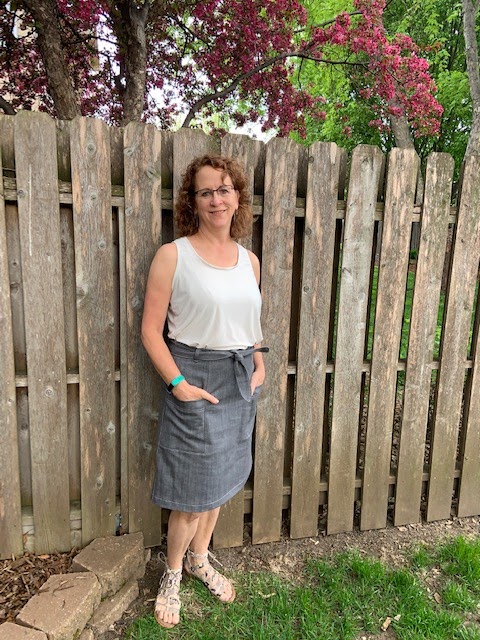
For the cardigan, It's a super simple sew as well. I used a lovely ITY knit, again from Fabric Mart. The pattern I used, is FREE! It's from Sinclair Patterns and you can find the link here:
Sinclair Patterns Harper Cardigan
If you are wondering what it looks like, here's a photo:
This comes in several lengths as well as sleeve variations. I made the duster in a tall size. Oxana Sinclair offers her patterns in petite, regular, and tall. Since I am 5'7", I love using the tall sizing.
You'll see more of these cardigans from me!
Thanks for reading and I hope this finds you and your loves ones safe and healthy!
Sue