About Me

My photo
Sewing is therapy for me. I hoard fabric, patterns, notions, and spend more time shopping for fabric than I care to admit...

Tuesday, February 26, 2019

Oslo Stole by Oraguse

Hi guys!  
Up today is a FREE pattern from Oraguse, an indy company from France.  This is more of a set of directions than pattern pieces but it's so easy to put together, you won't miss the pattern piece!  

Here's an image from their website: 
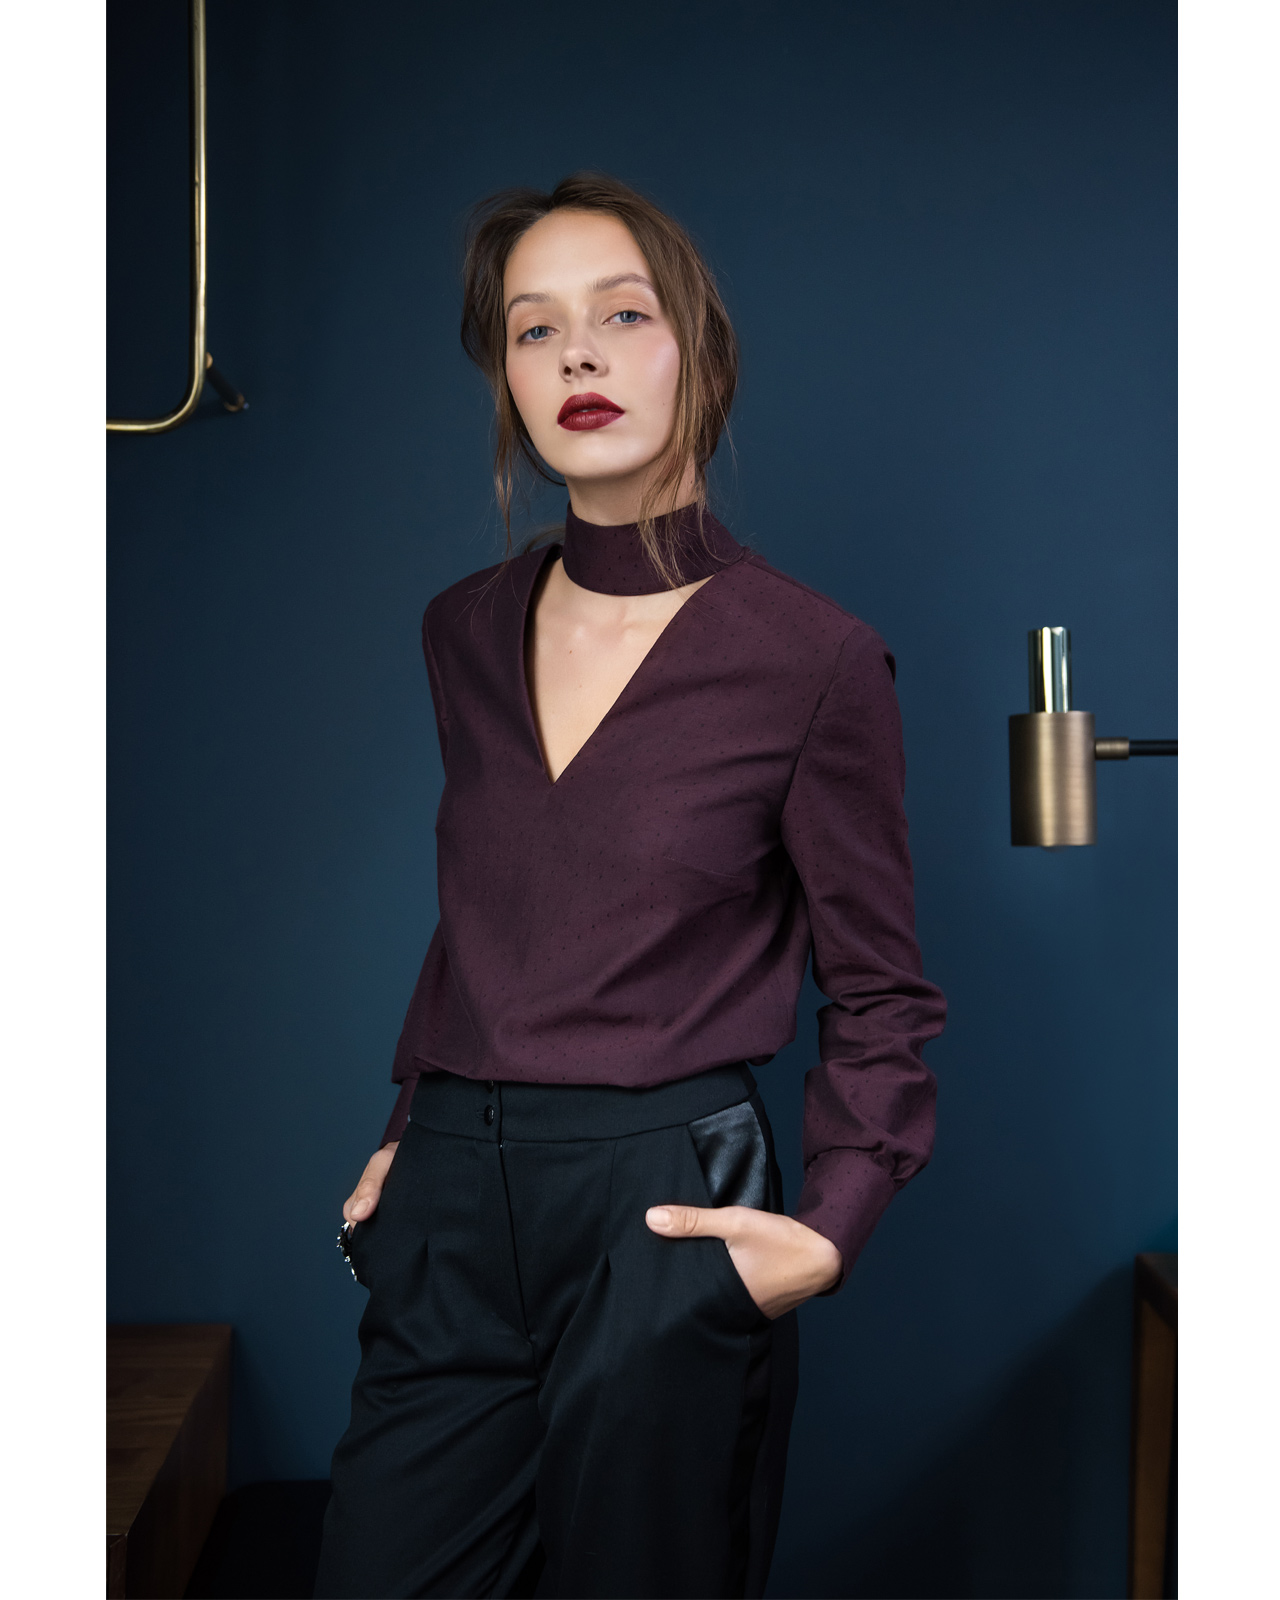

Here's my version: 


This fabric has been in my stash for ever!  Probably one of the longest of all pieces!  I thought it was wool but is actually stretch cotton.  It looks like wool and has a feel of wool, so it may be a blend.  The tag from when I purchased it was only partially attached.  Hard to tell!  


The back 'collar' is only partially stitched down the front of the garment.  The back is left to hang out, if you know what I mean.


This is a bit wrinkled.  I didn't get a change to take photos until after wearing it to work.


One thing you'll notice is that the closure on me is high up while the model shows the closure much lower on her body.  I double checked my measurements and they are correct.  For reference, I am 5'7".  Height may be a factor.  


This is very comfortable to wear and surprisingly warm, even though this isn't wool.


Here are some details--I like how the corners are finished.  


Here's where the collar is stitched down.  If you look closely, you'll see where I did some zig-zag stitching to strengthen and stabilize the back side seam intersection.  This tiny portion of the garment isn't finished as it is a cut edge and I thought the zig-zag would reinforce it a bit as well as give me a more solid surface to attach my pin closure.  

Thanks for reading!  Do you have any free pattern resources?  Please share them if you do!
Sue


Sunday, February 10, 2019

Silk Orageuse the Prague blouse


I positively fell in love with this blouse the moment I laid eyes on it.  It's a new to me pattern company based out of France.  The company is called Orageuse and the pattern is the Prague Blouse.  This was fun to make! Instructions are available in either French or English.  They were detailed and easy to follow for this pattern.  

Image result for images Prague blouse

You can vary this pattern at bit at the neckline.  See the line drawings below.  

Image result for images Prague blouse

That front portion can be left open (does that describe this?) or you can have a contrast, or even use the same fabric as the blouse.  I choose to use a silk from Fabric Mart for this blouse.  This creation was for my February blog post.  I really, really love this pattern!  


Since this was a new-to-me company, I made a muslin and am glad I did.  I also flat pattern measured and knew it seemed be developed from a standard pattern block and that my typical alterations would work. 


I was so hesitant to try this neckline and when I was making my muslin, I seriously toyed with the the full-coverage neck.  But then I had a talk with myself and said, just go for it!  Your next version can have the full-coverage neck.  Okay, now just get it cut out so you don't change your mind...again.  Anyone sew like that?


That slit in the back is super cute as well.  For alterations here's what I did.  I learned this from Designer Joi when I took a classroom from her last summer.

Lengthened from the shoulder line to the apex.  One great thing about this pattern company, ORageuse, is that bust alteration lines are marked on the pattern.  Can I get a whoop, whoop?
Lengthened the bust curve area.  This is 2 or so inches below the dart.  It gives you ease for the girls to move freely.  
I typically have to alter across the upper back as I must have broadish shoulders.  I don't have to with this pattern company.  
Lastly, to accommodate the front lengthening I did, I also added to the back across the bust area by about an inch and a half.  This ensures that the front isn't longer than the back.  Make sense?  

I also widened the hips by about a total of an inch.  I just didn't want this too close-fitting in this area.    

V

Here are some detail shots.  This is where the neckband connects to the bodice in front.  Sew precisely here!  


I love these buttons I found.  They were at JoAnns.  I think they add the right amount of glam.  Look how precise my topstitching is!  I get excited about things like that. :)


Here's the back neck slit.  Again, I did some very precise stitching here.  I also only used two instead of three buttons as they were a bit too large to fit three of them.  


I really love this blouse and plan on making another.  As I was putting this together, I thought a sleeveless version would be worth trying.  I should mention that in this photograph, you can barely see the piece of interfacing I used to reinforce the area at the back slit.  I didn't want anything to stress that seam.  

Thanks for reading!  Have you tried any european pattern companies?  If  you have, please share their name!  I'd love to check them out. :)
Sue