About Me

My photo
Sewing is therapy for me. I hoard fabric, patterns, notions, and spend more time shopping for fabric than I care to admit...

Sunday, June 29, 2014

Vogue 8774 (again!)


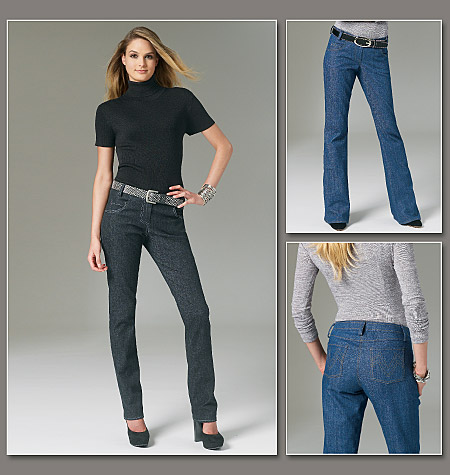
Fitted, tapered or straight-legged jeans (below waist) have shaped waistband with hook/eye closure, carriers, front/back pockets, back yokes, and binding for front fly zipper closing. Topstitching and narrow hem.

Here is pair 1:

Here is pair 2: 


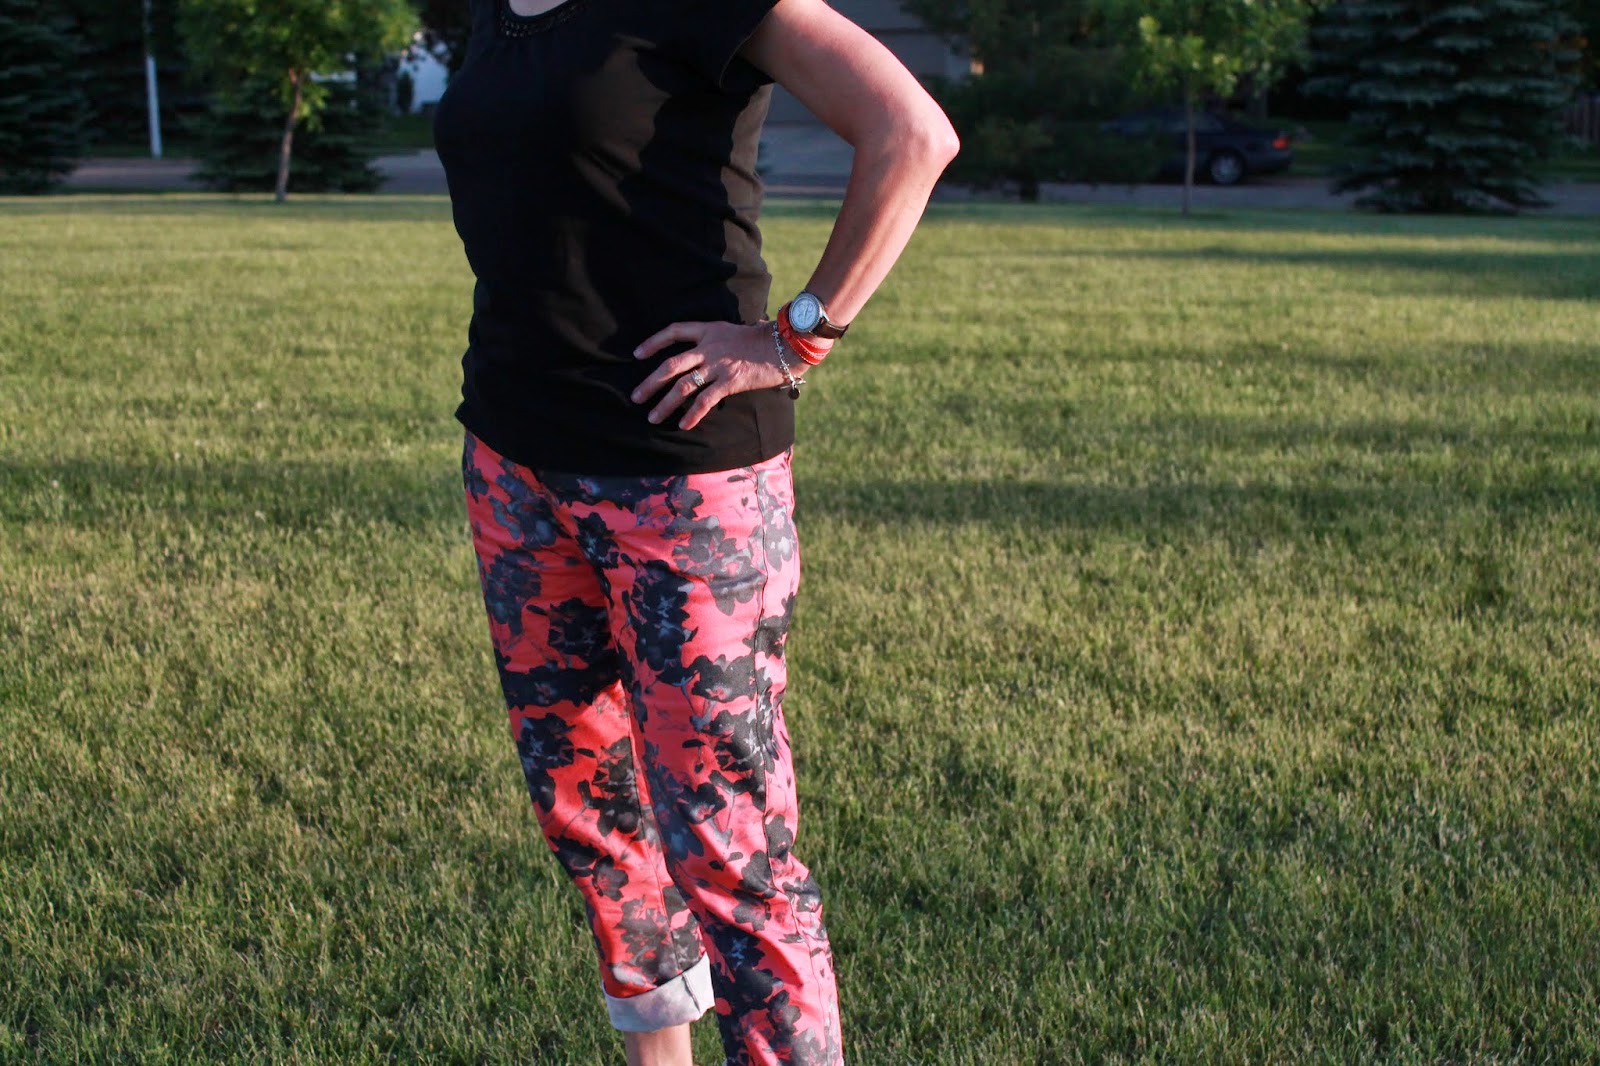
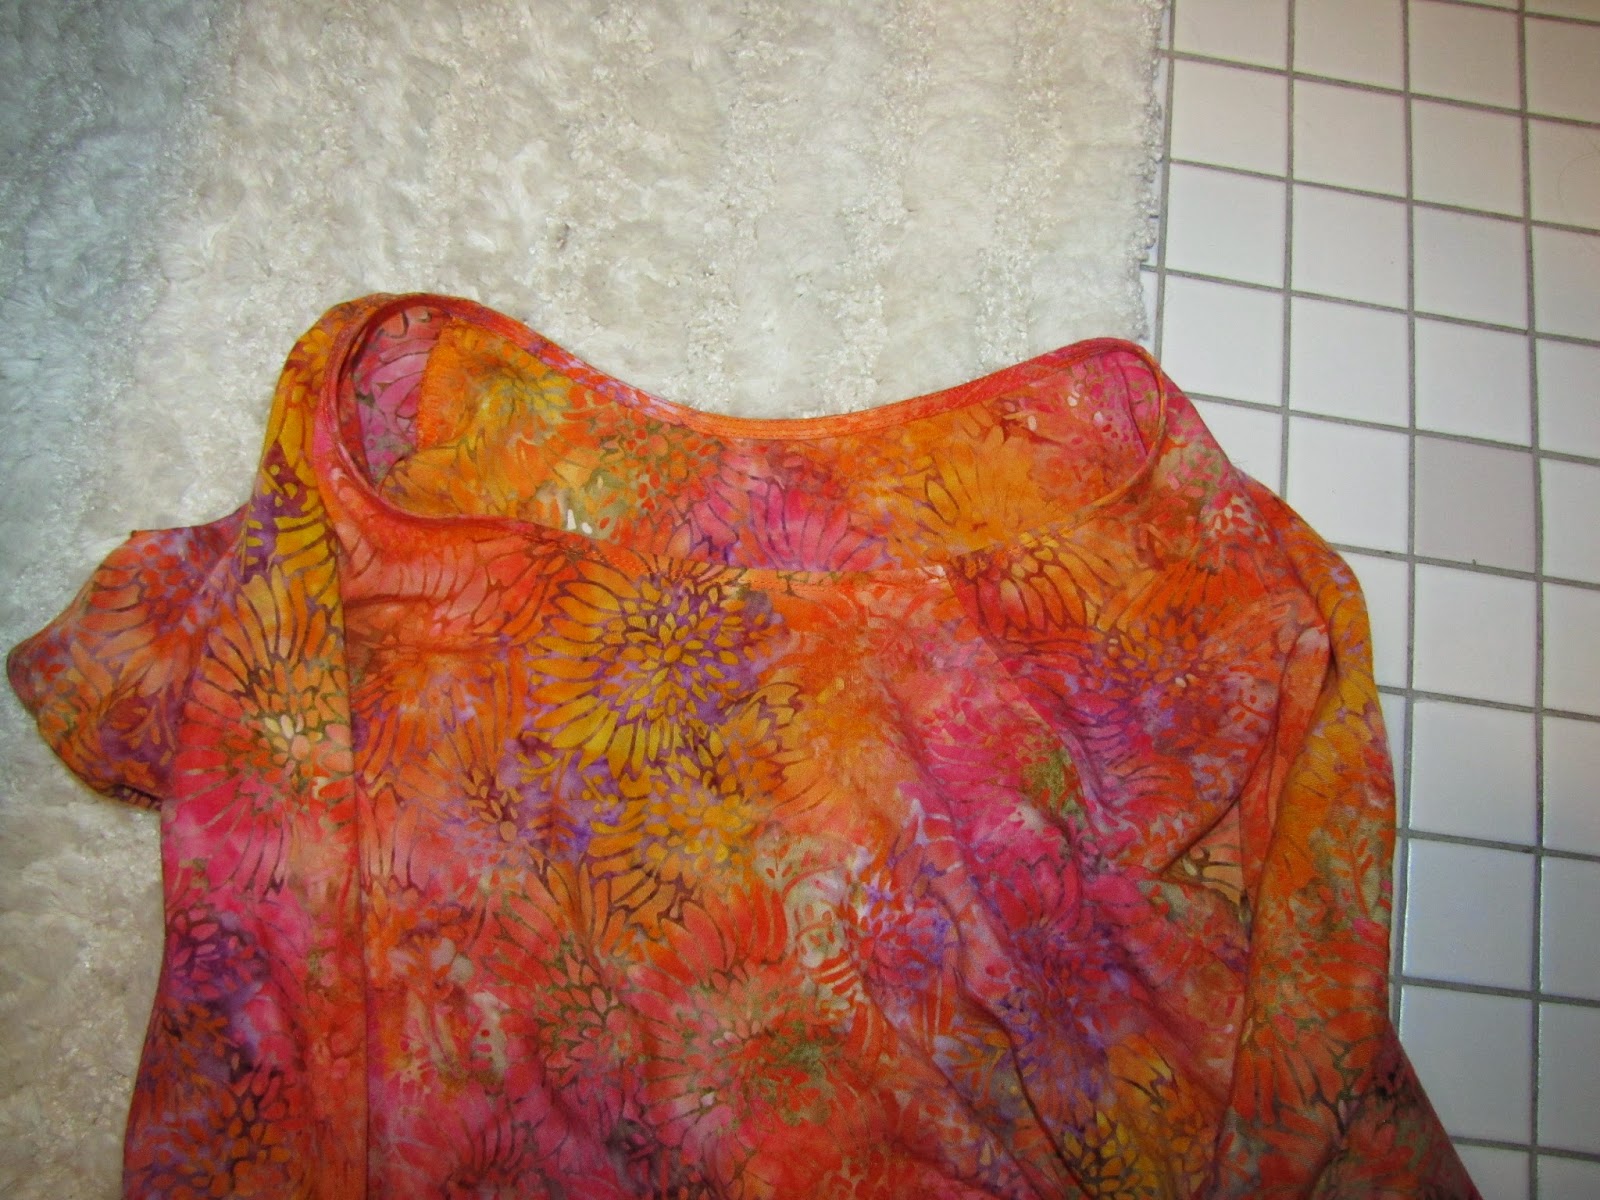
I had to make this Vogue pants/jeans pattern again. I have worn both pairs numerous times and they are so stinkin' comfortable that I want about 10 pairs in every possible color!  Maybe one of these days I will make them in good old denim blue!  This lovely coral is from Emma One Sock.  It sewed up beautifully!  It has just a little more stretch than I am used to and may have to take these jeans in a little more at the outer leg seam.  I will reassess after washing and drying. 


From cutting out to sewing on the hook and eye closure, it honestly took me only about 3.5 hours to make these. Not sure why they whip up so quickly other than this is probably the best fitting, most well written pattern I have used for jeans.


Cutting out I started with a 16 but with my fabric I graded to a 14 in most places, particularly the legs.  If I didn't mention it earlier, I made view A or the straight leg version, same as the two previous versions I made.


I only added one row of topstitching in all the places shown on the pattern directions simply because I used white jean/topstitching thread.  I thought it might be hard to get everything perfectly straight.

I did decide to add topstitching along the inner and partway down the outer leg seams along with the center back seam or butt of the pants. I also played with the topstitching on the back pockets and had some fun with it.  Rivets were added in the usual places on the front pockets, including the watch pocket.  I find it is much easier to add the rivets when you first use an awl to make the hole for the opening, stick the peg portion of the rivet through the hole the awl made, line everything up and then use a rubber mallet to secure it.  I did make a practice rivet before applying to my actual jeans as it had been a while since I had done one. 


I made these jeans about 2 inches longer than any of the other two I previously made.  They are perfect length wise.


The fly goes together so well and you don't have that annoying gap that shows glimpses of the zipper pull or any of the zipper for that matter.


Speaking of pattern strengths, I still love where this pattern hits at the top of the hip bones rather than the waistline.  When you sit down, no one sees your undies--which is a bonus in my book!


I love my pants.  I wore them all day today and found them extremely comfortable, colorful, and fun to wear.

Thanks so much for reading! 
Sue

Wednesday, June 25, 2014

New Look 6189 Pants!

Ok, so I made another pair of pants.  I had to.  When I came across this pattern, it just screamed my name and after checking out the positive reviews on-line, it was a done deal for me. 


 This pattern went together quickly.  There really aren't that many pieces--front, back, waistband (front and back) and the carriers for the belt loops.  That's it.  Much easier than a pair of pants with a fly!  One of the things that really drew me to this pattern was the slim style along with the split waistband in the front.  I mean, both elements are super cute, right?  Given the super cute floral fabric on the model, I knew a floral denim would be perfect for this. One thing that is very interesting is that there is NO description on the back envelope.  I'm an experienced seamstress so I can see what is going on but come on, nothing at all? 


While looking around at Hancock, I found this super cute printed denim.  I told myself not to buy any additional fabric, but I had to, this was too cute to not purchase.  And, I am super happy with how it performed.  It washed and dried beautifully, sewed like a dream, and is just so soft!  How often can you say that about fabric purchased at a big chain store like Hancock?


So in addition to the fabric, you only need some interfacing for the waistline along with a zipper.  Let's talk about that dang zipper for a moment.  I tried to put it in with a typical application, didn't work, meaning it looked terrible!  The pattern calls for a lapped zipper but I held out.  Why?  I don't know.  Next, I tried an invisible zipper but it didn't work well with a heavier fabric such as denim.  Finally I gave in and put in the lapped zipper and yep, the pattern designer knew what he/she was talking about when giving the direction for this type of application.  Next time, maybe I will obey the rules and follow the suggestion!


I found the directions logical and well thought out.  If you are a beginner and have never tried out pants, this would be an easy pattern to try out.  Having said that, typically I don't have to make may alterations to any pattern straight out of the envelope.  With this pattern, I did!  I made a size 16 even though I purchase an eight or ten in ready to wear and had to take them in everywhere!  Waist, hips, and especially the legs.  One thing I usually never do is let pants out at the back waist seam which I did this time.  I am truly not sure if that was due to my inadvertently taking it too much of the inseam and that pulled that seam down a bit or if it was a bit low to begin with.  Any way, how I remedied this was to drop the front waist seam about 1/2" and lengthen the back waist seam by 1/2".  This evened everything out and now the pants fit better, are far more comfortable, and also hang nicer.

I also added one welt pocket to the left back.  I had to.  Plain backsides are a little boring to me.


I can't even tell you how much I ended up taking in at the side seams.  I did take more out of the hips and upper thigh than anywhere else, but my goodness is the model's photo misleading!  These are far roomier than how she is wearing them.  I was so disappointed after I put them together and tried them on for my initial fitting.  I should have know as I was cutting them out as the slim fit I was hoping for wasn't reflected in the pattern tissue.  Why didn't I make a muslin you ask?  My answer is simply because I am lazy.  I really need to complete this necessary step more often.

Ignore the little thread I forgot to trim at the center front detail! 


I am really happy with my pants.  They are super comfortable and I hope to find a more exciting colored top to wear with them than brown!  I thought I had a red t-shirt somewhere, but I couldn't find it.  Any color suggestions are welcomed!

Thanks for reading!  I love your comments.
Sue

Monday, June 23, 2014

Sewn Square One for Your StyleGo Anywhere Dress!

How cute is this simple little dress?  Very, if you ask me!  I am so glad I tried this pattern.  After seeing so many cute reviews on SPR, I had to buy it and I'm glad I did!  Here is my review for this little dress.  Here is the pattern description from the pattern back: Go Anywhere dress is a fitted dress, tunic, or top with sleeveless, short of long sleeved options.  Flattering princess seams curve into the side seams.  Optional pleated patch pockets follow front curved seams.  Back zipper closure.  


When I purchased the pattern I was pleased that all sizes from XXS to XL were in one envelope.  


Based on my bust measurement, I started with a large.  I love how this fit!  It was so simple to put together and all the notches and other markings matched up perfectly.  There is an extensive guide for how much yardage you need based on the many options you have based on sleeve length and overall length of the garment.  There are also options for with or without pockets.  


There are eleven pages of instructions, but please don't let that intimidate you!  The directions are thorough and written for a beginner.  Cutting instructions alone take up three of the eleven pages.  Any beginner should be able to purchase this pattern and achieve success.  If you have never put in a zipper, the directions are clear for putting in that as well.  I decided to put in an invisible zipper.  I just like them better, especially on lighter weight fabrics such as this linen I used that was purchased from Fabric Mart. 


 I just love this color.  It is one of my all-time favorites.  Too bad that this fabric wrinkled even while hanging up!  I washed and dried it twice using hot water and a hot dryer hoping to soften it up and get the wrinkling sort of under control but my efforts were in vain.  When you look at the skirt portion of the dress, it looks as if I sat for quite a while but I didn't.  I only put it on and walked outdoors to have DH take pictures.  Ugh.  Linen is supposed to wrinkle, right? 


I did try and put the pockets on the dress but didn't like them with this fabric.  I think for a fabric with more texture or variation in color, the pockets would add an interesting design element.  


All in all, I like this dress and how it fits.  I used my typical 1/2" swayback adjustment but as you can tell from the photos, I need to increase that just a bit.  I didn't have to make an FBA--yay!  But I would like to to add just a 1/2" or so to the shoulder seam as I feel like I need just a smidgen extra fabric there. My only other small adjustment for future garments would be to modify the neckline facing.  My fabric is not opaque and with the proper undergarments, you'd be able to tell.  Next time, I will modify the neckline so it is looks more like RTW.  


I highly recommend this indy pattern.  The strength of this dress is the princess seaming and the fit.  I think the pockets have a great deal of potential, but I will most likely leave the little pleating detail off those.  The length is great and with the variations, it seems to be an all around versatile pattern.  I am so pleased with my dress--except for how much my fabric wrinkles!  Next time, I will pick a less wrinkly fabric and create this again!  


Thanks for reading!

Sue 

Sunday, June 22, 2014

McCall's Tunic 6794

http://mccallpattern.mccall.com/filebin/images/product_images/Full/M6794.jpg


Here is my review for what I had hoped would be a cute little tunic made out of my beautiful rayon/cotton blended fabric I purchased last fall when my daughter and I went to a quilt show.  I had been waiting for just the right pattern and thought I had found it, but I am sorely disappointed.  Let me know what you think.....

The description from the back of the envelope simply states this is a very loose-fitting, pullover tops and tunics have neckline variations, front gathered into midriff, attached tie ends, and narrow hem.  A: gathered sleeves and bands.  C: shaped back hemline, wrong side shows. 
I made View D.
When I purchase a piece of fabric which I have no immediate plan for, I typically get three yards.  With this fabric, there was no exception to my three-yard rule.  This top took almost all my fabric, which is okay, but keep in mind this pattern is somewhat of a hog.  Cutting out and putting together was fast and uncomplicated.  The directions all made perfect sense and I had no issues whatsoever.  There really aren't that many steps for this top, so I really feel like it you love the style and are a beginner, you'll have success.


I changed just a few minor things in hopes I would like the top better, but I simply don't.  My neckline facing is different than making a regular sized facing and stitching it in.


I made my facing narrower and on the bias so I could turn it under.  After edge stitching the facing, I top-stitched two rows on the outside and I think it gives a nice finish.


So here is what I don't like.  It is all in the design.  I don't like having my bra show at the side seams.  I don't think I should have to wear a cami underneath a high-necked top.  I should have known by looking at the model on the envelope.  By the looks of it, her bra is also showing!


Another modification I made was to add some elastic at the back waist to help keep some of the fullness in control.  I think it helps control how the top lays in the back, but given the bra showing problem, I am going to consider this a wad.  I even tried to pull it up at the shoulder seams, but that makes it a lot more difficult to take on and off and also it interferes with the waistband detail.  Argh!

Thanks for reading, this is a big thumbs down for me! 

Sue :) 

Butterick 5218 Tunic

This is a review for a super easy Misses' top and tunic: loose-fitting, pullover tops A, C, tunics B, D have collar variations, front button closure with front pleat, back gathers, dropped shoulders and sleeve variations.  A has a self belt.  B: sleeve with elastic casing and side slits, C, D patch pockets and long sleeves with inside buttoned tab to hold self-rolled cuffs.  D: side slits.


This is a multi-sized pattern and since I knew it is loose-fitting, I made a size smaller than usual.  I also made a variation of the pattern with the sleeves of A and the length of D without the side slits.


So this is an easy rated pattern and it is indeed that!


So here is what I did.  The fabric I used was from Fabric Mart.  It is one of the J Crew's fabrics that was a Fabric of the day so I got it for a great price!


Since my fabric is so sheer and I was worried about my interfacing making it opaque or funny looking, I decided to use silk organza instead.  It worked great!  The organza is lining the collar and front placket area.  I did make the self-belt but hated it on me so I ditched it for this belt.  Also, I really didn't feel confident making button holes on such sheer fabric so I used plastic snaps.  I could have just sewn buttons on the front without the holes.  This top is so loose-fitting that you don't need to unbutton anything.  It slips right over your head!


This top whipped up in a a few hours so if you need an instant gratification project and love the comfort and ease of tunics and leggings, this is for you!  I honestly hated it when I first put it on but after DH stated he didn't think it was 'too bad' and looking at the pictures, he's right.  It isn't too bad, its not my favorite either, but I think I will wear it a few times before moving it out of my closet and making room for something else.


I do recommend this pattern for a fast and easy top.  It does run large, so my advice would be to make it a size smaller (maybe 2).  Carefully choose your fabric as I think it makes or breaks the top.  I am wondering if I should shorten this a bit?  Add some side slits?  Take it in more?  I am very open to suggestions!


Thanks for reading!
Sue 

Thursday, June 19, 2014

Named Clothing--Kanerva Button Back Peplum Blouse


 How cute is this little top from Named?  This is their Kanerva Button Back Peplum Blouse.  I ordered this pattern yesterday, downloaded it, and had it taped together in about an hour.  What I really love about this download is that you can choose which size you want  to print rather than have a range of sizes from zero to 14 in one.  I mean, I will never be a size zero, so why should I have to mess with it?  I printed off the size range I wanted and am very happy I only had two cutting lines to deal with and sort out.  :)   


This pattern in rated as either simple or average depending on if you add the peplum or not.  I don't think the little skirt on the top added to the difficulty at all.  In fact, I would rate this entire pattern as simple.

So back to the download.  This was an environmentally responsible download.  There were 12 pages and the pattern pieces overlap one another.  After taping together, which went very smoothly as everything lined up perfectly, I used pattern tracing cloth that I purchased at either Joanns or Hancocks and using a permaenet marker (sharpie?) drew all my lines and markings necessary.  Next came choosing fabric and I choose this pretty little blue and white number from my stash.  Actually, this was a recent addition.  It is a vintage find from an antique store not too far from my home.  Since it was only 36" wide and I had only two yards, I had to shorten the sleeves, which is okay by me for this version.  I think it is fun to use vintage finds once in a while as I can't imagine how some of the dresses were made.  This fabric is from the 1940's!  It was in beautiful condition but as you can imagine a little fragile.  I will tell you how I managed that in a bit.


After cutting out and beginning to sew, I did pause and read the directions.  They were clear and concise and there was a great deal of helpful information if you are a beginning seamstress.  I found the actual steps to creating the top clear and concise.  The visuals are helpful as well.  I do believe there is one mistake as far as the visuals are in step five.  The task is to sew the back waist darts on the top but the image shows the bust dart.  If you are new to sewing, you may wonder where the heck that dart is that you are supposed to be sewing!


Other than your fabric, you need very little else to complete this top.  One inch strips of the length of the top is needed of fusible interfacing as well as six button closures.  Luckily I had all this stuff in my stash including the matching snaps I used instead of buttons--yippee!  I just needed a few hours to sew today not another run to the local fabric joints for a few measly notions!


Ok, so here is what I modified from the original pattern.  Oh, and isn't it cute?  Remember when I mentioned my fabric was a little fragile?  Well, while handling the fabric's cut edges, they tended to fray quite a bit so instead of turning and hemming the neckline and sleeve hems, I cut bias bands of the tiny bit of self fabric left over and serged that to the edges, turned those and topstitched about 1/8 inch from the seam.  It feels much more secure that way to me, especially as I continued to handle it.  Also, the directions didn't mention staystitching the neckline but I thought it was necessary so I added that step as well prior to attaching the neckband.  Instead of using buttons, I did use plastic snaps and my Kam snap pliers to set them and am very happy with the results!


So, I like the result of this little top.  The button up back is darling and the peplum is so sweet and cute.  There is enough ease that I can slip this on and off over my head without having to use the snaps--another like!  Everything went together well and I can't wait to try this in a beautiful floral cotton I purchased from Emma One Sock.  I did measure the location of the snaps prior to putting them in and feel like the bottom most one needs to be a tad lower so it more closely matches the model.  I will hopefully remember that for next time!


Thanks so much for reading my post!
Sue