
Every time I say the name of this pattern I feel like I should be tickling my little grandson's toes. Weird right? What an awesome name for a dress as you certainly will remember it and what an even better pattern! What the crap took me so long? I love this pattern so much I made two, back to back....and if I had the right fabric for a long sleeve winter version I would immediately sew up a third.

In all honesty, the drawings don't excite me that much. How about you?
Here is a description of the pattern from the web: This funky yet functional knit dress has a fitted bodice, scooped banded neckline, a curved flared knee-length skirt, and options for trimmed cap sleeves, or banded ¾ length sleeves or long sleeves. It's designed to flatter the figure with a waistline that hits at the natural waist and a skirt that gently skims over the lower waist and hips. In plainer fabrics the skater dress lends itself to a casual wardrobe staple that's cute with sneakers, or snag yourself a fancy fabric for a knock-out evening dress. There are eight sizes included in the pattern, ranging from a 30” to 44” high bust, and a 24” to 38” high waist. It's a perfect garment to make if you are new to sewing knits and very quick to sew up. The pattern itself prints over only 22 pages, and the tutorial takes two streams: a full photo tutorial with hints and tips for visual learners and a shorter crib sheet for more experienced garment sewers.


Yep, I totally agree with this description. It is a functional knit dress with a fitted bodice that has negative ease. Typically when I hear negative ease, I cut at least a size larger but this time I didn't. Although I do have to explain myself as I am between sizes--which seems to be happening to be more and more! You measure your high bust, not your full bust, and your high waist or true waist line to discover which pattern size you need. Since I was between sizes, I went with the larger size in the bust and graded to the smaller size in the waist and hips. I love this sizing, it is comfortable without being tight yet fits but isn't loose. How awesome is that for a knit dress?
My first make of this was the red dress with fabric that was basically a nightmare to sew. Think I am exaggerating? Well, I'm not. While it is what I consider to be the perfect shade of red, it has a generous four-way stretch that is exacerbated or hindered by the raised 'rails' of pattern on it. After trying just about everything I could think of to tame it, I finally pulled out my walking foot and hallelujah(!) it worked better.....what was I thinking when I purchased it?


If any of you were misled as I was to purchase this fabric for the bargain basement price of about $4 a yard, be aware you may be in for a nightmare if you have a lot of seams and are going to attempt to topstitch. The walking foot helped tremendously and had I not had one, I would have thrown in the towel and burned it. With this fabric, I tried a technique for finishing the neckband from the book, The Dressmaker's Handbook of Couture Sewing Techniques: Essential Step-By-Step Techniques for Professional Results by Lynda Maynard. She had a fabulous technique for finishing the neckline on a knit garment that I intend to use multiple times and make it a mainstay of garment construction.
I used this technique on both my red and floral dress and loved it both times. I think it gives my dresses a couture finish. What do you think?
Here is what I did.
1. Sew one shoulder seam but be sure you have clear elastic sewn on both shoulder seams!

2. Cut lightweight fusible interfacing the shape of the neckline or alternatively use lightweight stay tape to 'stay' the neckline. If you use fusible interfacing, staystitch the neckline as well. If you use the staytape, you will have to apply it along the staystitching line anyway.
If you stitch carefully you won't have to trim the seam evenly as this will be your guide for turning the neckband to the inside.

4. Apply the neckband to the neckline, lining up the raw edges. Keep in mind that if the garment has 5/8" seams, unlike this pattern, the edges of the neckline may line up differently. If this is confusing, align the seams and look at it for a minute and perhaps it will make more sense.

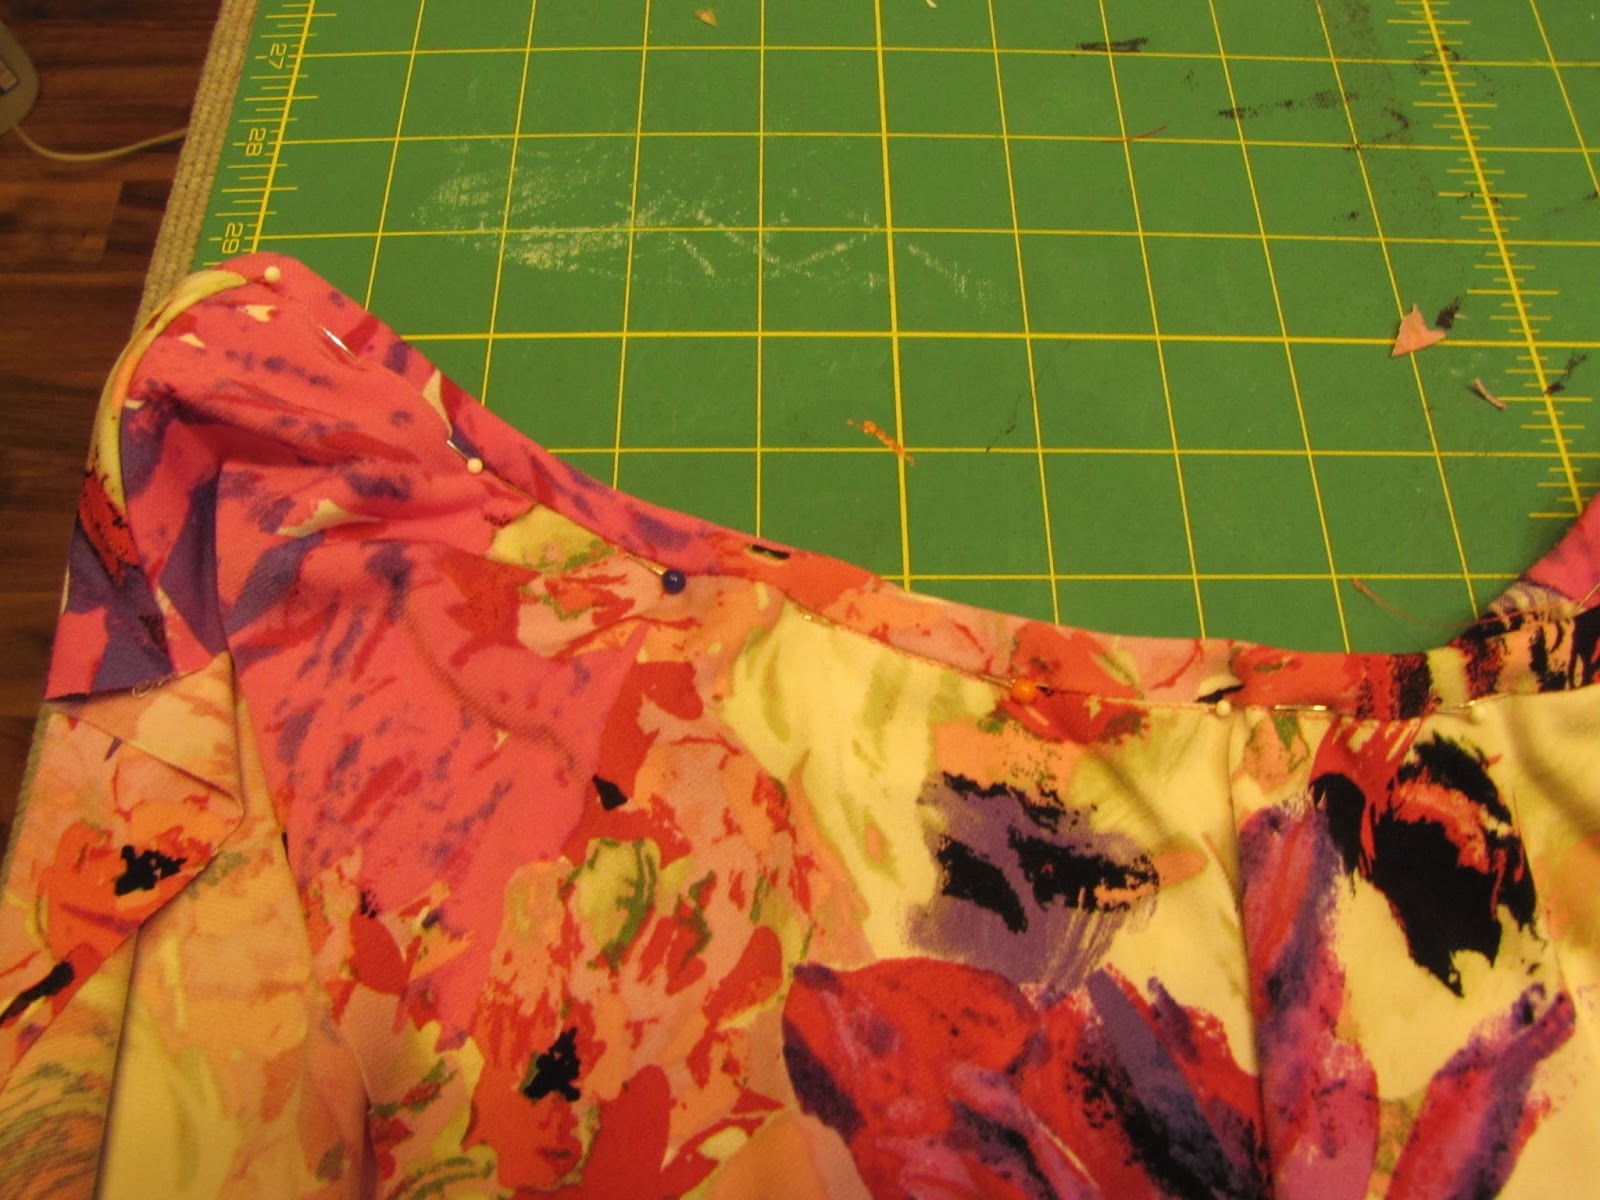
6. As you can see from my photo, I pinned in the ditch so my seam would be less noticeable. If you stitched everything straight, this will be a super easy application.
7. Stitch in the ditch or wherever you prefer. And done! Check our your neckline, it should be beautiful!
What I love about this pattern is the versatility. I can see this being equally cute in a sweatshirt, plain t-shirt of lovely lace type knit. You could apply lace along seam lines or pretty piping.
I also have to say that I have never applied elastic to the waistline prior to attaching the skirt. You have to be very careful not to stretch it as it will ruin the total effect.
Another thing I love even more is the FIT!!! It ROCKS!!! What the heck took me so long to make this dress? Well, I know the answer and that is that I had to tape the PDF together but had I know how easy and painless this process was, I wouldn't have hesitated.


Other than my alteration to the neckline and drawing the pattern a smaller size from the waist down, it was a straight sew. I thoroughly enjoyed making both versions of this dress. My second dress was made from fabric I purchased from Mood. OMG! I so love this fabric! It sewed like a dream, didn't roll at the cut edge at all and washed and dried beautifully. I will be ordering more from Mood!
Thanks so much for reading! I do appreciate your comments!
Sue
These dresses are both lovely, Sue. I can see why you love this pattern.
ReplyDeleteThanks Jean Margaret! This is such a great pattern!
DeleteBoth dresses are beautiful.
ReplyDeleteJudy, many thanks!
Delete