
Hello sewing pals! I was so excited when Deepika of SPR asked if I would be willing to create her newest pattern and participate in blog tour! ME? This was such an honor and I am excited to share my thoughts with you on this great little top that is easily converted into a dress.
And, here it is! The Lillian top/dress!
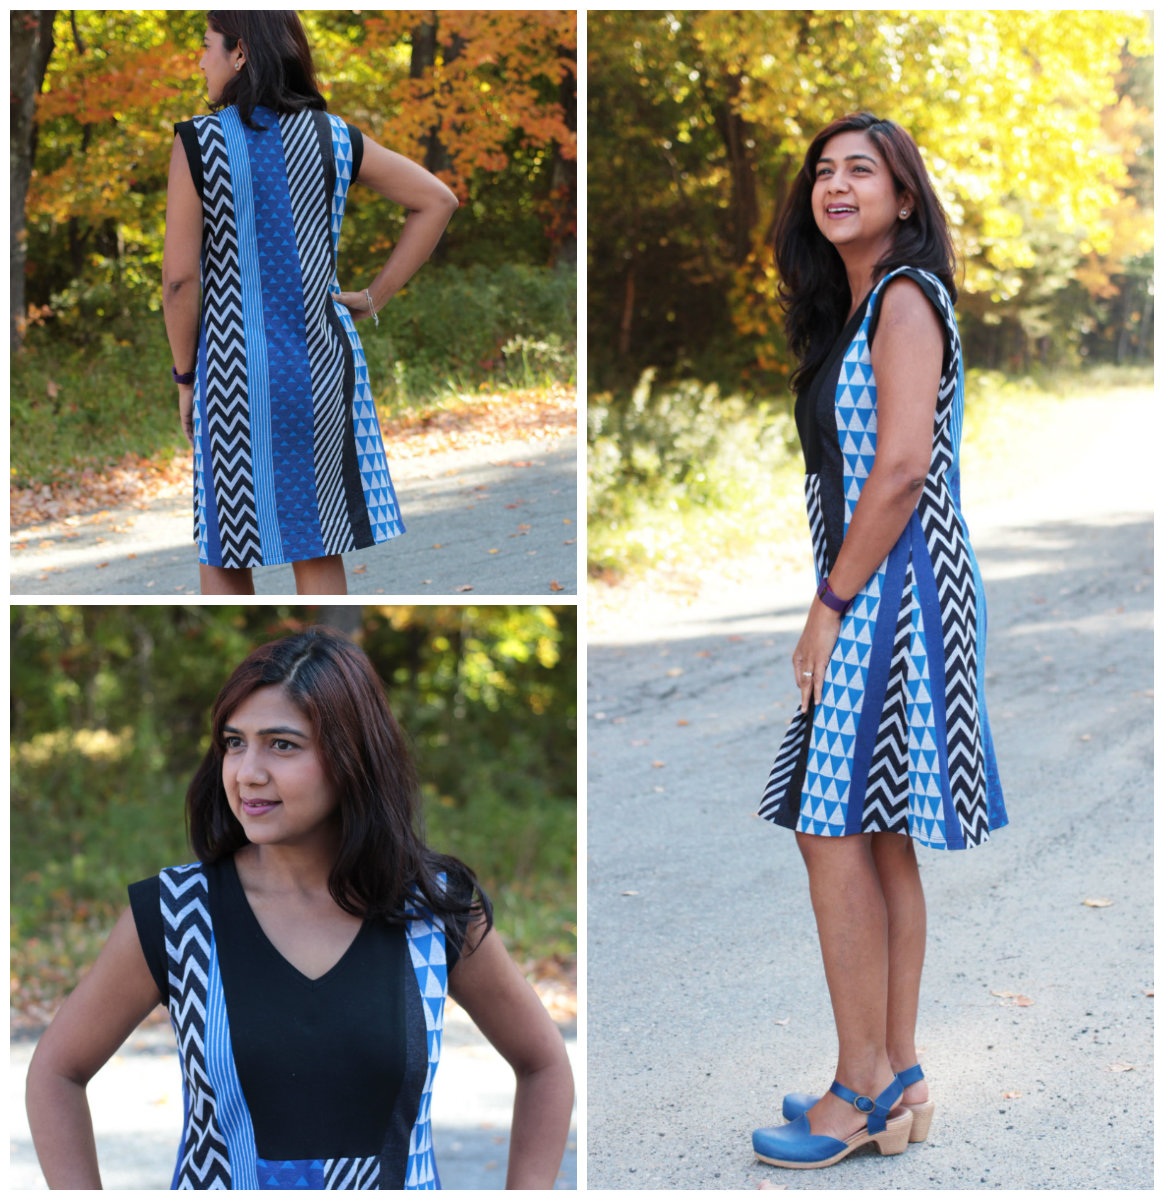
And below are my versions:

Normally with a pattern, I make a sloping shoulder adjustment, swayback adjustment and FBA. for this pattern, I only needed two of the three.

Here is the description of the pattern from SPR's site:
A knit top or an A-Line dress with a V-Neck Yoke and cap sleeves. The front yoke allows for subtle
bust shaping as well as infinite design opportunities. Mix and match fabrics and create a whole
wardrobe of Lillians! The top skims the figure and works for a variety of figure types. Go down a
size if you want it to be close fitting.

After making this up twice, I know the description is accurate. I made a size medium as I didn't want the dress too snug. There is some really nice built in shaping with the design of the pattern pieces, especially related to the bust.

I live in the Northern Plains of the US and winter is approaching...I obviously lengthened the sleeves by measuring how long I wanted them, how wide I wanted the wrist, and using my ruler, I drew the lines to make a new sleeve length. Easy! You can see too that on the lighter colored dress, I added a little band at the wrist.

I love the length! Perfect for tights and boots!

Normally, I make an FBA, but with this pattern I didn't have to! No drag lines either!

I used two very different fabrics for my two versions. The navy is a textured double knit. The purplish contrast is a ponte. The lighter colored version is a sweater knit and an ITY. Both worked equally well with this pattern and its drafting.

I really like how the yoke looks with both of my fabric choices. When Deepika designed this, she took a lot of care to make sure the pattern was drafted so the neckline was a nice V shape, but not too low. I think it is the perfect depth. If you like a lower V, adjust your pattern to reflect that.

I like too how you can see the hint of purple at the back neckline.

Deepika's instructions are well thought out and have some great photos to accompany them. I have my own way of making a V-neck band and that is how I opted to do this dress as well.

First, I cut 1/2" strips of fusible knit interfacing and adhere that to the neckband all the way around. Staystitch the neckband as well, 1/4" from the edge.

This next step is totally optional, but I do it anyway! After cutting my neckband using a ruler and rotary cutter, I serge the edge of it just to make it look neater. How long do I cut it? About six inches longer than it needs to be. I wish I would have had matching serger thread but didn't so I opted for navy, which is what I used for the remainder of the dress.

Stitch the neckband on using 1/4" seam allowances using a regular stitch. I baste this on first to check the fit. You will need to either make a sample or practice a few times to get the amount of stretch you need so it lies flat. Since you are using one long piece of banding, you eliminate the center back neck seam as well. Stitch around to about 1 inch from the V. Turn to the right side, pin both pieces in place and stitch. Sorry I didn't take a photo of that!

Other notes about this pattern--there are many notches to get the pattern to line up perfectly. You can sew the sleeves in flat or set them in. I choose to set them in. Did I mention how well this fits me in the shoulders? Love it!
Printing this off is economical--not that many pieces to assemble!
Ready to get your own? Here is the link!
I can't wait to try this again when it is warmer outside so I can create the cute little contrast sleeves!
Want to see more? Here are other sewers whom have created this pattern and the date of their blog tours:
PatternReview.com (24th)
Julie
(24th)
Sue
(25th)
Sarah
(26th)
Eryn
(27th)
Margo
(28th)
Bianca
(29th)
Hila
(30th)
Thanks so very much for stopping by!
Sue :)
Sue, I love both your versions. Thanks for such detailed instructions on the neckband instructions. One thing to note if you are not binding the neck as per the instructions, you may want to trim it a little because if you're adding a band, it will raise the neck and make the neck opening a little narrower too. Just something to keep in mind. Thanks for participating in the tour. Its so lovely to see all the different versions.
ReplyDeleteThanks for that important info Deepika! Also, thanks for letting me participate, I thoroughly enjoyed it and now have two fun dresses to wear!
DeleteThe more I'm seeing this dress, the more I'm liking it. Not just another boring knit dress. Your two versions are really lovely.
ReplyDeleteThank you Irene! I do appreciate your kind remarks!
DeleteI love the fabrics you choose for your dresses! The fit is so good on you.
ReplyDeleteThanks Bianca! I love to see everyone's interpreatation of this pattern! So fun!
DeleteThis looks like a great new pattern with a lovely fit. I love a knit dress.
ReplyDeleteThanks Jean! I love knit dresses to! They look polished but the comfort level is almost pajama like!
Delete