About Me

My photo
Sewing is therapy for me. I hoard fabric, patterns, notions, and spend more time shopping for fabric than I care to admit...
Showing posts with label New Look. Show all posts

Monday, December 10, 2018

having fun mixing and matching fabrics

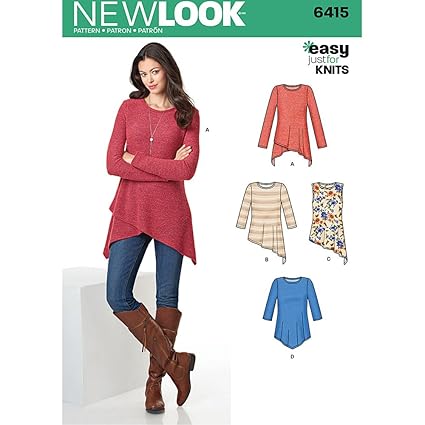
How cute is this tunic?  I love view A, with the asymmetrical side seams.  


Image result for images New Look patterns

Sorry about the indoor photos as it is dark before I leave for work and after I get home.  


I used a stretch velvet for the outer layer and wool knit for the inner layer.  The sleeves are a lightweight ponte.


Black is so difficult to photograph indoor but you get the idea of the shine and design of the fabric.  


This is such a great length for leggings, even for my 5'7" frame.  Everything is covered, both front and back.  Gotta love that!


I am showing you the underlayer here of the wool knit.  All three fabrics are washable.  
Thanks for reading!
Sue

Monday, July 10, 2017

Summer Work clothes

Summer work clothes!


I am going to be starting a more professional job at the end of the summer and need some additional clothes that are appropriate for my new position.  I love maxi dresses, and have several, but noticed I didn't have any maxi skirts.  What?  They are so comfortable and I've made a bucket load for one of my daughters.  I decided to make one for myself with a coordinating top and a little jacket, just in case it gets chilly in an air-conditioned office.

I fell in love with this sparkly black and white knit.  I know, I know.  I use a lot of black and white when I sew but I love how effortless it is to put together.  This knit is soooo soft and that hint of sparkle is an added treat!  It doesn't seem to be available anymore but there are lovely other knits available, even in black and white!


This skirt is a TNT pattern for me.  It is super simple with two side seams and a waistband.  It literally takes me an hour to make!  I don't like to string elastic through a casing so I ended up sewing the two elastic ends together, stuffing them into the waistband, and then stitching the waistband to the skirt.  Super simple and no opening to fiddle with when you're done!


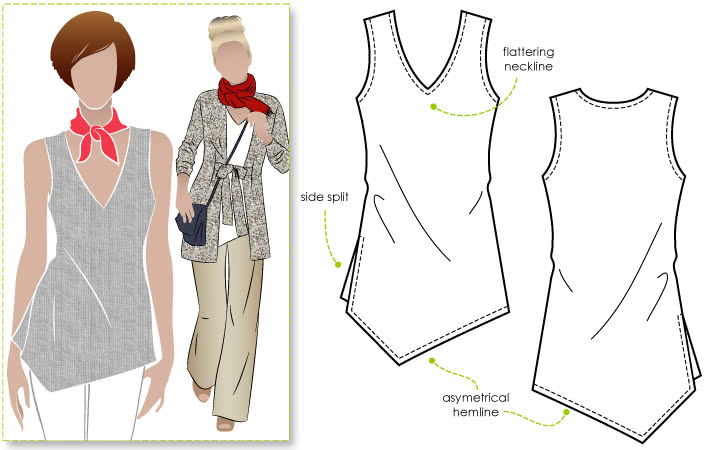
For the top, this is a new to me pattern.  This is the StyleArc Seaside Sue top.  I love the v-neck, which I don't sew a lot of but I decided I needed more of this style in my wardrobe.

Seaside Sue Top Sewing Pattern By Style Arc - Great throw on tunic with interesting hemline

This knit was easy to work with.  It washes and dries beautifully, is comfortable and I am glad I made these into separates.  The top will work great with both black and white pants and the skirt will work with other tops as well.


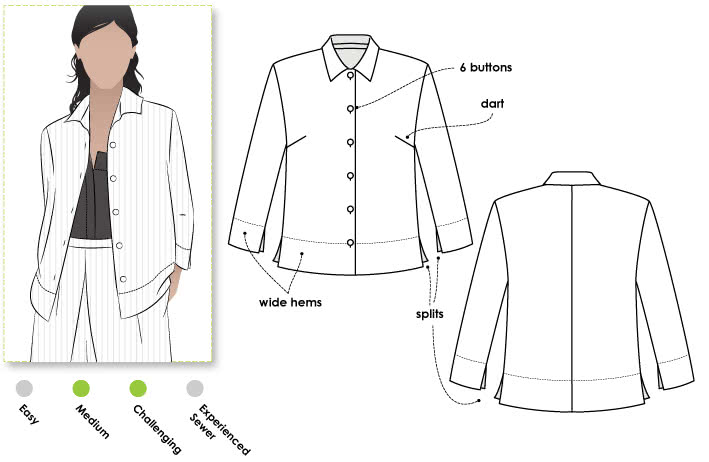
I also wanted to make a very light little jacket to wear as everyone tells me my new office is very cold in the summer.  I am rarely cold, so I can't imagine being cold but wanted to make this little jacket just in case.  This is another StyleArc pattern called the Marley Woven Shirt.

Marley Woven Shirt Sewing Pattern By Style Arc - Boxy shaped shirt featuring wide hems & ¾ sleeves

I thought it would be perfect for a lightweight shirt to wear over a sleeveless top or dress.


This is made from a light-weight crepe.  I love crepe.  It is easy to work with and is so awesome to wear.  I will probably keep this in my office for the warmer weather months to ward off the possible chill.

Both of these fabrics were great to sew with, washed and dried beautifully, and will make some very functional pieces in my wardrobe.


Thanks for reading!
Sue from Ilove2sew!


Saturday, April 15, 2017

Flowers anyone?


Yes, you've seen me make this pattern before but I wanted so badly to make it again!  I had to make one with that super cute drawstring waist.  In case you missed round 1, this is the Vanessa fluid pant from Jalie.

Jalie 3676 - VANESSA - Fluid Pants in Tencel Lyocell

Choose your size based on your full hip measurement.  There is a bit of ease there and you don't want these tight at all.


I love the pockets--just the right size!  I stabilized the curved seam of the pocket with stay tape--just in case.  After all, I did purchase this stretch denim from JoAnns.  I hope it doesn't disappoint me in the long run.


See those fun grommets?  They aren't difficult at all to insert.  I ended up stabilizing that entire front band piece--it's about six inches across with fusible interfacing.  I do wish I could have found a better cord.  This was also purchased at JoAnns.


When I tried these on for photos, and asked the hubby if he thought these were as awesome as I do, he replied they were something.  I don't think he likes them.  :)


I almost didn't add the elasticized bottom but I thought they might be a tad short if I didn't.


Aren't these just so fun and colorful?  


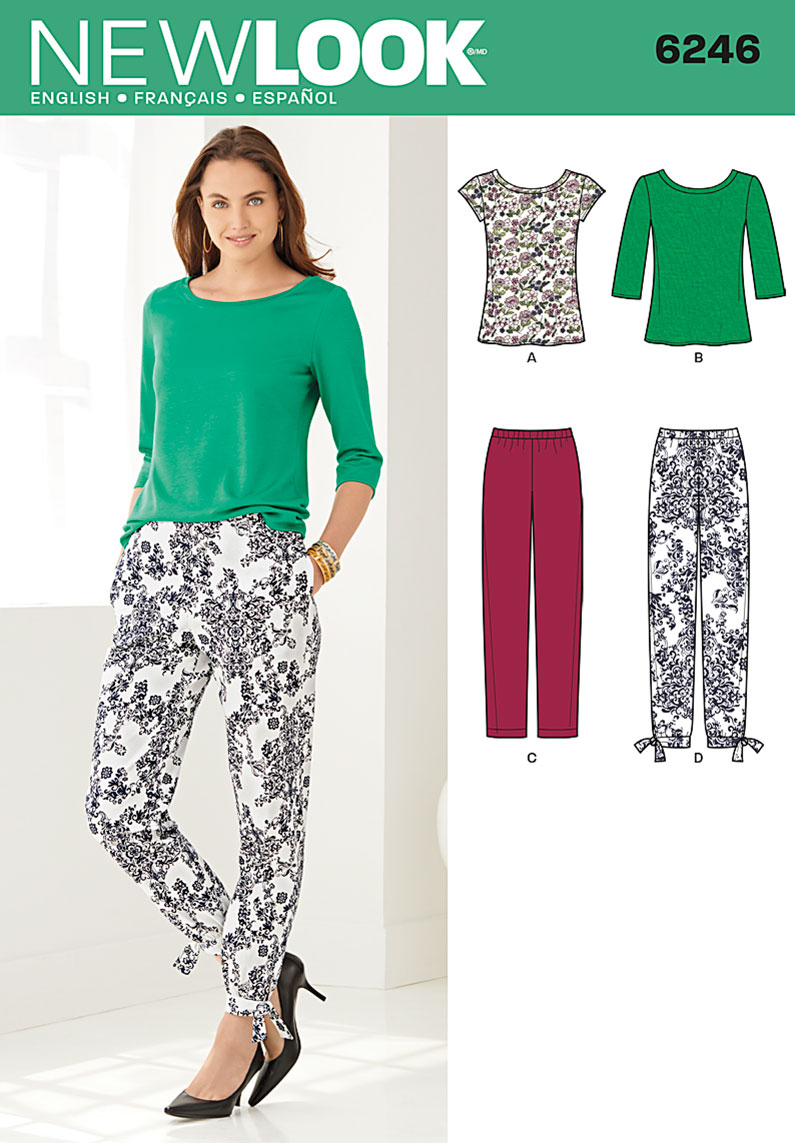
So now for the top.  The pattern is New Look 6246.  I purchased it for the pants but haven't gotten to those yet.  I do really like the shape of the tee.

                           New Look Misses' Tapered Ankle Pant and Knit Top 6246

And that is what the purple is made from that pattern.  I am really stoked about the neckline.  Check it out!  This is a bamboo knit that was in my stash.  I used it on another project and had just enough to eek out this top.


I want to show you the steps I take to make a good looking neckband.  


I stabilize the area with stay tape.  One side is nubbier than the other and that one I put next to the wrong side of the fabric.  With this pattern having a 5/8" seam allowance, you can see in the photo above how I line everything up. The stay tape is about 1/8" over the seam allowance and will be covered by the neckband when finished.  


Next, serge the seam in the neckband.  Yes, I meant to clip that seam.  As long as you don't go all the way through the left needle thread, it will never fail you!  Now you can press those seams in opposite directions so you don't get any annoying bumps.


Sew your neckband on.  You can sew it wrong side up if you'd like but as you can see in the picture, I did not.  I do like to baste first using a straight stitch before serging.  


Here is what is look like prior to pressing and topstitching.  


And this is what it looks like afterwards!

Thanks so much for reading!  I hope you all have a blessed Easter!
Sue


Some of you have asked which stitch I used for my topstitching.  I used #22.  Which you can see above.  

Happy Sewing!
Sue 

Monday, March 20, 2017

A girl needs some gold....

My daughter Katy has discovered she has something in common with her momma: her love for leggings!  Aren't they awesome?  So comfortable and they make so many great outfits!
Katy asked for GOLD leggings and we found this gold performance fabric at JoAnns.  It was really nice to work with.


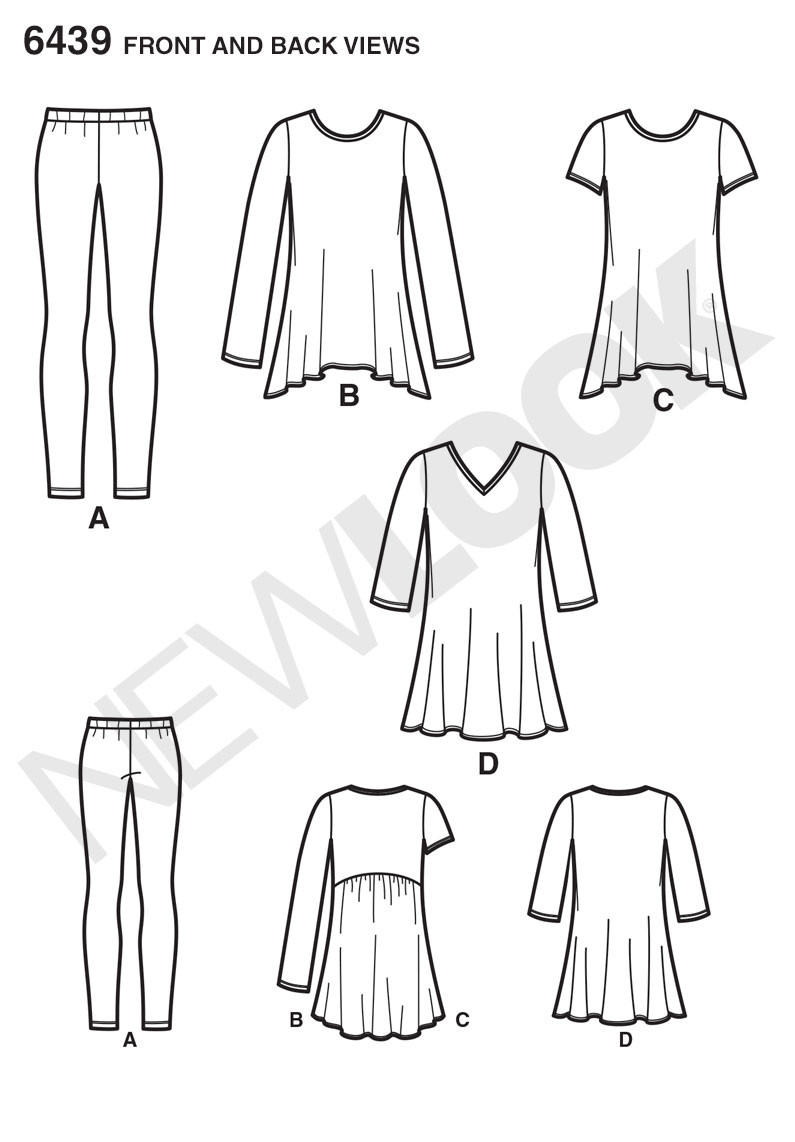
The pattern we used was one that I just picked up.  I purchased it for the adorable tunics, but we also decided to test the fit of the leggings.  Here it is:


Image result for images New Look 6439Image result for images New Look 6439

I am totally in love with the back of B and C.  But I digress so back to the leggings.


On the model they look more like stretch woven pants rather than traditional leggings so I knew we'd need to make alterations.  After I stitched them together and held them up, I realized that two of my daughter could fit into them!  I took these in no less than 4 inches everywhere.

Katy is 5'3" and the length was also too long,  We chopped off at least 3, if not 4 inches from the bottom.


We made a swayback adjustment as well.

DD2 loves these!

If you are wondering about the lace top, I made that as well, for myself but DD snatched it.  The pattern is from Jalie and is the Raglan Top and dress.  I wanted a simple design for the lace. The lace was purchased from Hobby Lobby.  They have a few gems once in a while.  

                 
                            Jalie 3245 - Raglan Tee Pattern

I just used the dress length and added about 2 inches to it.  This pattern goes together really well.  If you haven't tried it, what are you waiting for?


Thanks for reading!
Sue

Wednesday, March 8, 2017

A new dress!

So, I've seen so many cute versions of this dress, mainly View C, the one the model is wearing.  

Image result for New Look 6000

However, being different, wanted to make E, or what I call my all-occasion dress.  


You know what I mean, right?  A dress you can pull out when you need something more than casual, but less than black-tie or formal, that just-right dress?  


So, I decided on view E.  And, I am totally in love!  I must make View C or B because of that adorable collar and side tucks!  


I chose a stretch designer suiting I picked up from one of Fabric Mart's amazing sales.  I know that gray can be rather boring, but I knew that with a classic dress that you can wear just about anywhere (yes, funerals, weddings, job interviews, etc.,) it couldn't be red and I didn't necessarily want black. My other go-to color is gray and so now I own another gray article of clothing.  Maybe I need to branch out a bit?  Maybe winter has been too long in the tundra?  


Fitting this dress required help from DD2.  I cut the dress out using flat-pattern measurements and allowing for some ease.  In some areas, I cut my usual 14, some in between a 14 and 16 and some a 12.  Don't you love multi-sized patterns for that reason?  

After cutting it out, I pinned it on me and DD2 and I went though some repins until we got a much better fit.  In all honesty, if you used a ponte with some stretch and used your regular size or went down a size, it would probably fit great--that is unless you have some fitting challenges like I do.  


The biggest issue with this dress was the swayback adjustment.  I still don't think it is perfect or even close by any means but I do need to move and be able to sit down without feeling like a sausage stuffed into a too small casing.  


Not only did I make a bit more than usual swayback adjustment to the pattern tissue, but I also ended up pulling up the upper back to try and reduce the amount of puddling in the small of the back.  I know I need a much less flat booty, and I am working on that but the amount I pulled on the fabric was sort of astounding to me--more than an inch, not including the swayback adjustment!  Beware!  


I decided to line this dress and picked up the funky printed stretch poly blend at JoAnns.  I certainly hope this holds up!  And, more importantly, why didn't I order something to line the dress with when I ordered the fabric?  


I do think I have some additional fitting issues to work out--bust and darts, but all in all, I have a very wearable dress.  It  is comfortable and can be worn with different jewelry and accessories.  I do really love the sleeves.


And, would you look at that zipper? 


Thanks for reading and yes, I will be making this again!
Sue 

Saturday, February 11, 2017

Casual Friday outfit

Do you have a day you look forward to every week?  My day is FRIDAY!
Just like the rest of the world, I love Fridays! I get to wear more casual clothing to work and I daydream about what I am going to sew! For this month's post, I wanted to make a casual Friday outfit. I didn't want just any jeans but some sort of dressier ones--does that make sense? I also wanted a breezy top that was somewhat dressy as well but in some super awesome fabric.

So here is my outfit:


I choose to use the StyleArc Katherine Pant.  The legs are what drew me to the pattern--not skinny but also not too wide and those slant pockets are cute.  I knew they were just what I wanted to go with this amazing denim.  


This denim is the perfect weight for these pants and actually, it would work equally well for a shirt dress, jacket, or a structured top.  I love that it is printed and the floral design is right up my alley!

Katherine Pant - Straight leg tailored pant with seam detail

For my top, I used a New Look Pattern that I've tried before and love.  It is easy to put together and I thought the texture of the fabric with the draping would be very nice and I am happy with the result.   


I've always had issues with upper back leg bagginess.  After quite an extensive search, I found a link that talks about reducing that by equally lowering the bottom of the back crotch and also at the waistline.  You redraw the crotch to compensate for the lower seam line and then stretch the crotch seam to fit the front leg.  


You can kind of see what I did above.  Sorry I didn't take a before photo!  Stretching the inseams so that matched wasn't difficult at all.  


I think this technique worked well but when I use it again, I am going to try a 1/4" rather than a 1/2" adjustment.  I may have gone slightly overboard with the 1/2"!


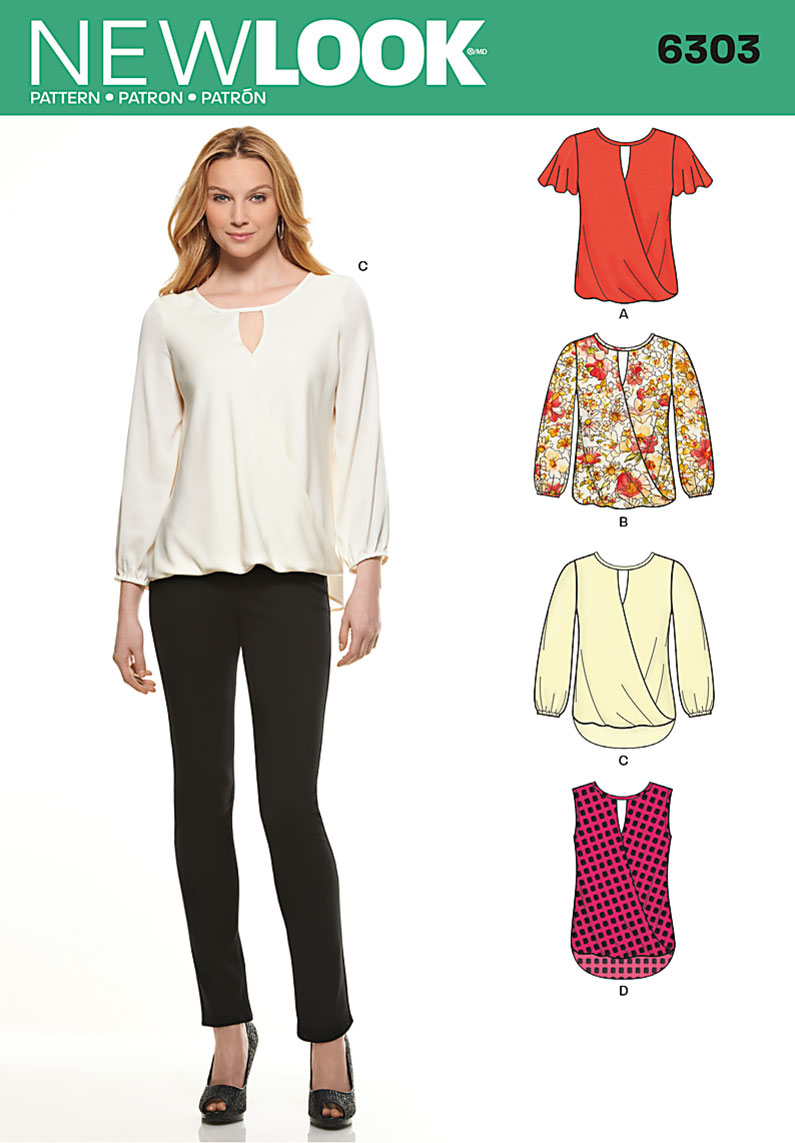
For the top, I used a favorite New Look pattern.  I love the sort of twisted front and the split 
neckline.  

Image result for Images New Look 6303

I made view C.  


This fabric is from Halston.  Do you shop the designer fabrics?  This fabric is just so pretty and fun to work with.  


I used a single-layer for the sleeves, and a double layer for the front and back.  


I matched up the 'plaid' lines on the layers so it didn't blur the design.  


See the wonderful texture in the fabric?  


I enjoyed creating this outfit and now need the weather to warm up so I can celebrate a casual Friday in my new outfit!

Thanks so much for reading!
Sue 


If you'd like to see the tutorial on the pant alterations, here it is!
http://closetcasefiles.com/ginger-sewalong-pt-5-fitting/