About Me

My photo
Sewing is therapy for me. I hoard fabric, patterns, notions, and spend more time shopping for fabric than I care to admit...
Showing posts with label leather. Show all posts

Sunday, October 14, 2018

Sewing with Leather: The StyleArc Lorie jacket

I've made this pattern numerous times and since they are all a bit different, I knew I had to try this same style in a completely different fabric choice: leather!  If you are wondering, here's what the pattern looks like: 
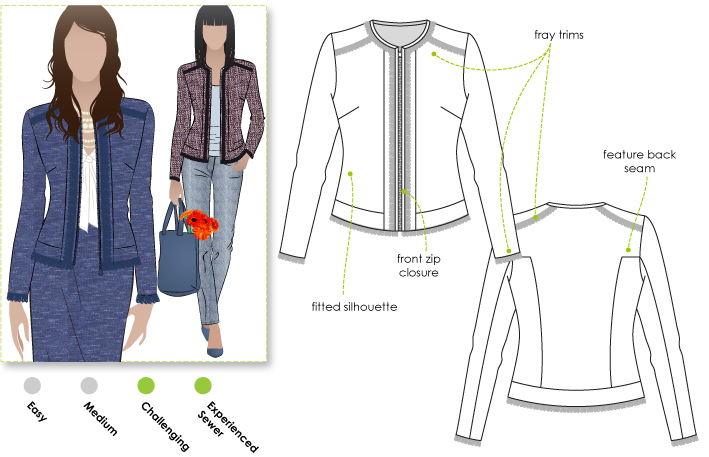
Image result for images StyleArc lorie jacket

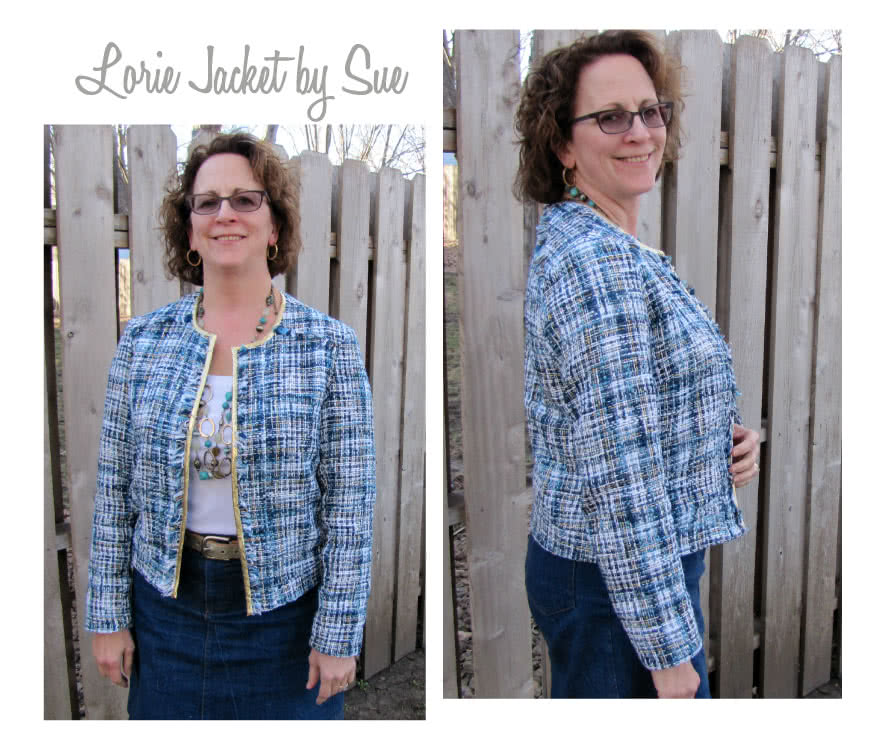
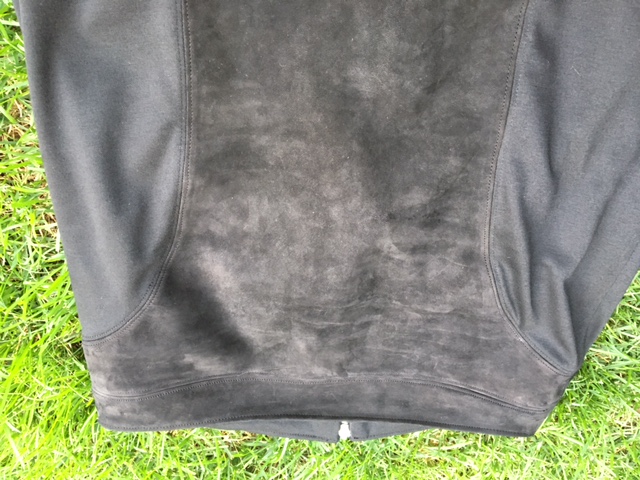
And here are some previous makes from this pattern: 

Image result for images StyleArc lorie jacket


Related image

This pattern is simply fun to make!  

I've taken some fitting classes since I made these two jackets and I put my skills to work!  I also knew the leather would have zero forgiveness so fit from the start is so important!  To simply this make a bit, as you can see I eliminated the frayed trim and the zipper.  I never, ever zip a jacket such as this and didn't want to wrestle with it to insert a zipper I'd never use.


Sorry about the indoor photos on a rustic wall project that's nearly done, but it snowed about 5 inches today and was cold, damp, and windy.  Not the best or most pleasant place to take photos!  


What I did differently based on my measurements and comparing the fit to my other two jackets was the following: 
I lengthened the bust curve by 1"
I added 1" for a broad shoulder adjustment
I added 1" to the mid back length to match the adjustment to the front bust curve area


Based on previous results with this pattern, I decreased the shape of the shoulder area of the sleeve by 1/2".  I consider myself a master at easing sleeves into the shoulder area, but with this pattern is simply isn't possible.  


It's a little tough to see, but for my facings, I used light blue denim.  You can see that in pictures below.


Leather isn't forgiving at all, so if you make a mistake, you have to live with it as needle holes are permanent.  I had a few super tiny mistakes that I won't show you! 


Now that I've tackled this jacket in leather, I have a few other leather garments I really want to make!


Not the best photo in the world, but you can see the light blue leather for the facings.  I also used a designer lining from Fabric Mart.  It was Mark Jacobs (I believe) and it is luscious!  Glad I picked up 10 yards of it!  

Thanks so much for reading!
Sue  


Wednesday, January 31, 2018

A new coat! Butterick 6423

This coat pattern is getting a lot of attention....look at how cute it is!  This is Butterick 6423


I love everything about it.  Here is the description from the back of the pattern envelope: Very loose-fitting lined coat has front shaped princess seam with pocket, curved gusset under arm, lower back seam with pleat.


I choose to highlight some of the design elements, especially the shaped front seam that extends into a pocket!  How clever!  Actually, that is my favorite detail....


I used a heavy wool coating I've had in my stash for quite some time, years actually!  This past Christmas, my two beautiful daughters challenged me to actually sew from my stash--now that's a novel concept, huh?  We agreed to not purchase a single thing in order to complete this challenge--which lasts the entire month of January.  While I am happy with many of the makes I've made, I know to make a dent in my stash, I have to extend this...at least until March!  Do you think I might have a bit of a problem?  I am however very happy that I finally sewed up this fabric.  And, I made a very colorful lining with a floral 100% silk that I've also had for several years.  I think this coat is a match made in heaven for fabrics!  


Construction of this coat is straight forward.  My only deviation from the instructions was when I inserted the leather piping I used...yes, this was also from my stash!  I decided to sew together the piping, insert the piping on the princess seam, and then proceed with the directions.  If I was a brand newbie, I would wait before trying this coat, despite the 'easy' rating.  There is a lining to insert, inseam pockets, lots of hand sewing, etc.  Make sure you have a bit of experience before you try this pattern.  It isn't difficult, but it does require a bit of precision and there are a lot of steps.


Fitting this coat is a bit of a challenge, and I could have done better...I may end up taking it apart a bit...or I may end up just enjoying the easy fit.


I made a sloping shoulder adjustment along with a swayback adjustment and that's it.  I looked at the finished measurements for the bust area and decided it should fit fine and it does.  


With this big old collar, I highly recommend under-stitching it all the way around until you get to where the collar roll stops.  Since my wool is so very heavy, I decided to topstitch 3/8" from the edge. 

This was a fun coat to make, and I received some nice compliments today about it.  Isn't it great when someone comments on your me-made makes?  

Thanks for reading!
I love your comments....
Happy sewing!
Sue


Saturday, July 9, 2016

A little leather skirt: perfect for all seasons!

When summer rolls around, I start thinking about what I am going to creating for fall/winter.  Crazy?  Probably.


I've been wanting a leather skirt for ages.  I love sewing with leather.  It is so soft and supple and is actually quite easy to create something that will be in your closet for as long as it fits.


My leather skirt is only partially made of leather.  The other fabric I used is a rather stable ponte that was a remnant from a previous project.  I hadn't really thought about how to put these two fabrics together until very recently and was so surprised that no one addressed any special techniques or tools for sewing leather to a knit.  After clenching a rabbit's foot in my teeth, I experimented and I'll show you what worked for me.

Sorry this photo is upside down, but you can at least see the two fabrics I combined into one skirt.  


The first thing to consider when using leather is the needle.  There are specialty needles for sewing leather but I had no idea how they would work on the knit portion of my garment.  
Schmetz Leather Needles Size 110/18
Also, I typically have a large stash of different types and sizes of needles but I realized I was out of leather ones!  As luck would have it, everyone locally was out as well. I experimented and found out that universals, size 14 worked just fine, although if my entire garment was leather and none of the adjoining pieces were of another fabric, I would have panicked with a capital P!  From reading about the realities of sewing with leather, I learned that the wrong size needle and type and your thread can rip out of it just like tearing out a piece of paper from a spiral notebook.  No one wants that!  I increased my stitch length and after sewing a sample, I tugged and pulled and that seam stayed put. Whew!


Next I decided I needed to figure out how to finish my seams.  For this skirt, I knew that I would use a straight stitch, clip the seams to about 1/4", press the seams open and then topstitch.  This worked just great and since leather nor ponte frays, this was a fast and easy finish that also looks professional (at least I think it does!)


I also purchased a Teflon coated foot a while back that made gliding over the leather so much easier! Easing up on the amount of pressure the presser foot applied to the two layers also helped feeding the fabric through.

My pattern choice was NewLook 6312.  This is a simple pencil skirt with some nice details.  When sewing with leather, if you aren't seasoned, you'll want a simple pattern with few pieces.  I knew this pattern would work great with my leather and ponte fabric.


I made a muslin as one thing you MUST know with leather is that a needle hole in PERMANENT in the fabric.  Yes, I know this picture isn't the greatest, but it does show how much I had to work with this skirt to get it to fit right.  I used pattern weights when cutting out my skins and wonder clips to hold the edges together when sewing the skirt.  


I changed this pattern up a bit by adding an exposed zipper up the back.  Many patterns call for a 7 inch zip but I like to use a 9 inch one so it clears my hips more and doesn't strain the lower end of the zip.  


For the exposed zipper, here is how I prepared the seam.  I stitched from the hemline to the zipper notch using a 5/8" seam.  Next, from the waistline to the zipper notch I stitched using a 7/8" seamline, pivoting to connect the seams at the notch.  Clip the corners and then press down those little triangles along with the seam allowance.  I use steam-a-seam on the zipper tape to position the zip.  


I love the fit and comfort of my new skirt.  It can be super casual....


Or dressier....


Black can be so hard to photograph!


Thanks for reading!  I really love your comments....are you sewing for fall/winter yet?

Sue

Sunday, February 14, 2016

McCall's 6992--another one--are you surprised?


Have you made this uber cute sweatshirt yet?  If not, why?  There are so many super cute versions out there and the possibilities are just endless!


I made view C this time with REAL Leather trim on the upper sleeves.  It was a risk, but I just went for it and I like it!


The textured navy knit is from FM and I believe was described as a double knit.  It sewed up just beautifully!

I may have stretched out my front neckline just a bit, but I am going to wear it anyway. Or, I might add an exposed zip in the front and take out some of the excess fabric in that area.  


I don't have much to add to this project other than this time my fabric was so much heavier and everything behaved beautifully!


I can't wait to make view E with the lace or view A with the lace sleeves.  I think they would both be perfect for cool spring days!


Try this pattern, it is easy, fast to put together and there are so many options!


 When I stitched on the leather--it won't ravel so I cut it and stitched it on with a top-stitch using a leather needle.


At the shoulder and neckline, I treated all three layers as one and stitched using a triple stitch for knits in that area and all is well!  I did switch to a leather needle when I got to that section of the neckline.


Can you tell I love the color orange?  I have on an orange shirt to match my orange door!

Friday, August 14, 2015

Fall transitional jacket starring StyleArc Livia :)

Fall has to be my most favorite season of the year.  In South Dakota typically the weather is at its best, the trees, flowers, shrubs are filled with color, and the cool evenings and warm days are delightful.  What's a girl to do besides sew some garments that take us from summer to fall and even winter?

  Classic jacket with pocket treatment

In swoops a gorgeous suiting from Fabric Mart in black/blue and ivory novelty weave  with great body, weight, and I knew it would be perfect for the Style Arc Livia jacket.  The colors stated were black and white, but I think the black has a lot of blue in it and found my leather pieces, also from Fabric Mart, were a perfect match!  More on that later!


This pattern was a freebie from July's StyleArc order.  You may remember that I made the StyleArc Sierra Jacket in a plaid suiting, also from Fabric Mart, and when I ordered the pattern, I simply had to state my size in order to receive the free Livia jacket pattern.  I love the clean and classic lines and the simple fit.  Not too boxy but not fitted either. 


I wanted a jacket that would work with jeans for casual Fridays or a skirt or dressier pants for the work week.  


Cutting and sewing the pattern was simple!  There are only nine pattern pieces which include the front and back facings, two sizes of patch pockets, two piece sleeves front, back and side back.  Seriously, this took about 30 minutes to cut and I am a slow poke when it comes to that step!


I love the patch pockets on the front.  I mentioned I used garment leather for the top portions of the pockets.  The leather is hand washable and the suiting fabric is washable on gentle.  I think this will be a win-win fabric combination.  


Sewing this up is fast and easy as well.  There are minimal seams to put together which is a bonus.


Look at those sleeves.  Are they not hanging beautifully or what?  I added 1/4" shoulder pads and found that they rounded out the area perfectly and help the sleeve hang just like it is on a hanger or dress form.


This jacket is unlined and look at how beautifully the fabric is suited for this!  Sometimes I feel like I nail it for fabric and patterns combos and yes, this is one of those times!


Here is a glimpse of the hook and eye type of treatment I used at the neckline. This was in the button section of JoAnn's fabrics and I thought it would be a tad bit nicer than a regular hook and eye the pattern calls for.


I love this fabric, I love my jacket so pick up some suiting fabric from Fabric Mart, match it to pattern and show me what you've created!

Thanks for reading!
Sue