About Me

My photo
Sewing is therapy for me. I hoard fabric, patterns, notions, and spend more time shopping for fabric than I care to admit...

Monday, April 1, 2019

Picnic Pants: Beth Stretch pant

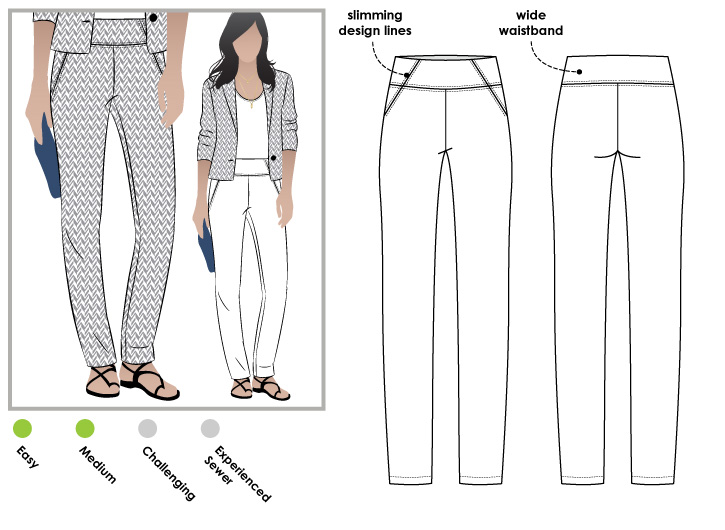
I really love wearing elastic waist pants that are stylish.  How about you?  So comfortable and when made in fun fabrics, so fun to wear!   This pattern is from StyleArc and is the Beth Stretch Pant.

Here's the pattern I used: Image result for images stylearc beth stretch pant

These go together easily and are stylish, right?  I love the narrowish leg and the slimming lines at the waistband in the front. 

When I said these were picnic pants, I dubbed them that name after DD2 told me that that's what my fabric resembled.  She's right, I know.  But I don't care.  I will wear them with pride. 


We had an unseasonably warm day recently and I wore them with sandals to work!  So comfortable!


This fit pretty darn well, but with my flat booty, I do need some additional fitting in the back.  


It's just at the upper back thigh. It's difficult to fit but not over fit.  You do need to be able to sit, stretch, and bend.  Right? 


I really like these!  


I did add a 3 inch slit at the side seam so I could show off my cute sandals.


Thanks for reading!  I hope you are sewing some warm weather clothing for upcoming spring and summer!

Sue :)

Monday, March 11, 2019

Simplicity 8790 in Stof

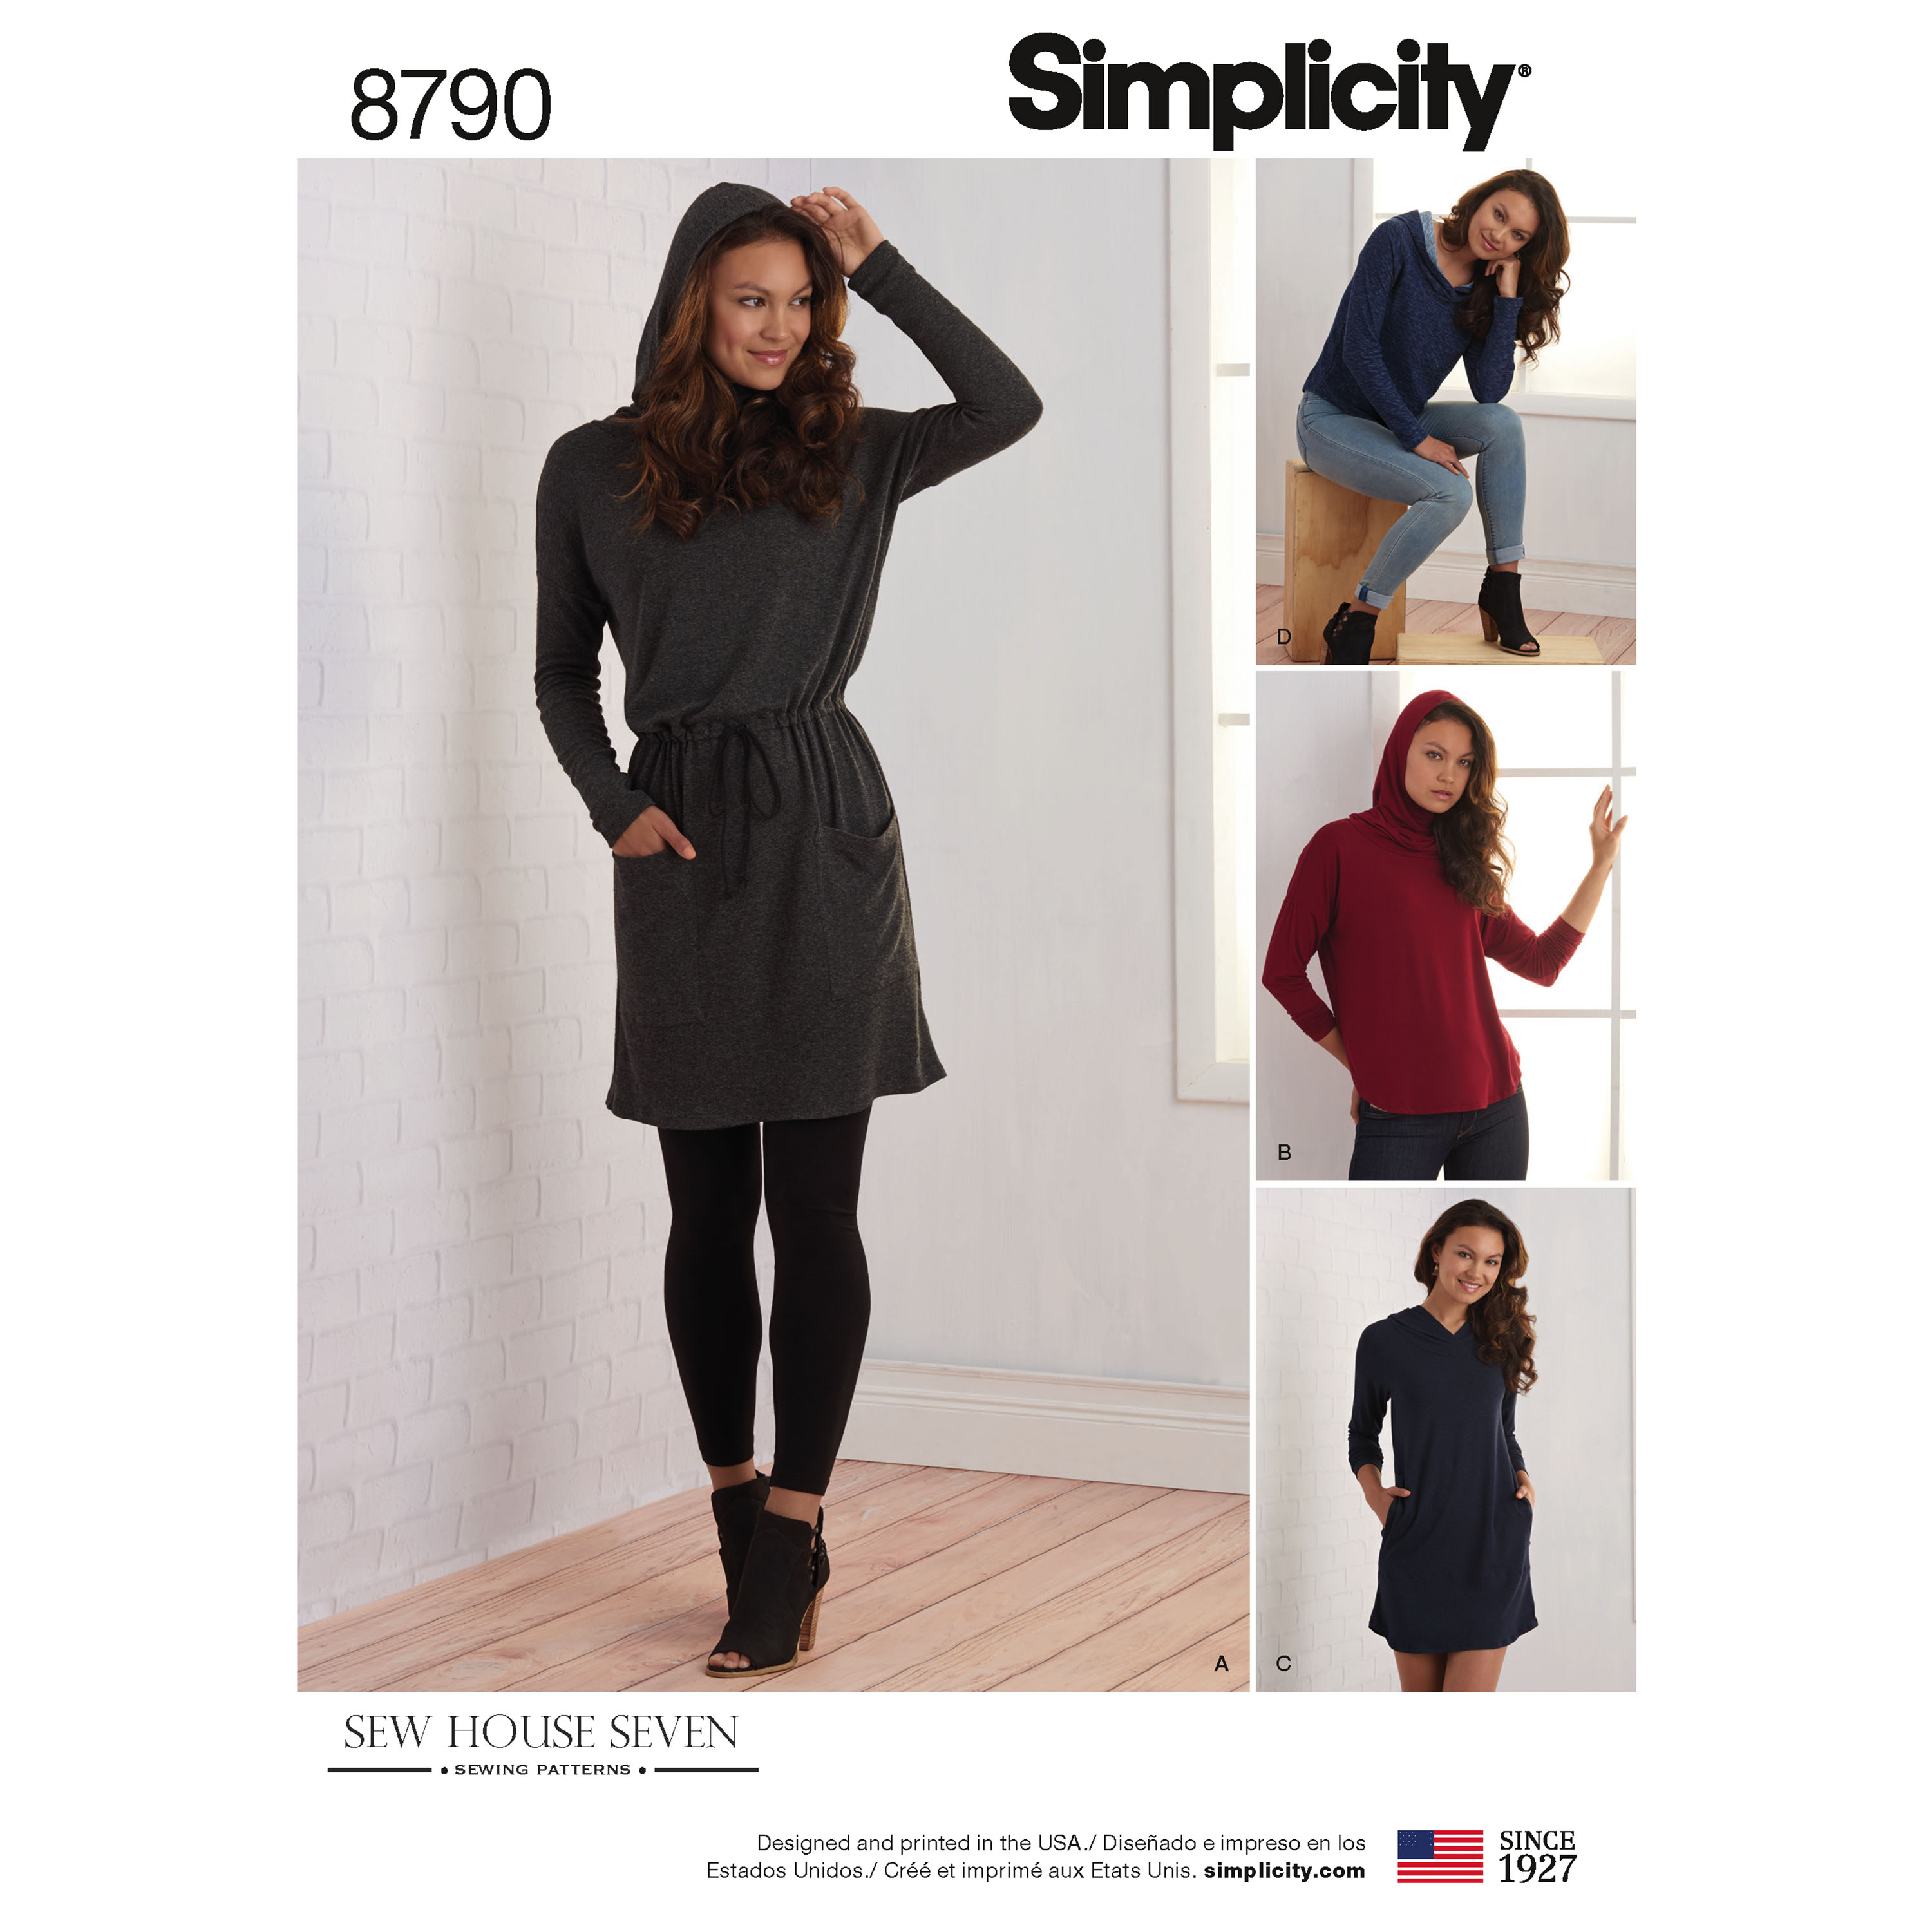
As soon as this pattern came out, I began hoping it would show up at my local JoAnns.  Once it was sold out and the next time Simplicity was on sale, I was finally able to get it in my hot little hands. 

Image result for images Simplicity 8790

I am such a sucker for knit dress and I love hoods.  Simplicity's embracing of Indy pattern designers is awesome!  This pattern is by Sew House Seven.  I've made several of their designs and have had great success.  I will count this one as successful too! 


Easy fit, comfortable, and it's a knit dress!  What more can you ask for?  It also has these great roomy patch pockets. 


Here's a close-up of the front portion of the hood.  The very front of the hood has a high neckline.  At first I wondered if I should redraw it but decided to leave it alone.  One thing you'll notice about the pattern envelope is that for this view, the lovely young lady is wearing her hood up so you can't see how high the neckline is. 


Here's the back of the hood.  It's rather small and doesn't overpower the dress or the back neckline. 


Here's a look at the pockets.  They are nice and deep.  To keep these from sagging or getting wonky, I used SewKeysE woven stay tape on the sides and double sided hem tape on the top portion of the pocket. 


My photographer, always gets me with goofy looks on my face. 
 

We had to take photos outside today.  It was above zero degrees, the sun is shining, and the wind isn't really blowing.  Count today as a win! 


The blousing is just perfect on this, I think.  Not too much, not too little. 


Here's a look at the back, or I should say side-back.  I should mention the fabric.  This is a Stof knit that I purchased from a recent trip to see my daughter, granddaughter, and son-in-law.  I wish we had this nice of knits locally.   


Thanks for reading!  I hope your weather is improving where you live!

Sue

Saturday, March 9, 2019

Orageuse Helinski top


The winter doldrums have hit hard and the best solution for me is to start sewing for spring.  Someday, spring will arrive.  It has to, right?  

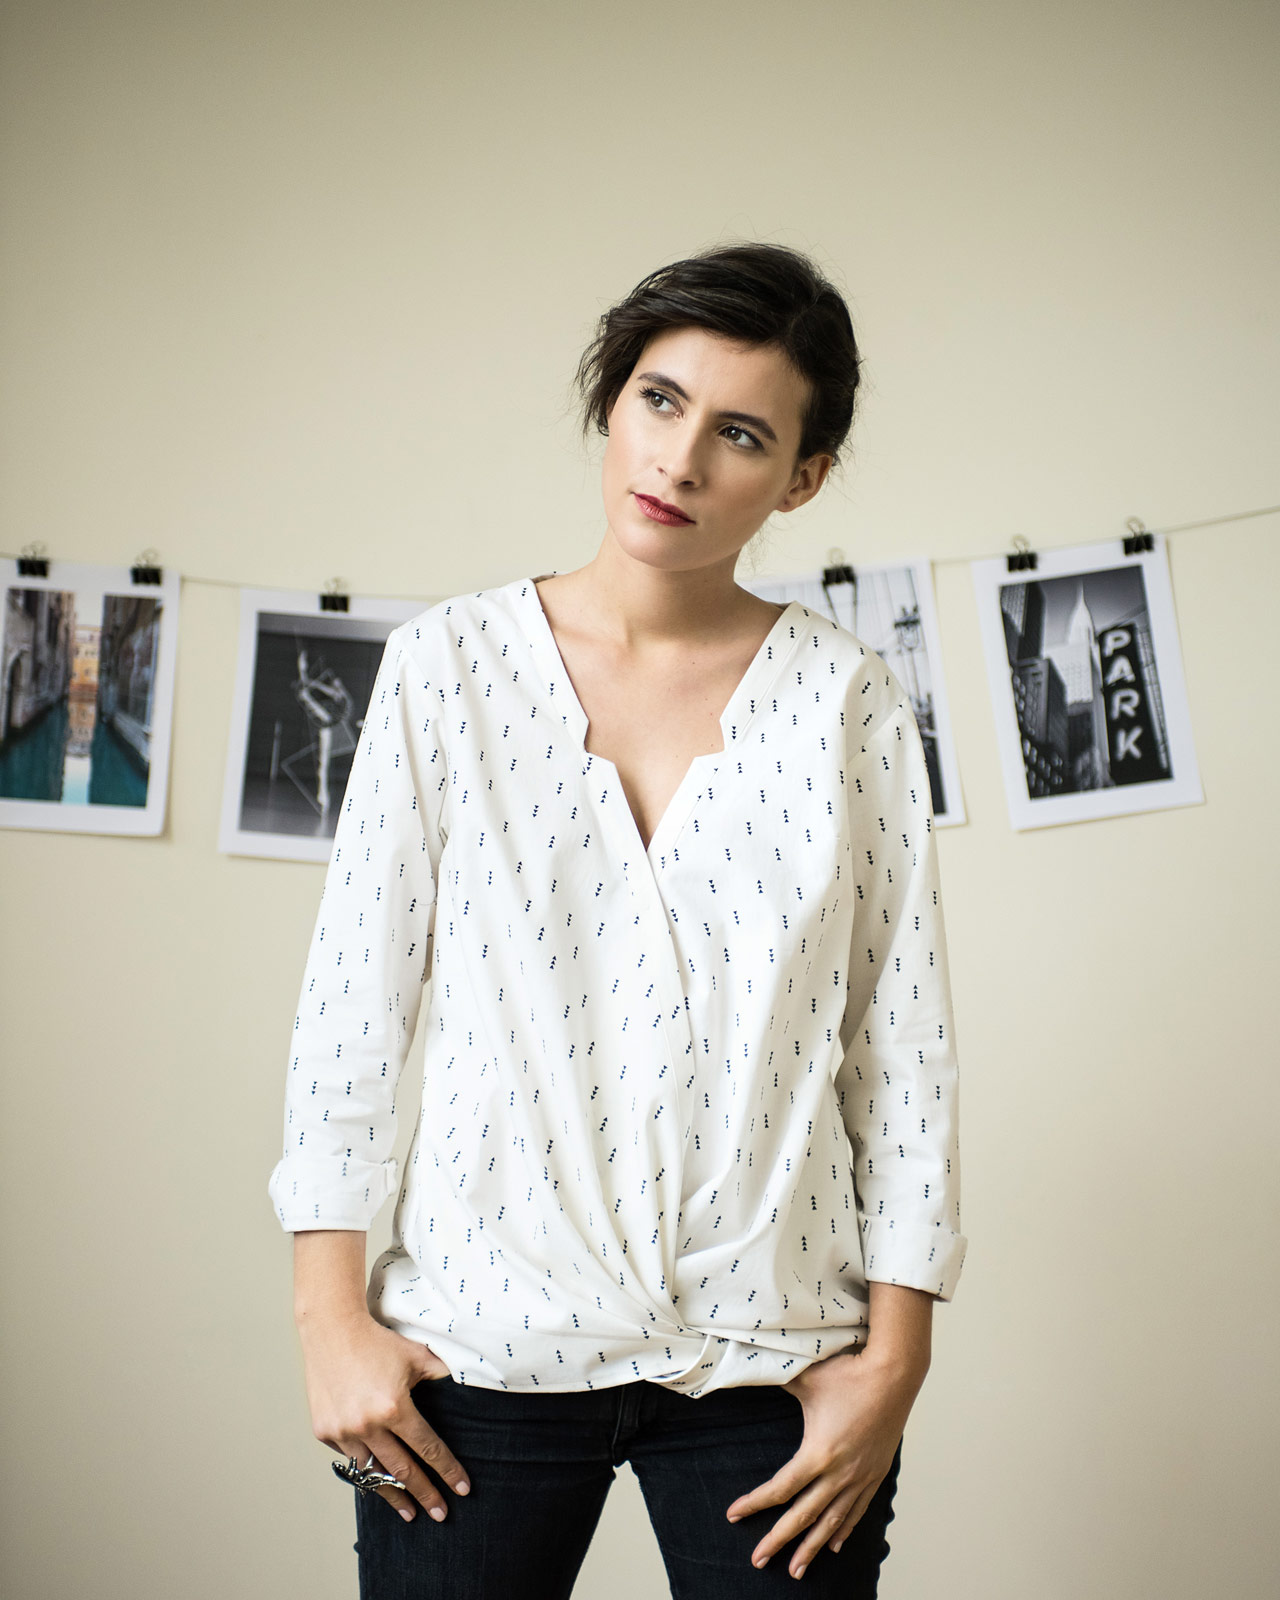
For this month's Fabric Mart post, I choose to use some Chambray.  I love working with Chambray.  It drapes so well and is such a workhorse of a fabric.  I've been eyeing some of the trendy tops and this one is the pattern I chose to use: 


Here's the link to the pattern company: Orageuse Helinski 

I love that deep V neck and that twist front.  How cute!!!  
Here's my version in the chambray:


Of course I modified this a bit in the sleeves.  I made three-quarter length but left the cuff on.  


My usual alterations include lengthening from the shoulder to the apex and the bust curve area.  I always then lengthen the back from the shoulder to waist to accommodate the front.


My top is longer than the models, not sure if she is a lot taller than me or not but I really like the length of this.  


Those little V's at the front and center back weren't difficult at all and give this a bit more interest that if they were just plain.  

I really love this new top!  It required a bit of hand sewing with the front bands but I enjoy hand sewing so not a big deal. 

Thanks for reading!
Sue 

Monday, March 4, 2019

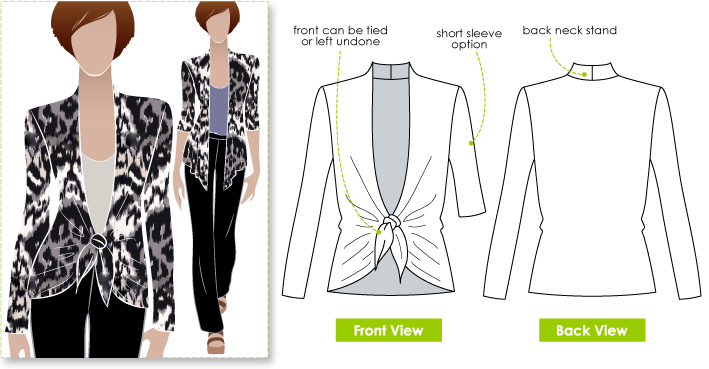
The Abby Cardi by StyleArc

I think it's safe to say that I am a huge SA fan.  I made this cardi previously but sort of forgot about the pattern until Elizabeth hosted her Day to Night Dress challenge.  For my dress, I knew for evening I wanted to make a black cardi with some umph. 


I really love this dress.  It's casual but can also be dressy.  The fabric is a textured knit in this stunning color!  

Now you can see it with my Abby Cardi.  This is a great pattern!  

Image result for images Style Arc Abbi Cardi

It goes together quickly and is designed beautifully!


I love how it ties!  You can also wear it loose and open, but I currently love wearing it tied at the waist.


A peek at the inside! 

My normal alterations include lengthening from the shoulder to the apex, lengthening the bust curve, lengthening the back from the shoulder to the waist.  SA patterns fit me well in the sleeve length and are exceptionally well drafted.


Here are a few details.  I used a decorative stitch on my machine to cover the outside seams and the hems.  I also always use SewKeysE hem tape to stabilize prior to stitching by hems.  At the neckline, I stabilized using SewKeysE stabilizer tape.  If you've never tried this stuff, you must!  Its awesome and makes sewing knits so successful! 


Thanks for reading!  In case you are wondering, this is a jet black knit that's cotton-lycra manufactured by Stof.  I really love this stuff!

Sue

Sunday, March 3, 2019

Hacking in prep for Spring--Simplicity 8375

Do you hack?  I want to and try to but sometimes I worry.  Will I be able to execute the design I have in mind?  With this pattern, all the worry is taken and you can simply have fun with it!
Plus with the way this pattern makes hacking so easy, it will give you confidence to try other design ideas. 

Simplicity Pattern 8375 Misses' Knit Dress or Top with Multiple Pattern Pieces for Design Hacking


This is Simplicity 8375: 


There are main pattern pieces with lines to hack--you can see the various lines on the front.  As you can see, I made the dress with the slashed sleeves.  I had fun playing with how to keep the sleeve closed.  


I found this happy cotton-lycra knit at JoAnns.  It felt to be of decent quality and with some brutal cold weather on the way over the weekend, I knew I needed to do something to combat spring fever.  I bought the fabric. :)  I made a dress.  :)  I did some hacking. :) 


Here's the front.  It's a little looser fitting than my beloved McCalls 6886.  That's okay though.  


Here's a good look at the sleeves.  I followed the slash lines on the tissue and made a length of fabric folded onto itself to make something like a belt loop--no tube! Every three inches on the sleeve I put a length of the tape and stitched it on.  Easy.


More views of the sleeve.  


Here's a view of the back.  This pattern goes together well.  I will be using it again.

Thanks for reading!
Sue

Tuesday, February 26, 2019

Oslo Stole by Oraguse

Hi guys!  
Up today is a FREE pattern from Oraguse, an indy company from France.  This is more of a set of directions than pattern pieces but it's so easy to put together, you won't miss the pattern piece!  

Here's an image from their website: 


Here's my version: 


This fabric has been in my stash for ever!  Probably one of the longest of all pieces!  I thought it was wool but is actually stretch cotton.  It looks like wool and has a feel of wool, so it may be a blend.  The tag from when I purchased it was only partially attached.  Hard to tell!  


The back 'collar' is only partially stitched down the front of the garment.  The back is left to hang out, if you know what I mean.


This is a bit wrinkled.  I didn't get a change to take photos until after wearing it to work.


One thing you'll notice is that the closure on me is high up while the model shows the closure much lower on her body.  I double checked my measurements and they are correct.  For reference, I am 5'7".  Height may be a factor.  


This is very comfortable to wear and surprisingly warm, even though this isn't wool.


Here are some details--I like how the corners are finished.  


Here's where the collar is stitched down.  If you look closely, you'll see where I did some zig-zag stitching to strengthen and stabilize the back side seam intersection.  This tiny portion of the garment isn't finished as it is a cut edge and I thought the zig-zag would reinforce it a bit as well as give me a more solid surface to attach my pin closure.  

Thanks for reading!  Do you have any free pattern resources?  Please share them if you do!
Sue


Sunday, February 10, 2019

Silk Orageuse the Prague blouse


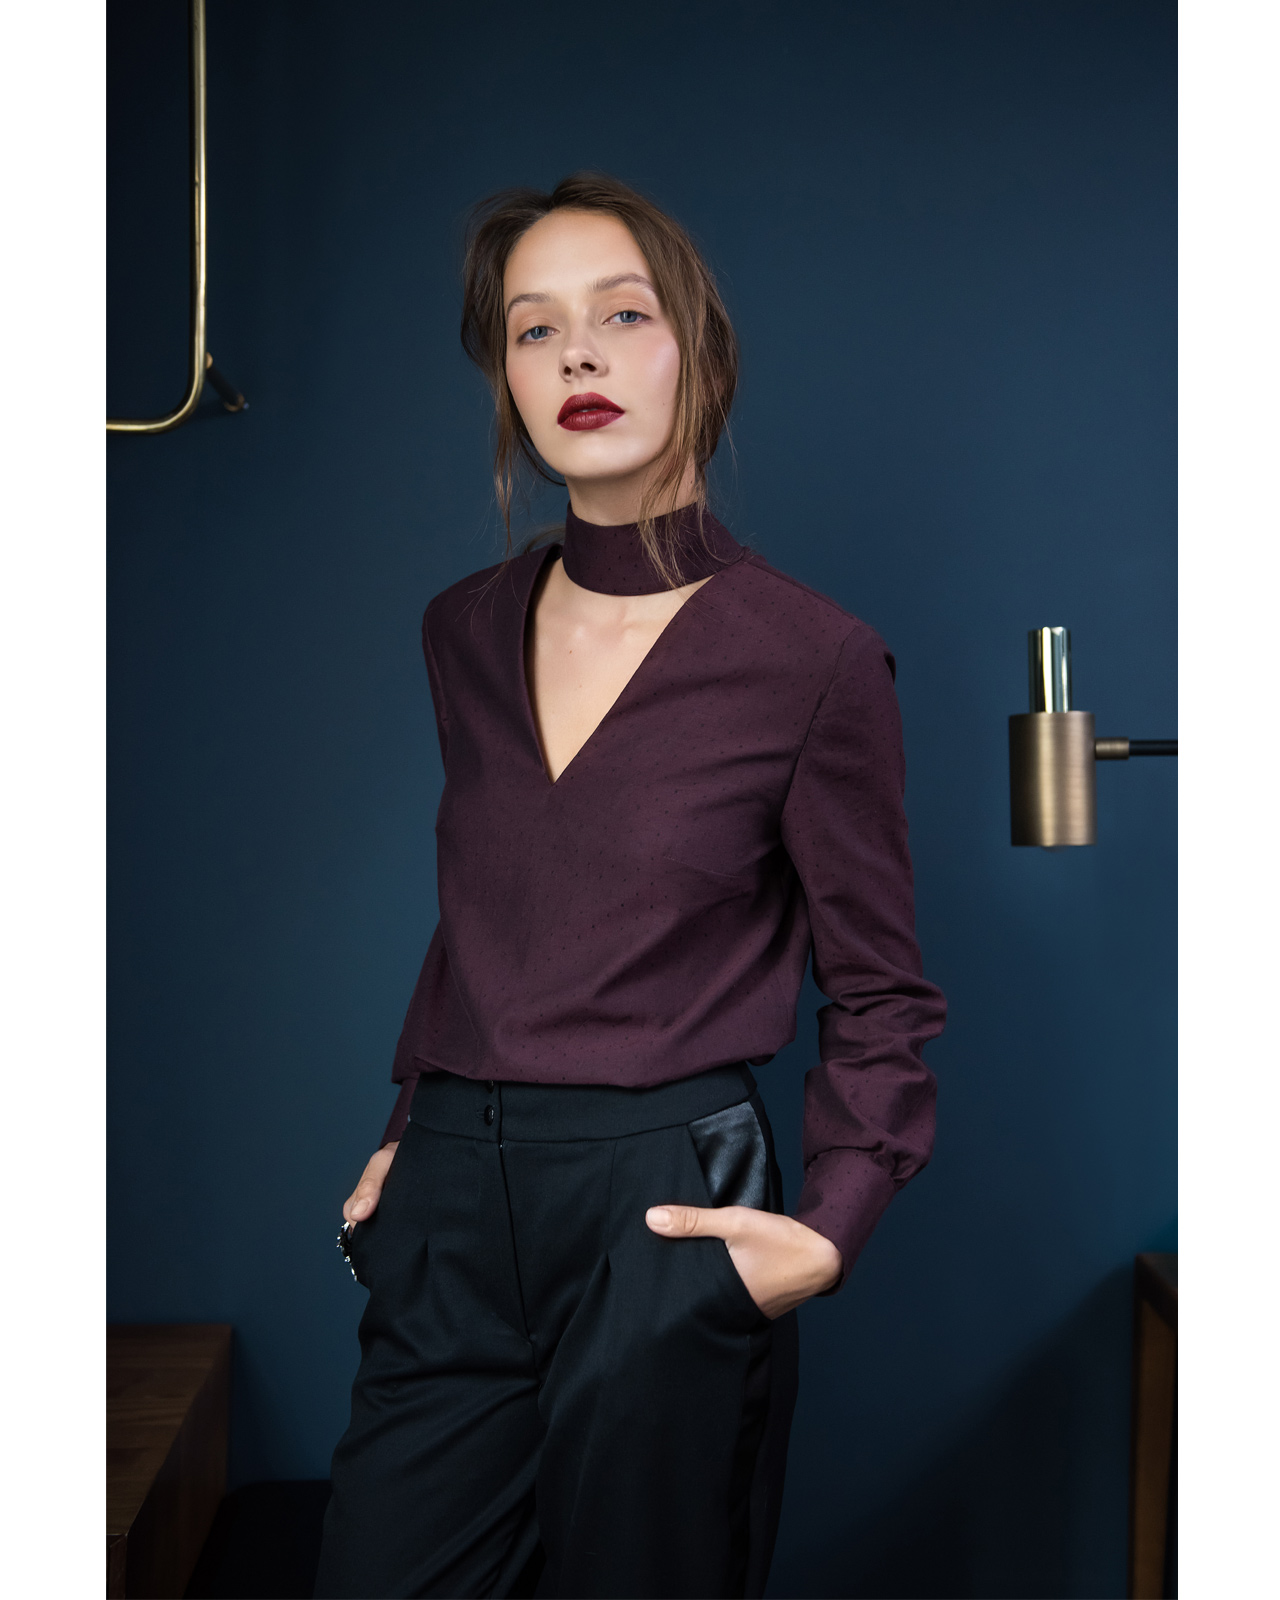
I positively fell in love with this blouse the moment I laid eyes on it.  It's a new to me pattern company based out of France.  The company is called Orageuse and the pattern is the Prague Blouse.  This was fun to make! Instructions are available in either French or English.  They were detailed and easy to follow for this pattern.  

Image result for images Prague blouse

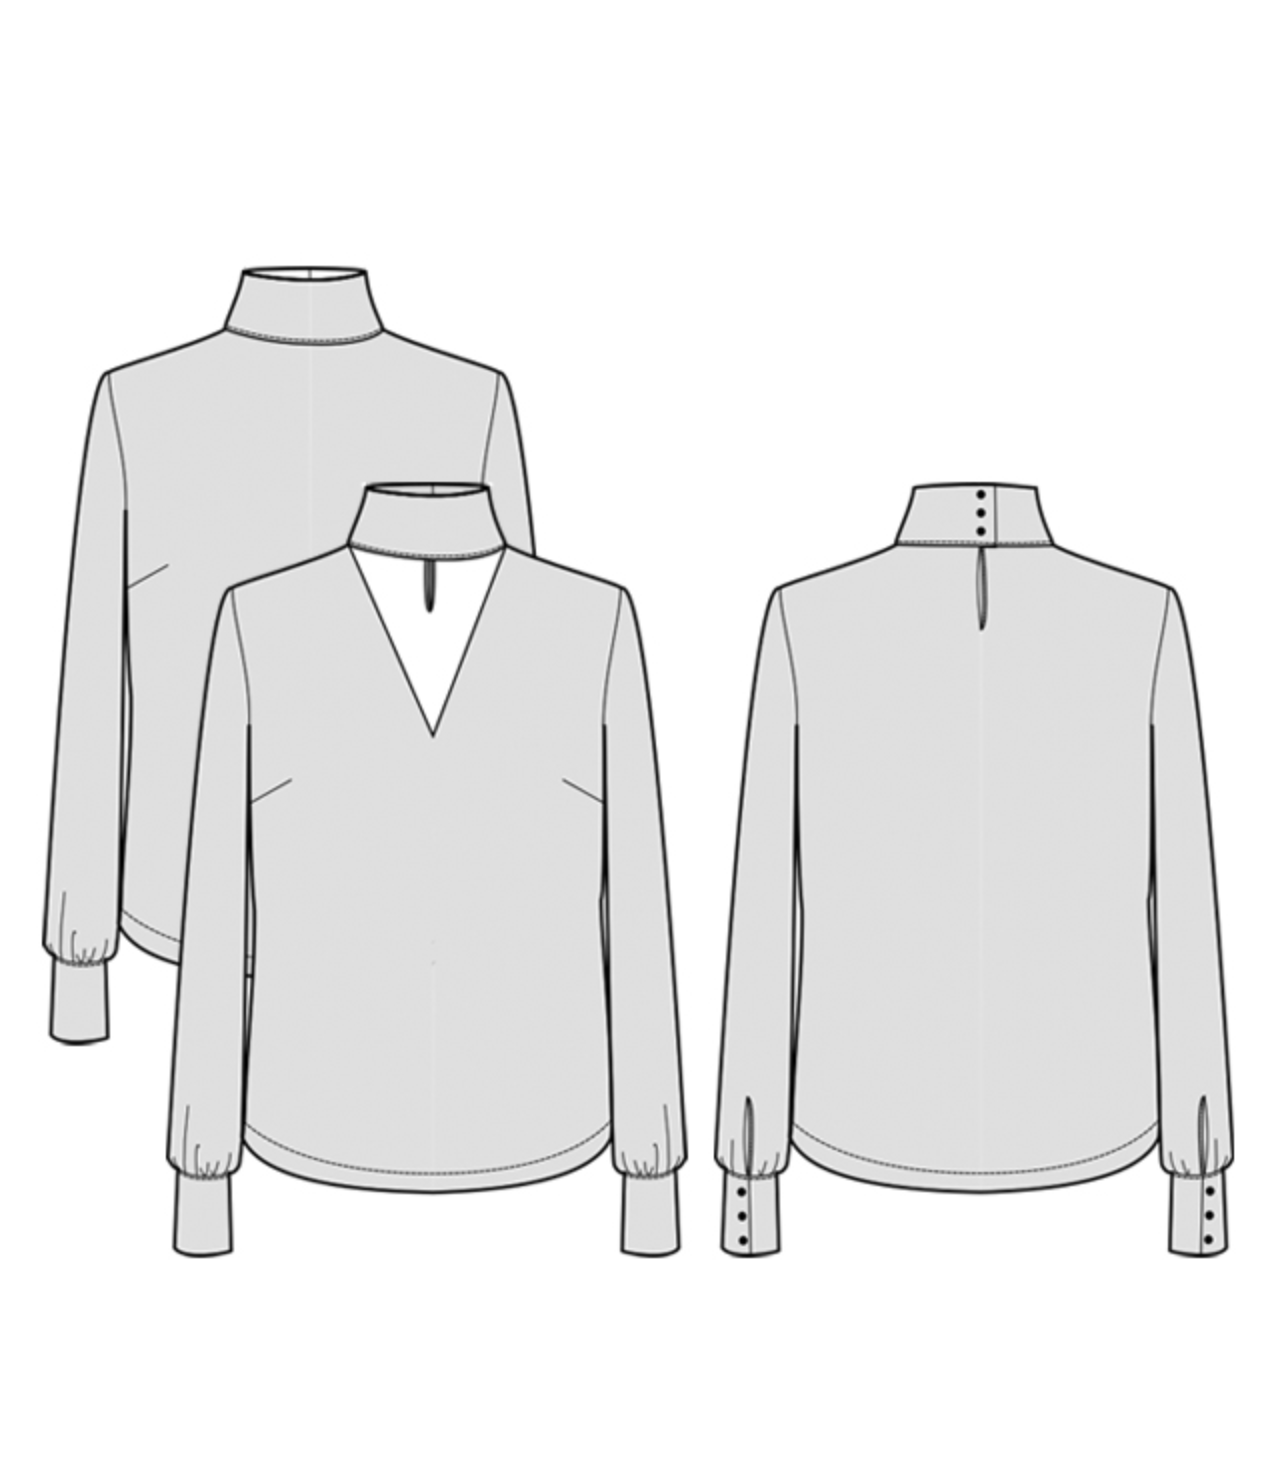
You can vary this pattern at bit at the neckline.  See the line drawings below.  

Image result for images Prague blouse

That front portion can be left open (does that describe this?) or you can have a contrast, or even use the same fabric as the blouse.  I choose to use a silk from Fabric Mart for this blouse.  This creation was for my February blog post.  I really, really love this pattern!  


Since this was a new-to-me company, I made a muslin and am glad I did.  I also flat pattern measured and knew it seemed be developed from a standard pattern block and that my typical alterations would work. 


I was so hesitant to try this neckline and when I was making my muslin, I seriously toyed with the the full-coverage neck.  But then I had a talk with myself and said, just go for it!  Your next version can have the full-coverage neck.  Okay, now just get it cut out so you don't change your mind...again.  Anyone sew like that?


That slit in the back is super cute as well.  For alterations here's what I did.  I learned this from Designer Joi when I took a classroom from her last summer.

Lengthened from the shoulder line to the apex.  One great thing about this pattern company, ORageuse, is that bust alteration lines are marked on the pattern.  Can I get a whoop, whoop?
Lengthened the bust curve area.  This is 2 or so inches below the dart.  It gives you ease for the girls to move freely.  
I typically have to alter across the upper back as I must have broadish shoulders.  I don't have to with this pattern company.  
Lastly, to accommodate the front lengthening I did, I also added to the back across the bust area by about an inch and a half.  This ensures that the front isn't longer than the back.  Make sense?  

I also widened the hips by about a total of an inch.  I just didn't want this too close-fitting in this area.    

V

Here are some detail shots.  This is where the neckband connects to the bodice in front.  Sew precisely here!  


I love these buttons I found.  They were at JoAnns.  I think they add the right amount of glam.  Look how precise my topstitching is!  I get excited about things like that. :)


Here's the back neck slit.  Again, I did some very precise stitching here.  I also only used two instead of three buttons as they were a bit too large to fit three of them.  


I really love this blouse and plan on making another.  As I was putting this together, I thought a sleeveless version would be worth trying.  I should mention that in this photograph, you can barely see the piece of interfacing I used to reinforce the area at the back slit.  I didn't want anything to stress that seam.  

Thanks for reading!  Have you tried any european pattern companies?  If  you have, please share their name!  I'd love to check them out. :)
Sue