Pattern Description:
Here is my description of this top: Semi-fitted top has front and back darts, collar with stand, patch pockets with flaps, optional rolled sleeves with tab closure.
Pattern Sizing:
All sizes are in one envelope.
Did it look like the photo/drawing on the pattern envelope once you were done sewing with it?
Yep, It does! I sewed it with basically no modifications.
Were the instructions easy to follow?
Super easy to follow although could be considered a little sparse. If you have sewn a blouse before, you can handle making this top using just the illustrations. If you haven't sewn with a Jalie pattern before, be aware the directions are printed on the pattern paper--you might be tempted to cut this off and throw away!
What did you particularly like or dislike about the pattern?
The fit is great! It is a classic and timeless style that you can embellish in many ways--contrast facings, etc. This pattern allows you to play with your fabric!
I really, really like the way the sleeves are put in flat before the side seam is sewn. It worked beautifully and honestly, does anyone really like to set in sleeves?
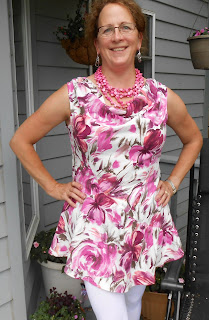
Oh, an please excuse the wrinkles. I wore it out to dinner with DH.
Fabric Used:
I used a stretch cotton from my stash. If I remember correctly I purchased it for almost nothing at Fabric Mart last summer. It was a little tougher to sew than I thought it would be as the stretch comes from very, very thin elastic threads running parallel to the grain of the fabric. I also used interfacing from Fashion Sewing Supply--best stuff in the world!
Pattern alterations or any design changes you made:
Only my usual swayback adjustment of 1/2". Length is great for someone 5'7". I started with way to big of a pattern size--about a T, I think but ended up taking it in about 2 inches on each side seam. Not sure if that was due to my fabric choice or not, meaning it may have stretched somewhat as I cut.
Would you sew it again? Would you recommend it to others?
Oh yes, I plan on sewing it again. There are so many cute versions out there that a girl just has to make several of her own!
Conclusion:
This is such a great top. It fits well, is easily alterable in the length, fabric choices, it can be dressy or super casual depending on what you choose. I do believe it took me longer to put in the button holes and sew on the buttons than it did to create this top. You can leave the pockets and flaps off it you'd like and it will give a completely different look! DH even gave his stamp of approval!
Thanks for reading!
Sue
About Me
- Sue Parrott
- Sewing is therapy for me. I hoard fabric, patterns, notions, and spend more time shopping for fabric than I care to admit...
Friday, July 26, 2013
Wednesday, July 24, 2013
Vogue 8649
Pattern Description:
From the back of the envelope: Misses' top: semi-fitted, pullover tops A, B, C have gathers, kimono sleeves and stitched hems. A: short sleeves. B, contrast lower front and lower back. B, C: three-quarter lengths sleeves. Separate patterns pieces provided fro A, B, C, D cup sizes.
This pattern is rated as very easy and I totally agree.
Pattern Sizing:
Multi-sized. I made a 14 with a C cup. I think I may have been able to go down a size in the bust. While I don't want it tight, it seems too loose.
Did it look like the photo/drawing on the pattern envelope once you were done sewing with it?
Yes, the lines are the same. However, I had to chop about 4 inches off the sleeve length as they were so long--past my elbow for the short sleeve version. I wanted them to look more like the envelope drawing. Of course, I made some additional modifications.
Were the instructions easy to follow?
Yep! Very easy, no issues with the directions. I was even pleased with the order of construction. They have you finish the neckline before attaching the lower half, which makes so much sense and lets you finish the neckline when it is still flat.
What did you particularly like or dislike about the pattern?
Likes:
Easy-fitting style.
Not too tight, but may border on being a tad big across the bust.
The sleeves while being kimono style are just the right fullness. I don't feel like I will fly away when I raise my arms.
Shoulder gathers, back waist line gathers.
This didn't take too much fabric.
Dislikes:
No stabilization at the shoulder seam
Bias tape finishing for the neckline and armholes? Nope, not for me!
Fabric Used:
I purchased this colorful and busy print from Treadle Yard Goods in Minneapolis earlier this summer. If I remember correctly, it is a poly-Lycra blend. I had to idea what I was going to do with it but decided it definitely needed broken up into pieces to give the eye some relief. This is such a wonderful knit. It feels like silk, sews like a dream and washed up beautifully. Love everything about it!
I did think I needed a solid color to tone this down a bit and attached some black knit from my stash to the neckline and sleeve hems. No idea the content of the solid fabric.
Pattern alterations or any design changes you made:
I cut 2 inch strips of black fabric, folded it in half and attached it to the right side of the fabric. I serged the edges, folded it to the wrong side and topstitched about 1/8" from the edge using a stretch stitch. It gives just a tad bit more coverage in the cleavage area and again, breaks up the busy print a little bit.
I stabilized the shoulder areas with 1/4" clear elastic serged to the shoulder seam. I thought this top needed shoulder stabilization and am surprised Vogue didn't include this in the directions.
As I mentioned earlier, I shortened the short sleeved version by about 3.5 inches as the sleeves hung down past my elbows. I wanted the sleeves to hit me about 4 or so inches higher than that so I hacked them off and applied a narrow band of black fabric just to break the busy print up a little.
I stitched the neckline closed with about an inch of stitching on the inside so it isn't visible to anyone other than me.
Would you sew it again? Would you recommend it to others?
Yes, I will most likely sew this again. I like the easy style and think it will look great in a variety of fabrics and fabric weights.
Conclusion:
While I really enjoyed this top, I am wondering if I should go down a size in cups as it just seems a little too roomy in the bust area.
Thanks for reading!
Sue
Monday, July 22, 2013
Vogue 8786
Pattern Description:
From the back of the envelope: Loose-fitting, pullover dresses A, B (fitted through bust) have back neckline slit with hook and eye closing, narrow hem. A: purchased bias tape finishes necklines and armholes.
This pattern is rated as very easy and I totally agree--that is if it fits you straight out of the envelope. :)
Pattern Sizing:
Multi-sized. I started with a 14. Not exactly what I ended up with.
Did it look like the photo/drawing on the pattern envelope once you were done sewing with it?
Yes, the lines are the same. Of course, I made some modifications.
Were the instructions easy to follow?
Yep! Very easy, no issues with the directions. I didn't necessarily like the order of construction, but that is a personal choice for me.
What did you particularly like or dislike about the pattern?
Likes:
Easy-fitting style.
Shape of the dress--I just love those extended sleeves.
This didn't take too much fabric. Nice!
Dislikes:
This was a fitting nightmare. More on that later.
Bias tape finishing for the neckline and armholes? Nope, not for me!
Fabric Used:
A lightweight, stretch denim from Joanns. I purchased it a month or so ago and it washed beautifully and the colors remained vibrant. It was easy to handle and sew. Not bad for Joanns!
Pattern alterations or any design changes you made:
I used self-fabric bias tape for the neckline and armholes. It looks so much nicer and will wear better in the long run. I also think it gives this very simple dress a little more design oomph.
I made my usual 1/2" swayback adjustment and it wasn't enough to take care of the fabric bunching midback. I ended up taking the side back and center back seam in and additional 1/2" at the waistline and lifting the back up into the yoke about 1" I guess that's what I get for not making a muslin.
Instead of a hook and eye closure, I used a round button and part of an elastic hair band. I didn't think the hook and eye would wear very well.
Believe it or not, I shortened the hem by about 2". I am 5'7", so that was a surprise.
I lowered the neckline by 2 inches. It just seemed to strangle me with it so high.
Would you sew it again? Would you recommend it to others?
Yes, I will most likely sew this again, I am eyeing a cute ponte print I have in my stash. I think it will be perfect for fall.
I do recommend it to others. It is an easy style and if it fits you well straight out of the envelope, you'll have an instant gratification project.
Conclusion:
I really love this dress, especially with my super cute shoes! It is an easy style, and although it caused me some head scratching in getting the fit correct, I loved the challenge!
Thanks for reading!
Sue
Friday, July 19, 2013
Vogue 8575 Easy Options Dress
Pattern Description:
This is the description from the back of the envelope:
Pullover dresses, A, B, C, D, E, F in two lengths have partial self-faced, gathered bodice, lapped bodice front, princess seams, front self-band, tie ends, side bodice variations, and gathered skirt. A, C: elbow length, kimono sleeves. B: long kimono sleeves, D: long sleeves. E, F: sleeveless. A, B, D, E: mid-knee length. C, F: below mid-calf length.
This pattern is sized for two-way stretch knits only such as cotton Lycra, rayon Lycra and nylon Lycra.
Pattern Sizing:
This is a multi-sized pattern with choices 8 to 14 or 16 to 22. I started with a 14 and ended up with a size between a 14 and a 12.
Did it look like the photo/drawing on the pattern envelope once you were done sewing with it?
Sort of, the model must be wearing a size two or three smaller than her measurements. I think this pattern runs big, especially through the bodice.
Were the instructions easy to follow?
Yes, very. No issues whatsoever.
What did you particularly like or dislike about the pattern?
Likes:
I really like how the bodice is partially lined. It gives a very nice finish to the bodice.
I love the variations the pattern has, it really gives you many options.
Dislikes:
This pattern is very mu-mu like (according to DH).
Bodice is pretty low cut. If you are larger busted you'll need a cami or you'll get lots of stares :)
The skirt is really full. If you desire a less full skirt, use a smaller size for the lower half
Narrow hems on the sleeves. Ugh.
Fabric Used:
I used a stretch slub rayon from my stash. I had 2.5 yards that wasn't quite enough so I had to line the bodice with a cotton knit, also from my stash. The dress cost less than $10.
Pattern alterations or any design changes you made:
1. I didn't take in my usual 1/2" swayback adjustment simply because there is a seam at the lower back. It worked out fine that I didn't.
2. As I said earlier, I used a t-knit to line the bodice as I ran out of the rayon. It worked just fine.
3. Instead of using a narrow hem at the shoulder seam, I cut 1.5" bias strips, serged them to the shoulders, turned and stitched about 1/16" from the seam. I have a narrow bias strip showing. It really drew the shoulder closer to the armhole and helped avoid gaping.
4. I took a 1/2" dart at the bust line to help with armhole gaping. With my busy print, you really can't tell.
5. I shortened the ties by about 8". I didn't have enough fabric to make them any longer and really, why would they need to be?
6. I attached the side ties to the side seam by stitching along the seam line, just to avoid as much drooping of the ties as I could.
7. I also took the top in quite a bit at the side seams, probably about an inch. This bodice is fairly large, I would recommend going down at least one size before cutting out.
Would you sew it again? Would you recommend it to others?
For myself, no, I won't sew it again. Would I recommend it to others, yes, especially if you want a breezy summer dress that you don't have to stand up ultra straight or hold in your abdomen. It's awesome for that! This dress would most like work if you are expecting.
Conclusion:
I am glad I tried this dress. It certainly has been under-reviewed and also not many positive comments have been given. While I like my finished product, it certainly has its place. It will be great for running errands, or wearing to work. I don't think this is an important meeting dress by any means!
Thanks for reading!
Sue
Thursday, July 18, 2013
McCall's 6683
Oh, this is so much fun, sewing for my soon to be born grandson, and first grandchild! Here is my review for McCall's 6683. I am only showing you a photo of one of the views that is available for a boy on this pattern . Is anyone else that wants to sew for boys a little put out by the lack of patterns? The ratio has to be about 25 girl patterns to each boy pattern. Disappointing.
Pattern Description:
Infants' tops, romper, dress, panties, shorts, pants and hat: Pullover tops, romper and dress have collar/front bands, and side front, side back seams. B: Lower band, snap crotch. D: narrow hem. Panties have elastic waist and legs. Shorts or pants have elasticized waistband, mock fly, and pockets. A, B, C, F, G: Stitched hems. F: Flaps, lower pockets with tucks. Self-lined hat has seam detail and elastic back.
This pattern is designed for moderate stretch knits and lightweight woven fabrics.
Sizing:
This is a pattern that contains sizes Newborn to X-Large or chest sizes 16.5" to 19". I made a large, in view B, which I hope will fit the little guy next summer.
Fabrics:
Suggested fabrics are Interlock, jersey, cotton knit. Contrast C, D, Panties E: broadcloth, madras. I used a medium weight interlock knit from my stash. The embroidery was one that I found on Editor Plus, a software program for my Bernina sewing machine. Honestly, this doesn't take much fabric. For a size large, such as I made, it takes 5/8 yard for the main fabric, 1/4 yard for the first contrast and 1/2 yard for the second contrast. You also need interfacing for the placket and collar band--more on that later.
Did the finished garment look like the pattern envelope?
Yes, my romper resembles the envelope. I just love the style of this little romper. It looks so comfortable for a little person to wear!
How were the instructions?
Instructions were pretty detailed, but I don't necessarily agree with the order of construction. The directions have you stitch the side seams and then attach the collar band. I thought that was silly, so I sewed the front pieces, attached the sleeves and attached the back pieces. This gave me a flat surface to put the collar band on.
Not sure why the collar band needed interfaced. I did it anyway and wondered why! I used a ribbing I purchased a while back and while I understand using interfacing on the placket, I have no clue why it needed to be on the collar band, that is unless you are using a woven fabric, then I completely get it. Also, there wasn't any interfacing in the snap crotch area, which was another huge surprise! The snap crotch doesn't need to stretch, but still for reinforcing the area because of the snaps, interfacing is a good idea.
I haven't made a placket in a very long time and feel pretty inadequate doing so. It isn't as nice as I'd like--so no judgments, okay? It really isn't as wonky as it looks, I didn't smooth everything down very well before I took the photo.
I was able to use my KAM snap pliers, which have to be about the best! The pliers are reasonably priced and it came with a variety of multicolored snaps. I used white in the crotch and red on the placket. If you sew for children and need a reliable pair of pliers, get these! They are far superior to the Dritz brand you can find at JoAnns or Hancocks.
Likes/Dislikes:
Likes: the styling. It's cute, right? It feels comfortable and isn't horribly plain; a problem I find when looking for little boy patterns.
Easy construction.
Takes little fabric
Variety of view for a girl/boy included in this pattern
The placket is nice and long and it appears easy to pull over the head.
Dislikes:
I hope the little guy's tummy fits inside. Does this seem long and narrow to anyone else?
Lack of interfacing in the snap band and interfacing that is unnecessary in the collar band (if using a knit).
Will you sew it again? Recommend to others?
Yes and yes. It is an easy pattern. I love how easy it is to embellish a simple pattern such as this either with embroidery or with fabric choice. If you need to sew something for a young child, this is a great pattern.
Conclusion:
I can't wait for the model to be born! I a very excited to make the pants and hat. So cute!
Thanks for reading!
Sue :)
Tuesday, July 16, 2013
McCall's 6752 Top
Here is another review for McCall's 6752. Last time, I made view D and just love it! This time I attempted view B, with disappointing results.
Description:
From McCall's pattern website: Pullover tops and dresses have neckline variations, and elasticized (seamed) waist. A: lower left side gathers and exposed zipper. A and B: loose-fitting . C: elasticized side seams on lower section. C and D: very loose-fitting, gathered (bias front) bodice. B and D: semi-fitted skirt. Stitched hem A, C and sleeves B. Narrow hem back neckline A, B and neckline/armholes C and D.
Fabric:
I purchased this gorgeous fabric from Treadle Yard Goods in Minneapolis. The colors are amazing and the feel is like a lovely silk against your skin. It has a 27" repeat on the print, so it was tough to get everything cut out just how I wanted given I took the last of the bolt and there was just enough to cut the dress out. I believe the content is a poly/lycra blend. It has great stretch and recovery.
What can I say that I didn't say before?
This pattern seems well drafted. Everything lines up well, all the notches match. As I said earlier, I attempted view B, but I am not sure if it was my clingy fabric choice or what, but I just almost despised it! I love the colors on the fabric, but the way it laid I felt like I needed to wear Spanks from my throat to my knees.
Did it look like the pattern envelope?
Yes, sort of. It looks like I took view B and hacked it off at the hip line, which is exactly what I did.
Likes/Dislikes:
Likes/Loves:
I love the style of the top. I think this view is super cute, just not on me. Everyone else I see wear this makes me want to make one of my own. Well, I did that. Not sure what I think of the finished result yet.
Dislikes:
The sleeves hung down past my elbows. I felt like I was about to fly away if I only flapped my arms hard enough.
The sleeve openings were gigantic! You could see all the way to my waistline before alterations.
Didn't like the skirt with this fabric. It is the same pattern pieces I used for view D and loved it. I am thinking it was a function of my fabric and pudgy body.
Changes/alterations/modifications:
I cut off 6" at the shoulder line and tapered it down to 4" at the underarm so it was more of a wedge I removed rather than a rectangle. That helped immensely!
To remedy the sleeve openings, I took in a total of 6 inches from each armhole opening: three inches from each side. This helped just as much as shortening them!
I actually added 1/2" to the front and back bodice pieces at the waistline. I felt like my previous version was just a tiny bit snug, plus I wanted a looser fit.
I tried to find tricot to line the skirt and try to salvage the dress but none of the local fabric shops had any so I hacked it off eight inches below the waistline, just what the measurement was for the length of the back bodice piece.
As with the previous version, I stitched the top of the casing to the bodice so it didn't flap around.
Recommendations:
If you are making this view, I highly recommend making a muslin if you plan to use precious fabric that is irreplaceable. Had I done that, I would have saved this fabric I loved so much and made something else.
If you are using a really stretchy fabric and don't have a coverstitch machine, like me, use steam a seam for the hems on the sleeves, back neckline, and top/skirt. It saved me a lot of grief.
I highly recommend stitching the casing down to the bodice. It helps it stay put and not flop around.
Check the neckline for how low you want this top to go. Given the drape of my fabric, I will be wearing the bright yellow cami underneath as is pictured. Not sure if I will wear the skinny black belt or not. It looks fine in front, but in back I think I need liposuction.
Conclusion:
I am still trying to decide if I like this top or not. I know I'll wear it a few times, but I really wanted to love it so very much! I really love my dress from view D but this view just doesn't do it for me.
Thanks for reading!
Sue
Sunday, July 14, 2013
Vogue 8856 Summer top
Here is a review for the 'Easy' top from Vogue, pattern 8856.
I made view A, which is the line drawing shown above and below.
Pattern Description:
Misses' Top: Close-fitting, pullover top has seam detail and narrow hem. Topstitching. B: Draped front overlay with pleats. Wrong side of fabric will show.
Fabrics: This top is designed for moderate stretch knits only such as jerseys, cotton knits.
This was an experiment for me. I was rummaging through my fabric closet where I hang my yardage (as long as it is a woven) on hangers so I can see what I have. I pulled out this lovely floral woven that I've had for quite some time and thought, why not? Try it out and see what happens. The worst thing would be having to rework the blouse into something else. So I sallied forth and did the unthinkable, made a top designed for knits from a woven linen-like fabric. You can decide if you think it worked or not. :)
Sizing: A5 includes sizes 6 to 14 and E5 includes 14 to 22. I made a size 14 and I like the fit.
Does the finished garment look like the envelope? Yep although to get a really nice drape in the neckline, you need to use a knit.
How were the directions?
Directions are fine. The notches all match up and the drafting seems just fine. I didn't have any issues with the directions and the line drawings are helpful as well. Since I used a woven, I made just a few modifications that I will mention below.
Likes/Dislikes?
I love the style of the top. It is breezy and summery and just a little different that a typical top. I love the front lower drape, it has just enough fabric so you don't feel like you need to twirl like a ballerina all day.
I think the length is great. If you are shorter than 5'7", you might find this too long.
Dislikes:
The narrow hems at the armscyes--it just seems like a shortcut to me.
The back ruffle isn't as full as the line drawing shows, which is fine, but I kept looking to make sure I cut out the correct pattern piece.
What modifications/alterations did you make?
1. Since I used a woven, not a knit, I let out the waistline just a little (about 1/4" total) just so I had a little bit of wiggle room. I know that isn't much, but sometimes every little bit helps.
2. I made 1.5 inch wide bias tape ad used that at the armhole edges and it gave a very nice finish. After stitching on the bias tape, right sides together, I turned them to the inside, edge stitched and then turned to the inside and topstitched 3/8" away from the edge.
3. I made my usual 1/2" swayback adjustment.
4. I topstitched the seams where the ruffles are just to help them lay flat.
5. I thought I might need a zipper, but this fits over my head and torso, so everything is ok.
Will you sew it again? Recommendations?
Yes, I will sew this again, most likely view C, the long sleeved top. It is just a little different than a normal T, and I really like it!
I do recommend this top to others. It is fun to stitch together and fits well. Maybe next time, I will try this top in a knit. I believe the fit will be good, especially in the armholes where they don't really gap.
Conclusion:
This is a fun breezy top. I love my fabric! Try this one for something a little different.
Thanks for reading!
Sue
Wednesday, July 10, 2013
McCall's 6752 summer dress
This is a review for a super cute and summery dress and top pattern in two different styles. Here is the description from the back of the envelope:
Misses' tops and dresses: Pullover tops and dresses have neckline variations and elasticized (seamed) waist. A: Lower left side gathers and exposed zipper. A, B: Loose-fitting. C: Elasticized side seams on lower section. C, D, Very loose-fitting, gathered (bias front) bodice. B, D, Semi-fitted skirt. Stitched hem. A, C and sleeves. B, narrow hem back neckline. A, B, and neckline/armholes C, D.
Here you can see the line drawings of how different the necklines really are.
I made view D, with some modifications. :)
Notions Needed: Just elastic for view D. For view A, there is a 7" exposed zipper along the waistline. View C needs some elastic as well.
Suggested fabrics are medium weight knits such as jersey, cotton knit and novelty knits. I used a medium weight knit from my stash that I've had for about 2 years. It has a wonderful soft hand. I believe it is a poly/Lycra knit that I purchased from Fabric Mart.
Sizing: A5 includes sizes 6 to 14 and E5 includes 14 to 22. I made a size 14 and I like the fit.
Does the finished garment look like the envelope? Yep, sure does, even given my minor modifications.
How were the directions?
Directions are fine if you want a so-so garment. I am just getting a little tired of the big four pattern companies taking so many short cuts on getting a really nice finished garment that you are proud to wear. I added a few steps that I'll mention below.
The notches all match up and the drafting seems just fine. For this view, there are just four pattern pieces and I quickly discovered that the skirt front and back are exactly the same size. So in all honesty, there could have been just three pieces to deal with.
Likes/Dislikes?
I love the style of the dress. It is classic and the length is great. Not too long nor too short. I am 5'7" and it is maybe an inch or two shorter than the model.
Coverage at the crossover neckline is good meaning that I didn't have to make any alterations to keep the girls covered. Normally I have to wear a cami underneath but with this top I don't have to and I feel like it is appropriate for work.
It is comfortable to wear. Gotta love knit dresses for summer.
"Straps" are nice and wide giving good bra coverage.
Dislikes:
The directions don't mention reinforcing the shoulder seams at all.
The casing for the waistline isn't stitched to the top when it is completed, it just dangles there.
Narrow hems at the neckline and armholes.
Armholes are a little lower than I 'd like.
What modifications/alterations did you make?
1. Added 1/4" clear elastic to the shoulder seams to reinforce and keep from stretching out of shape.
2. Stitched the top of the waistline casing to the top by stitching 1/2" from the waistline seam preventing the dreaded dangling of the seam
3. Cut 2" wide bias strips to enclose the neckline seams as well as the armhole seams. I measured how long the seam was and subtracted 4 inches from the right front edge to the left front edge and eased it into place. For the armhole seams, I subtracted 2 inches from each opening and stretched the bias to fit at the underarm portion of the seam so it hugged more there. It seemed to work. I just wish I'd take before pics as well!
4. Typical 1/2" swayback adjustment which I don't think I really needed but too late now!
5. Just to be safe, I stitched about 1/2" in the ditch of where the bodice crosses over just to avoid any possible wardrobe malfunctions.
Will you sew it again? Recommendations?
Yes, I will sew this again in the other view. Not sure if I will make the top or dress as you can never have too many of either one!
I do recommend this dress to others. It is fun to stitch together and fits well. I highly recommend the modifications I made in order to create a dress that will last and that looks more like RTW. If I were to make either C or D, I will raise the armholes at the bottom about1 inch. I do think my bias edging helped keep that area from possibly gaping.
Conclusion:
This is a fun dress. I can't wait to make view A or B sometime soon!
Thanks for reading!
Sue
Monday, July 8, 2013
Vogue 8835: White Denim skirt
This pattern is a Very Easy Vogue Skirt. It is described like this on the back of the envelope:
Semi-fitted skirts have lined yokes, back zipper and narrow hem.
A: button trim and mock welts.
Suggested Fabrics: Lightweight woolens, lightweight linen, lightweight denim.
Pattern sizing: Two size combinations: 6 to 14 or 14 to 22. I started with a 16.
Notions needed: Zipper, interfacing, and optional buttons.
Cost and time investment: Fabric, interfacing, and zipper are all from my stash. This is a fast and easy to assemble skirt. It is a fairly timeless style. I think I spent about 2.5 hours total cutting this out and putting it together.
Fabric used: I used a lightweight denim from my stash. I know I've had it for more than a year but have no idea what I spent. I used interfacing from Fashion Sewing Supply--the best stuff on earth!
Likes/Dislikes:
I like the style. It looks like a wrap skirt but there is a large/wide overlap of the front pieces so no worries about showing off more than you'd like to.
Length is great!
Easy to put together.
Dislikes: The yoke is really wide--see below for how I altered it.
The narrow hem may be a little difficult depending on the fabric you choose.
Modification/Alterations:
As I mentioned above, the yoke is really tall--4". It is shaped really well but I felt like it was digging into my waistline so I shaved off 1.5" from the top. Now it sits a few inches below the waistline and is much more comfortable.
I used a white quilting cotton for the yoke lining rather than the denim as I didn't want it too bulky. And instead of turning under the seam allowance of the yoke facing and stitching it, thus giving the seam a lot of bulk, I simply left it unturned and topstitched on the right side of the garment to keep it in place.
I also only had an invisible zipper and didn't want to go anywhere so I made do with it. It wasn't the best choice for denim, but it does work.
I ended up taking this skirt in a tad too much and it was too snug but fit DD1 beautifully so she is now the owner! I love it when I make items what work for SOMEONE! Although she may not like me saying this, we are fairly close in size.
Recommendations:
I highly recommend this pattern for an easy to whip up skirt. It is cute and stylish and really lends itself to a variety of fabrics, patterns, etc.
Conclusion:
This is a great staple pattern that has an unappealing drawing on the envelope. Don't let the drab drawing fool you, it has so many possibilities! I thought about using embroider on the front, or even ribbon trim along the front as well in a contrasting color.
Thanks for reading!
Sue :)
Subscribe to:
Posts (Atom)