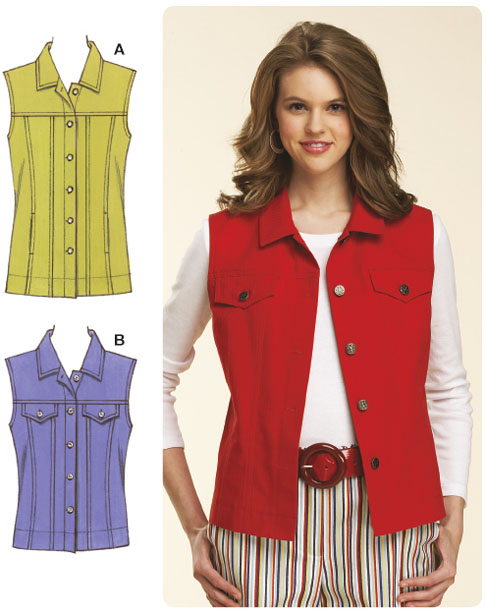
I love this pattern and the look of the final garment. My first version was it red denim and dang, it was just a bit too broad in the shoulders for me. Luckily it fit my mother perfectly and she's worn this numerous times.
This pattern is obviously for a sleeveless vest. It has classic jean jacket styling with the multiple panel seaming for front and back.
I had to make some alterations to get this to fit how I wanted to. Now that I've done that I am very happy with the fit.
I ended up making the same size I used that was a bit too large for me in the shoulder area. I knew I had to take those areas in and make a few other adjustments just because I knew that I had a vision for how I wanted this to fit.
For starters, I graded between 2 sizes for the bust and shoulder area. For the hips and waist, I graded down between 1 and 2 sizes. Isn't that the beauty of making your own clothes? You can do what you want with a pattern.
Based on the first time I made this, I knew the shoulders would extend further than I wanted them to so I shifted the seam allowance for the armscye binding. I mentioned earlier that I wanted this to have a closer fit in the torso than my first version. I took the seam allowances in from the armscye to the waist 1.5 inches on each side for a total of 3 inches. I knew I should have started with a smaller size! I also knew I'd never button this, ever.
I do think it would button, but that isn't the function of this garment.
In case you were wondering those pockets are functional


I love that feature! My only real deviation from the design is due to personal preference. I don't enjoy slip-stitching part of the neckline into the neckband so it looks neat and tidy. I rarely see this on ready to wear. When I use a heavier fabric such a denim, I will use a bias binding to cover the seamline on the collar section where it attaches to the front and back bodice. It is super easy to do this if you haven't tried it before. Next jacket I make I will try and show this super easy technique!
I always appreciate your reading and I love your comments!
Sue :)


Your sewing is just perfection!
ReplyDeleteDH asked if I would finish the back neck of his PJs the way you did with your vest. He doesn't like the back neck facing flapping about.
Did you stitch it down knowing the stitches would show on the other side (but covered by the collar of course). Is it that easy?
It looks great! I agree with DH that a loose facing just looks sloppy and messy.
Hi MaryMary86. You are correct, I just stitched this down and the stitches do show on the right side and they are covered by the collar. Thanks for asking and I hope he likes it as much as I do!
DeleteI'd love to see the tutorial for the bias finish.
ReplyDeleteCute vest!!!
I will write one up!
Deleteso cute and a great fit!
ReplyDeleteThanks Coco!
DeleteWhat a great vest! And it fits so well. Love the dress, too.
ReplyDeleteVery cute and beautifully fitted vest. Love that shade of blue too.
ReplyDelete