Yes, you've seen me make this pattern before but I wanted so badly to make it again! I had to make one with that super cute drawstring waist. In case you missed round 1, this is the Vanessa fluid pant from Jalie.

Choose your size based on your full hip measurement. There is a bit of ease there and you don't want these tight at all.
I love the pockets--just the right size! I stabilized the curved seam of the pocket with stay tape--just in case. After all, I did purchase this stretch denim from JoAnns. I hope it doesn't disappoint me in the long run.
See those fun grommets? They aren't difficult at all to insert. I ended up stabilizing that entire front band piece--it's about six inches across with fusible interfacing. I do wish I could have found a better cord. This was also purchased at JoAnns.
When I tried these on for photos, and asked the hubby if he thought these were as awesome as I do, he replied they were something. I don't think he likes them. :)
I almost didn't add the elasticized bottom but I thought they might be a tad short if I didn't.
Aren't these just so fun and colorful?
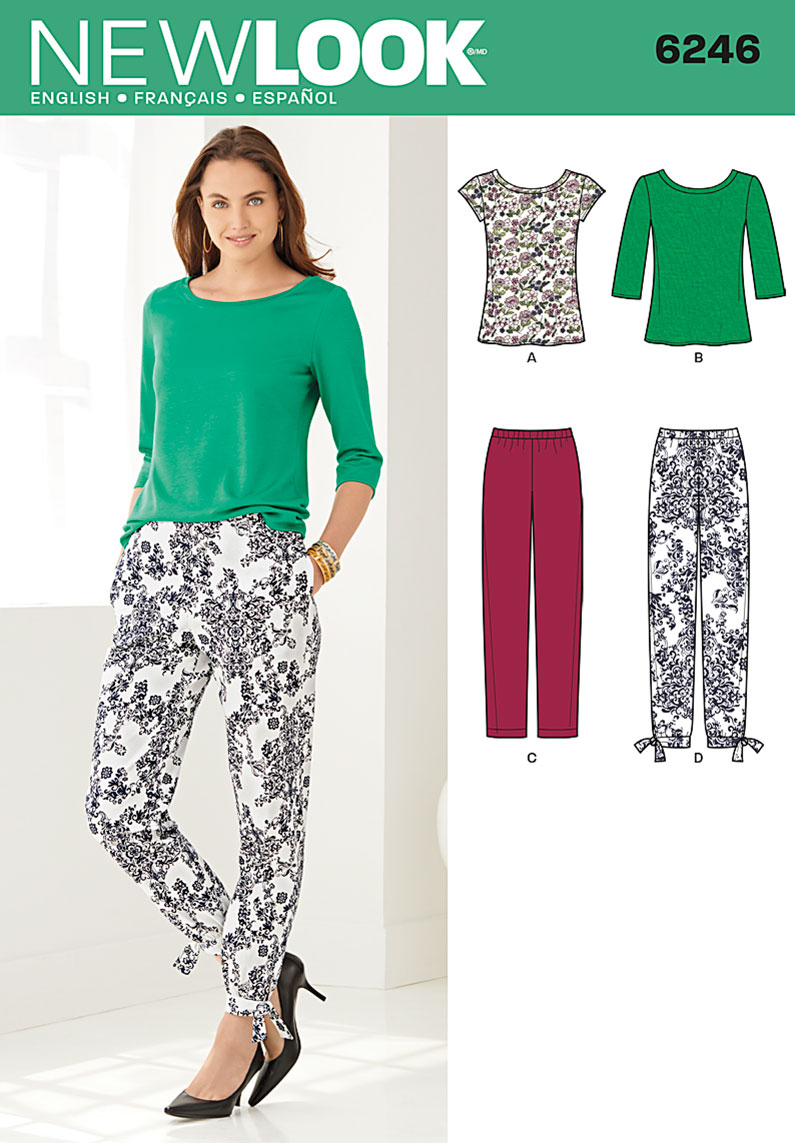
So now for the top. The pattern is New Look 6246. I purchased it for the pants but haven't gotten to those yet. I do really like the shape of the tee.

And that is what the purple is made from that pattern. I am really stoked about the neckline. Check it out! This is a bamboo knit that was in my stash. I used it on another project and had just enough to eek out this top.
I want to show you the steps I take to make a good looking neckband.
I stabilize the area with stay tape. One side is nubbier than the other and that one I put next to the wrong side of the fabric. With this pattern having a 5/8" seam allowance, you can see in the photo above how I line everything up. The stay tape is about 1/8" over the seam allowance and will be covered by the neckband when finished.
Next, serge the seam in the neckband. Yes, I meant to clip that seam. As long as you don't go all the way through the left needle thread, it will never fail you! Now you can press those seams in opposite directions so you don't get any annoying bumps.
Sew your neckband on. You can sew it wrong side up if you'd like but as you can see in the picture, I did not. I do like to baste first using a straight stitch before serging.

Here is what is look like prior to pressing and topstitching.
And this is what it looks like afterwards!
Thanks so much for reading! I hope you all have a blessed Easter!
Sue
Some of you have asked which stitch I used for my topstitching. I used #22. Which you can see above.
Happy Sewing!
Sue


Nice outfit, I love the purple. Thanks for sharing the technique.
ReplyDeleteVery pretty outfit, Love the color!
ReplyDeletethose pants are the bomb! love them.
ReplyDeleteI love your pants and top! Great colors. I am thinking about getting that pants pattern.
ReplyDeleteSue, purple and saturated colors are so flattering on you! (Will you hate me if I say so much more than white and pastels?😍) I may just have to get that New Look pattern - the top has such a classic shape! Would you share which stitch you used to do your PERFECT topstitching on the neckline? Love this outfit!
ReplyDeleteKathy
Hi Kathy! I included a photo of the stitch I used. It is number 22 on the chart above. It is my new favorite for topstitching!
DeleteThank you, love my BERNINA!
DeleteVery pretty outfit...perfect for spring.
ReplyDeleteLove that serger seam tip--so smart!
ReplyDeletelove this Sue ... I just saw it on Pattern Review! LOL ( I'm always a bit slow!) I've never used stay tape on knit neckbands, does it make a big difference? I will have to give it a go and also the decorative stitch too is gorgeous! Although it's 5 yrs later, happy easter to you too! xxx
ReplyDelete