Wednesday, November 27, 2019

The Grace Transeasonal Coat

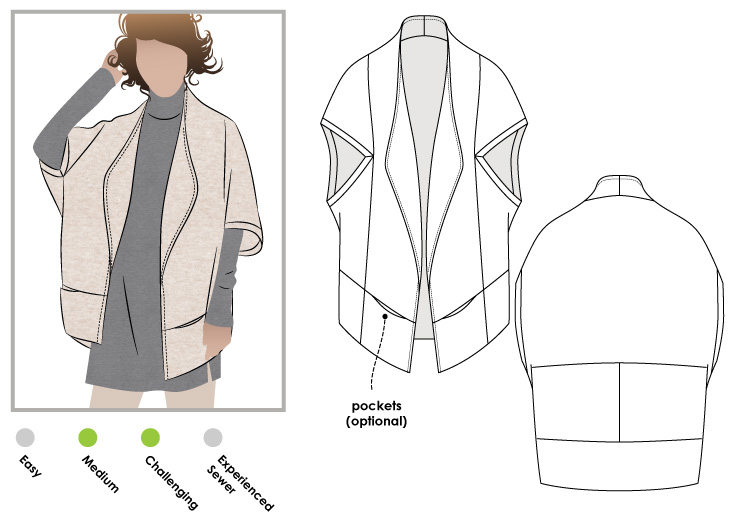
Image result for images style arc grace

I've finally made the Grace Trans-Seasonal Coat for the winter.  This is a StyleArc pattern, and you all know, I am a big fan! Here's a description: 

This is an easy-to sew, unlined coat with a fabulous collar--wear it up hugging the neck or open to give a more casual look.  Great deep buttoned pockets that are able to carry all that you need. Interesting seam treatment along with bound edges gives this coat a unique look.  
The Grace coat is a fashionable over coat and will become one of your favorites.  

I made this with a wool melton I ordered from Fabricdotcom.  I just love the color and the feel of this wool.  It doesn't ravel at all.  


I decided to add a lining to this coat to make it a bit warmer and I just love adding fun linings to my coat.  Why be boring when you can be bold?  Since the pattern didn't come with lining or instructions to line this, I drafted my own.  It isn't hard and there are so many tutorials online, you can find one that's easy to do.


The lining is a rayon by Telio found at fabricdotcom.  Again, I am a huge Telio fan and wow is this fabric not only pretty but I love how the color compliments the olive wool.


And, since I added the lining, I decided to add another touch and that was to the piping between the facing and lining.  I made my own (naturally) and love the custom touch! 


The buttons, which I really like, are from Hobby Lobby.  Right now, that's the only place in Sioux Falls I can get buttons for garments.  I've really got to stock up on things like buttons, zips, etc.  You never know when you'll need something and no one locally carries it. 


Would you look at my welt pockets?  I decided to add that little 'lip' at the top edge to give this a bit more oomph.  I love it!


You can't see it, but I also idd double rows of topstitching on the major seams.  


This coat is very oversized.  Based on the modifications I made, this is a size down from my typical SA pattern use.  I think it's pleasantly oversized but not so much so.


Can I have you check out how deep those pockets are?  My entire hand, up to the wrist, fits well inside.  


Plus, that collar!  You can flip it up and I added the buttons at the neckline.  If HL had two more of the buttons, I would have added them to the flaps on the welt pockets.  Dang.  I'll have to see if I can get more online. 

Thanks so much for reading!  I got my new coat completed just in time for the snow!

Sue :) 


Thursday, November 21, 2019

Rebecca Page Jo Jeans

Hey, another review from Rebecca Page as a brand ambassador!  This time, it's a pair of jeans.  This pattern comes in variations and sizing for the entire family.  

product_252658

I am reviewing the Jo Jeans, or ladies jeans.  Here's a link to the pattern: Jo Jeans Rebecca Page


These are slim fitting jeans.  They come in a large variety of sizes: XXS to 5 XL.


I made a muslin for this pattern and am glad I did.  These were extremely thin through the calf area.  Otherwise, the fit was really good.  I did have to do a few alterations since I am taller than what this pattern company is drafted for.  


The back yoke, which you can't really see since my hands are in my pockets, is uniquely shaped.  I like it.


This has all sorts of classic jeans styling.  These are comfortable and easy to wear.  I think my fabric came from fabricdotcom.  Love that site for quality fabric.

Yes, I will be making more of this pattern.  Try it! 

Thanks for reading!
Sue

Monday, November 11, 2019

More from Pattydoo! The Nora Coat

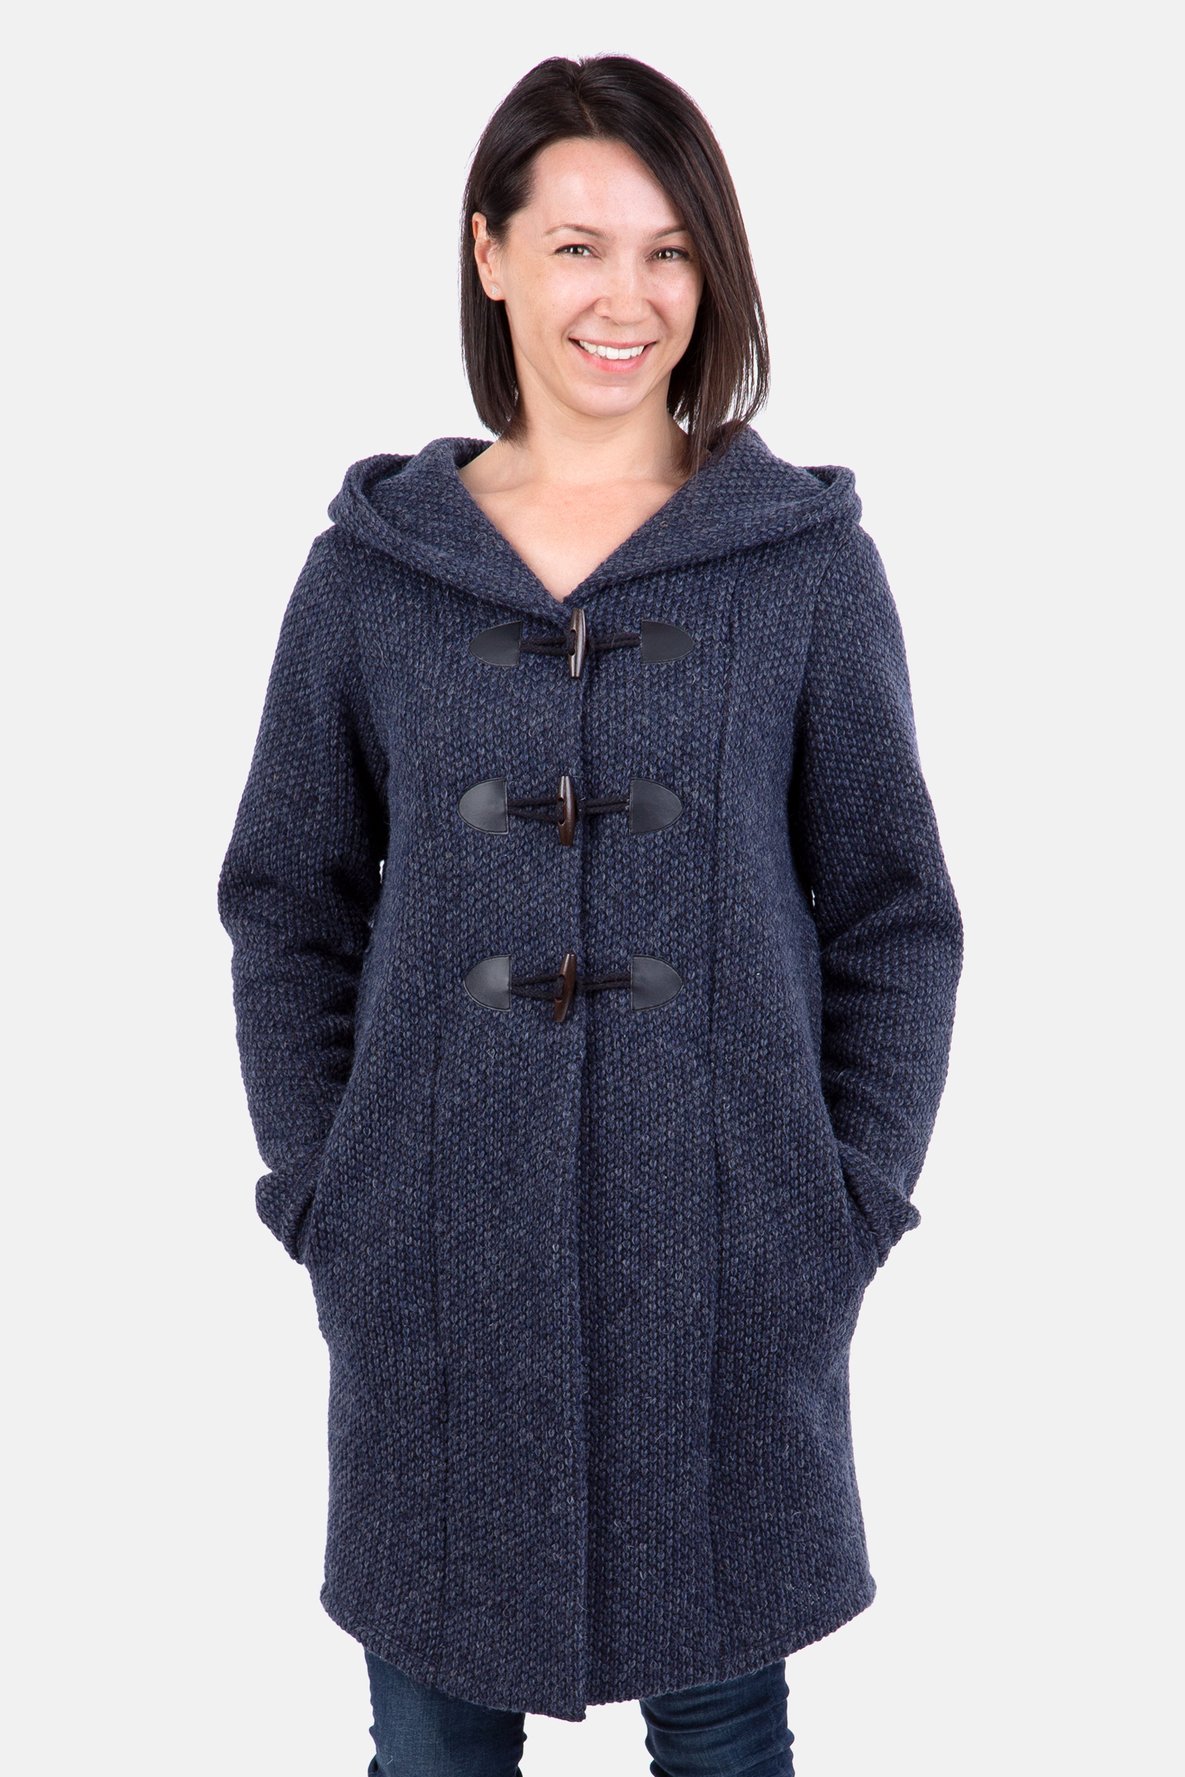
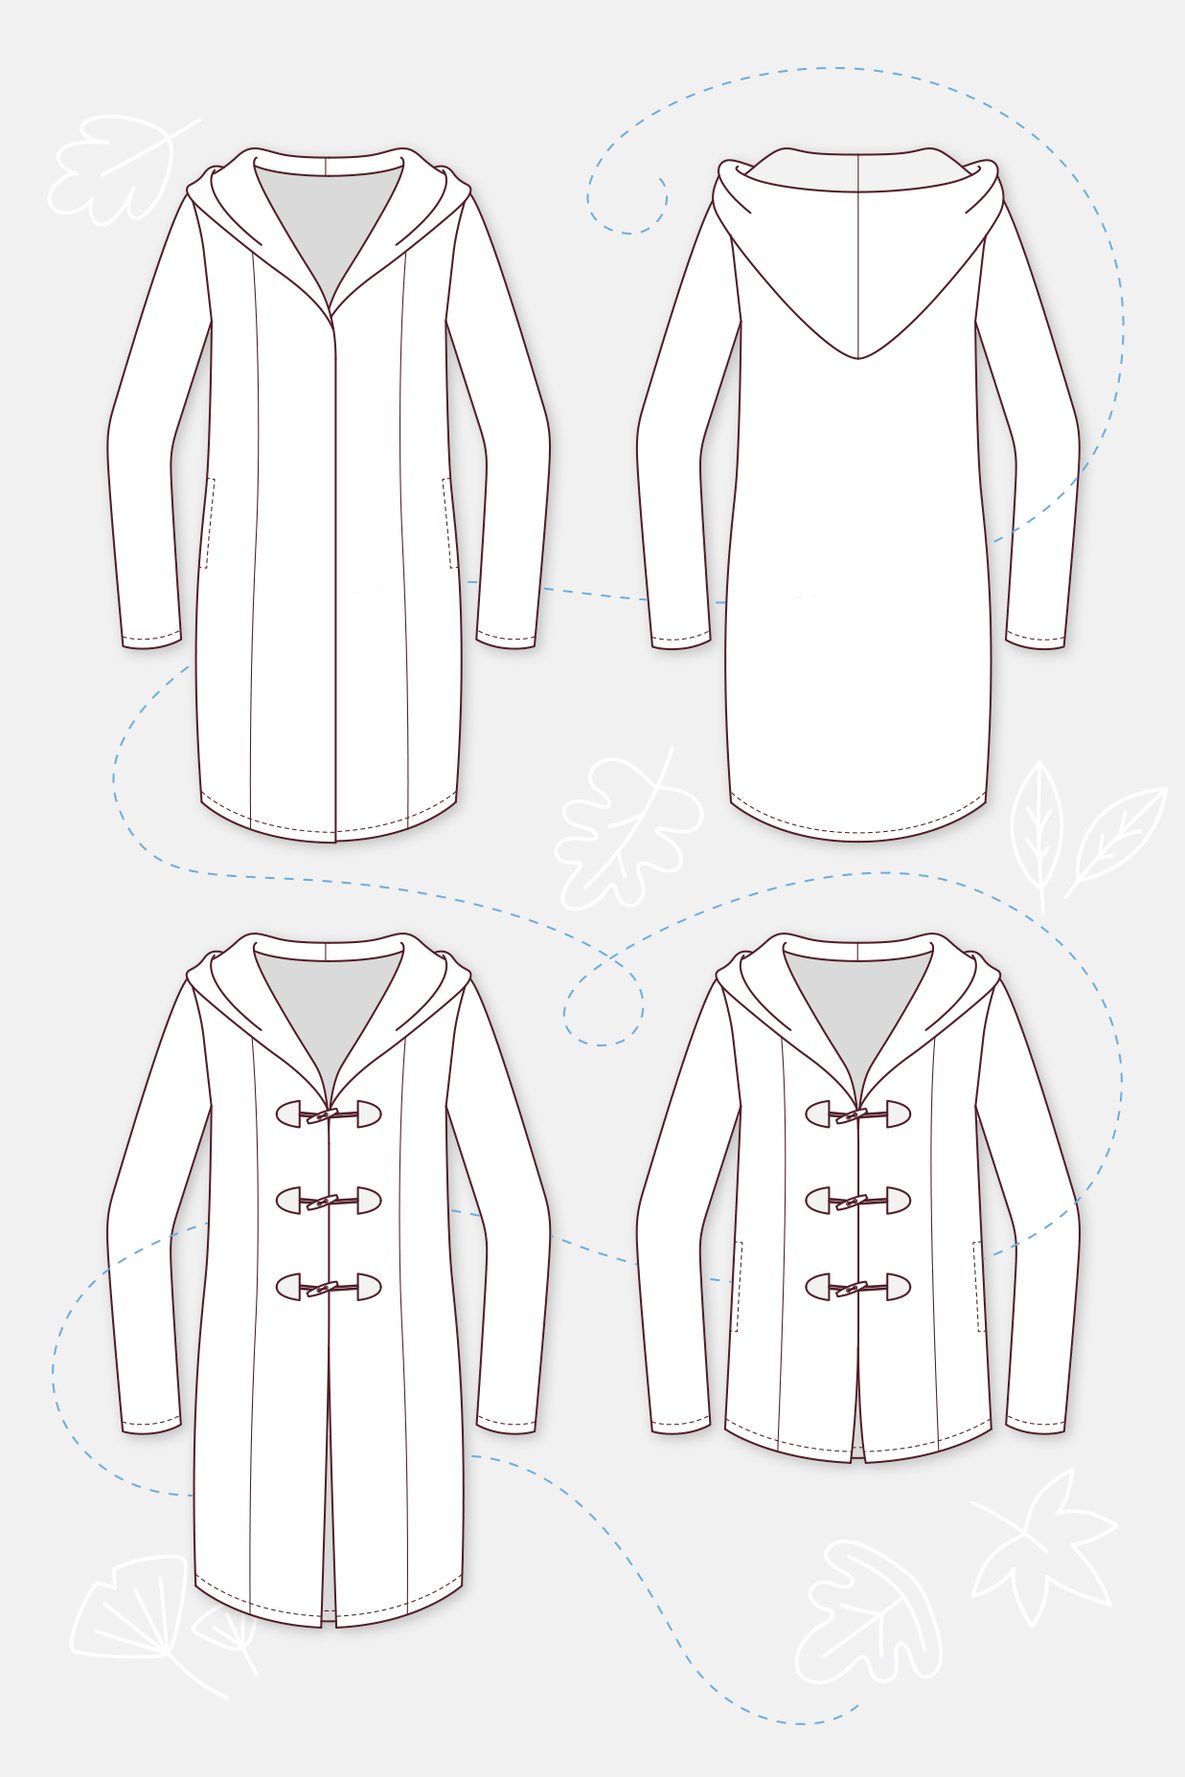
Today, I have another Pattydoo review for you!  This time, I made this adorable 'coat'.  My muslin was made from a wool blend plaid and my final garment was made from Telio sweater knit.  

Sewing pattern Ladies coat Wool fabric Duffle coat Sew on closure

I just love the design lines on this and the fact that the hood is lined.  As with the first pattydoo pattern I tried, the drafting is exceptional.   If you are interested, a link to the pattern is below.


Schnittmuster Damenmantel Varianten Zeichnungen

I chose to make my 'coats' more jacket-like with no closures and with a lighter weight fabric.  


So, here is my muslin.  I thought I had matched up the plaid on the front band area, but apparently not!  I didn't have enough fabric to recut, so I am living with it.  You can also see, my band facings are made from a solid black.  In hindsight, I should have cut the black as the piece you'd see on the right side.  


At least my plaids match across the front band area!   You'll notice too that the sleeves are a tad short.  I corrected that on my final garment.  I am hoping this fits DD2.  She's shorter than I am, so this sleeve length is hopefully perfect. 


I really like that the hood is lined on this.  It gives a very nice finish.  There are no printed directions for this and there are videos, but they are in German.  Although, you can see the steps so if you have some experience, you can simply follow along and create this with no issues.


There are also side seam pockets that are very nicely drafted.  I do believe it you lengthened the finished width by about 1/4" or so, you could catch them in the band seam and then they would't flop around at all.


Here you can see those pockets.  I did tack them down to the band at the top and bottom.


Here's my second version.  I used this blush colored Telio sweater knit.  This fabric is so amazing and lucious!  If I can sew about 10 more things without purchasing additional fabric, I am going to treat myself to a few more colors of this sweater knit.  I just love it! 


Here's the inside of the jacket.  No judgement on the sewing room please! You can see the band facing is cut in two pieces. This saves on fabric yardage for sure.


I just love the fit of this.  I lengthened the sleeves by about 2 inches.  With this knit, I did leave the pockets off as I wasn't sure how the fabric would behave with the pockets constructed per the directions. 


I really took my time with this and stabilized the front band area, the shoulders, the back neckband and of course the hemlines.


This might seem a bit weird, but I starched each cut edge prior to sewing together.  I think it made the fabric a bit easier to handle.  


I did edgestitch the facing so it wouldn't roll to the outside.  


The directions have you add a piece of bias to the back neckline, which I forgot to picture.  I highly recommend this step, especially if you are using a knit.  There's a lot of weight on that part of the garment with the two piece and layer hem.


I think I have a new layering piece this winter!

Thanks for reading!
Sue


Friday, November 8, 2019

Violet knit jacket by Style Arc.

Winter is rapidly approaching, and I wanted a few cozy pieces to layer up and keep warm.  

Image result for images StyleArc violet

On IG, one of my favorite reviewers is @birdy_sew_obsessed.  She recently made this in a textured white and I was instantly in love!!!  Do you know the feeling?  I simply had to make this.  

I ordered this lovely, thick knit from Fabric.com.  The manufacturer is Telio and this is just lucious!  


It's thick, warm, and that texture!  


Since I knew this was exceedlingly big, I sized down one size from my usual SA. 


This pattern is well-drafted and goes together easily.  I made a few mods to the construction to give an overall cleaner finish on the inside. 


Would you just look at that fabric? 

Thanks for reading!
Sue

Sunday, November 3, 2019

Patty Doo Zoey Colorblocked top

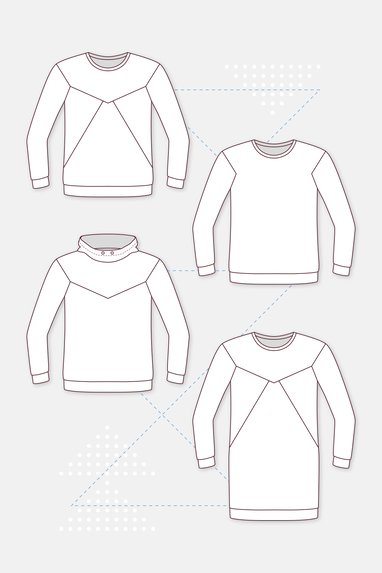
Today I have for you a casual, colorblocked top by a new-to-me pattern company called Patty Doo.  This company is based in Germany.  I fell in love with this design.  


Image result for images Patty Doo Zoey

And, here are the line drawings.  

Image result for images Patty Doo Zoey

This pattern is not available in English on Deutsch so I simply printed out the pattern pieces and figured it out.  It isn't difficult at all, as you can probably guess.  

If you are interested, here's a link to purchase the pattern or to look at their other pattern choices.


I picked my size based on the very helpful finished measurements chart included.  It's all in CM, so I used a handy calculator to translate that into inches. 


The fabrics I chose were from my stash and leftovers from a previous project and a purchase from the defunct Hancocks.  Am I the only one who is still mourning the loss of Hancocks?


Drafting on this garment is amazing.  Everything fits together beautifully and this sews together like a dream.


I really love this and plan on making more!
Thanks for reading!
Sue