Sunday, October 29, 2017

Brasov Wrap top meets leopard!

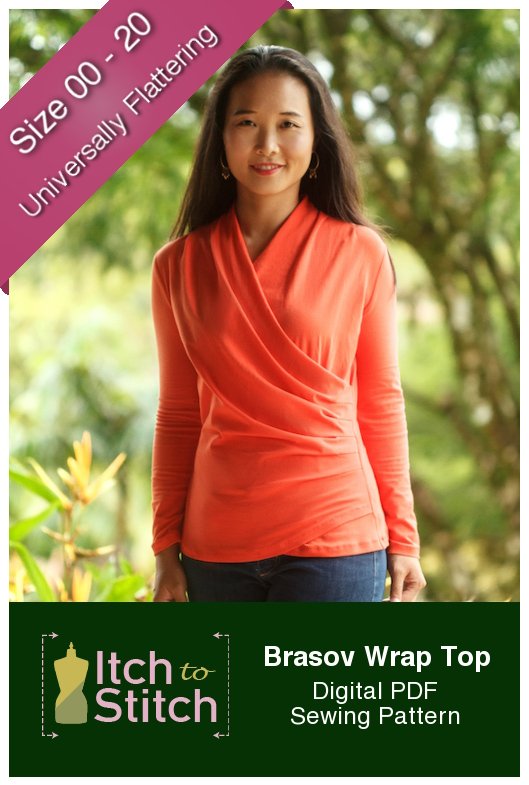
This is my first go at an Itch to Stitch pattern and I must say I am quite smitten!  Are you familiar with Itch to Stitch?  Image result for Images Brasov Wrap top

I found this pattern on Pattern Review and had to purchase it.  It was easy to tape together and sewing it was a breeze!  

Normally I shy away from wrap tops.  Being fuller busted, they simply aren't work appropriate and more importantly, I don't feel very comfortable wearing them.  Albeit I certainly haven't spent a great deal of time fitting them properly so they would be work appropriate.  Anyhoo, I digress.  Let's get back to the pattern!

There are 20 steps to this pattern all of which are necessary and well-explained.  A beginner with some experience sewing knits should be able to stitch this up with good results.  What is essential to this top is to mark all the pleats and markings well so you match everything up precisely.


Simple, right?

My fabric is a knit made by Stof.  If you've read my blog lately, you'll know that I drool over this maker.  These knits are so soft on your skin, substantial for garments with some shape, and wash/dry superbly!  

I so enjoyed putting this together and I see more in my future!  


Sorry the above photo is a bit blurry.  That is the stitch I use on my Bernina 430 for hemming.  My coverstitch has been in time-out so long I should consider selling it, especially with the great result I get with this stitch and a few others on my regular machine.  

Thanks for reading!
Sue


Sunday, October 22, 2017

The year of the sleeve with a twist! Simplicity 8340

The year of the sleeve, I have so enjoyed you!  Just because it is fall it doesn't mean that sleeves can't still be cool, right?  I decided to use this Simplicity pattern, 8340, to make a fun sleeve with cute little ties just above the wrist.  
Image result for images Simplicity 8340

However, since it is the year of the sleeve, I decided to embroider mine with a fairly recent purchase from Anita Goodesign.  The two designs I used were from the feather collection.  I had a lot of fun stitching these out.  


This is a great-fitting shirt.  It is just long enough for my 5'7".  It is plenty roomy.  Normally I make a FBA but didn't feel it was necessary with the over-sized fit of this top.    I used coconut shell buttons I purchased from Fashion Sewing Supply.  I love how the color stands out from the dark blue, lightweight denim I used.


Here is a close-up of one of the embroidery designs I choose for a sleeve.  I really wanted a fall-ish theme and choose the colors above to accomplish what I had in my head.  


I am not so sure I should be wearing a top like this with leggings.  DH thinks it is a fine look on me, but I am not so certain.


Aren't those sleeve ties just cute?  They are super easy to make as well!  


Here is the design on the other sleeve.  I think this makes a fun fall top.

What are you sewing to celebrate the year of the sleeve?  

Thanks for reading and I love your comments!
Sue

Saturday, October 14, 2017

Vogue 1562--a new winter coat!

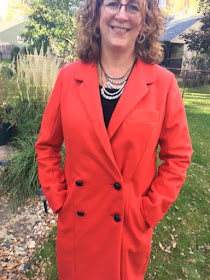
The minute I saw this red wool melton on Fabric Mart's site, I knew I had to make another winter coat.  It's only October, but with cold weather rapidly approaching, the sooner I started making this, the better.


Last year, I used a mustardy colored wool melton to make a duffle-type coat, and it was so wonderful to sew with that I went for the same type of fabric for this make.  There is still some of this candy-apple red wool available and some other colors as well on Fabric Mart's site if you are interested.


Look at those details!  Three welt pockets, bound button holes, a felt under collar, fully lined, gorgeous collar and lapels.  Can you tell I love this?  It is a Lialia by Vogue.  Directions are for advanced sewers and I totally agree.  This pattern is for an experienced sewer.  If you are a newbie, practice before tackling this.


I was a tad bit worried: this coat has six bound button holes and with the thickness of this fabric, I wondered how they'd turn out.  I practiced several and found they worked perfectly with this fabric.  Just take your time and sew carefully and you'll get a good result.


What good is a winter coat with a boring lining?  I want to liven up my winter and choose this dark brown, polka-dot fabric by Maggy London.  It is sold out now, but I believe it was a silk blend.  It was really nice to cut out and sew together.


Don't be afraid of using a heavier weight wool for your winter outerwear.  My Viking has zero issues sewing this.


I made my own shoulder pads, sewed the lining in by hand, hand hemmed the coat, so this truly was a labor of love.  I love how tailored it is compared to anything else I own.


There are a few things to be aware of when sewing this coat.
1.  Pay attention to the seam allowances listed on the pattern pieces.  The differences are not mentioned in the directions
2.  Not all the markings are present on the under collar
3.  Understitching the collar and lapel isn't mentioned but I did it as my fabric is rather thick and in all honesty, it is a step that shouldn't be skipped.
4.  Almost all pieces of the coat shell are interfaced with fusible interfacing.  If I make this again, and I might, I would use sew-in interfacing, probably hymo.
5.  I would add lower-hem facings instead of turning and hemming as I believe it would add to the lower hem lying nicer.
6.  I would pad-stitch the under collar to give it more shape.
7.   To give the shoulders and upper sleeve a bit more stability, I cut two pieces of hymo on the bias.  The shape followed the sleeve cap and continued from the shoulder seam to the notches for the front and back sleeve.
8.  I attached the lining by hand and am glad I did as it lays beautifully!
9.  I relied on an outside resource for my bound buttonholes.  The instructions are fine, I just wanted a few more details.  If you are experienced with these, you won't have any trouble.  Just make sure you measure your button hole width before you sew your garment.  My buttons are leather and quite a bit thicker than the pattern tissue indicates.


I typically make a FBA, sloping shoulder, and swayback adjustments.  I made all those but still needed to add shoulder pads.  I made those myself and covered them with the lining fabric before inserting into the shoulder area.   


Although I am not ready for winter, I am glad to know that I have a new coat hanging in my closet ready to tackle the cold weather!

Thanks for reading!

Sue from Ilove2sew!  A few parting shots of playing in the leaves!


Tuesday, October 10, 2017

The Terry Tie Cardi

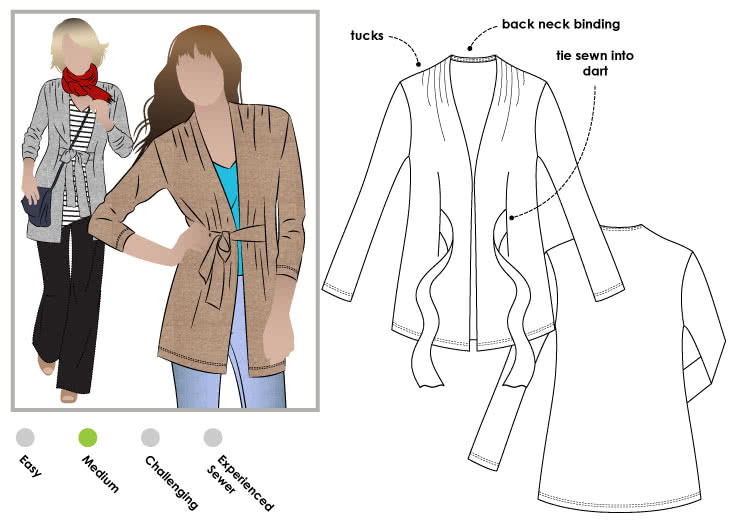
I really need to stop buying so many patterns.  I literally forget which ones I purchase at times.  I rediscovered this one recently and decided it was time to create it.  Luckily I had just the right fabric for it.  :).  This is the Terry Tie cardigan from StyleArc. 

Terry Tie Cardi Sewing Pattern By Style Arc - Knit tie front cardigan with tucked shoulder detail

Such a simple design deserves a lovely and drapey fabric and the one I used, I think, is just right!


This is a Telio knit from Fabric.com.  It feels like silk on your skin!


I love how this fits, rather fitting in the back but flowing in the front.


Sorry that photo is a bit of blurry.  I am not sure what my fashion photographer was doing.


You can see some of the details at the shoulder.  The pattern calls for tucks, but I changed that to gathers.  I think I like it better than the design.


Yes, my eyes are closed.  I typically have several photos with my eyes closed.  

T


I really love how the ties are long and are attached to the front with darts.  The provide cinching at the waist and shape!


Close up of the shoulder area.  You can also see the stretch stitch I used to hem the front, sleeves, and lower edge.

I really love this pattern and my fabric choice!
Thanks for reading!
Sue

Sunday, October 1, 2017

Dressing for fall! McCalls 7561


I so love the change of seasons, especially from summer to fall.  The days are still somewhat warm and the nights cool.  There is a crispness in the air that is delightful! 


Anyway, back to why you are here!  Falls sewing and a knit dress that feels like silk on your skin.  This fabric is from Telio and I purchased it from fabric.com.  It literally feels like silk!  It washes and dries beautifully and was wonderful to sew!  I told myself, no more fabric, you don't need it, you really don't, but when I saw this print, all my self-control melted away and I found myself purchasing about 10 more yards of fabric. 
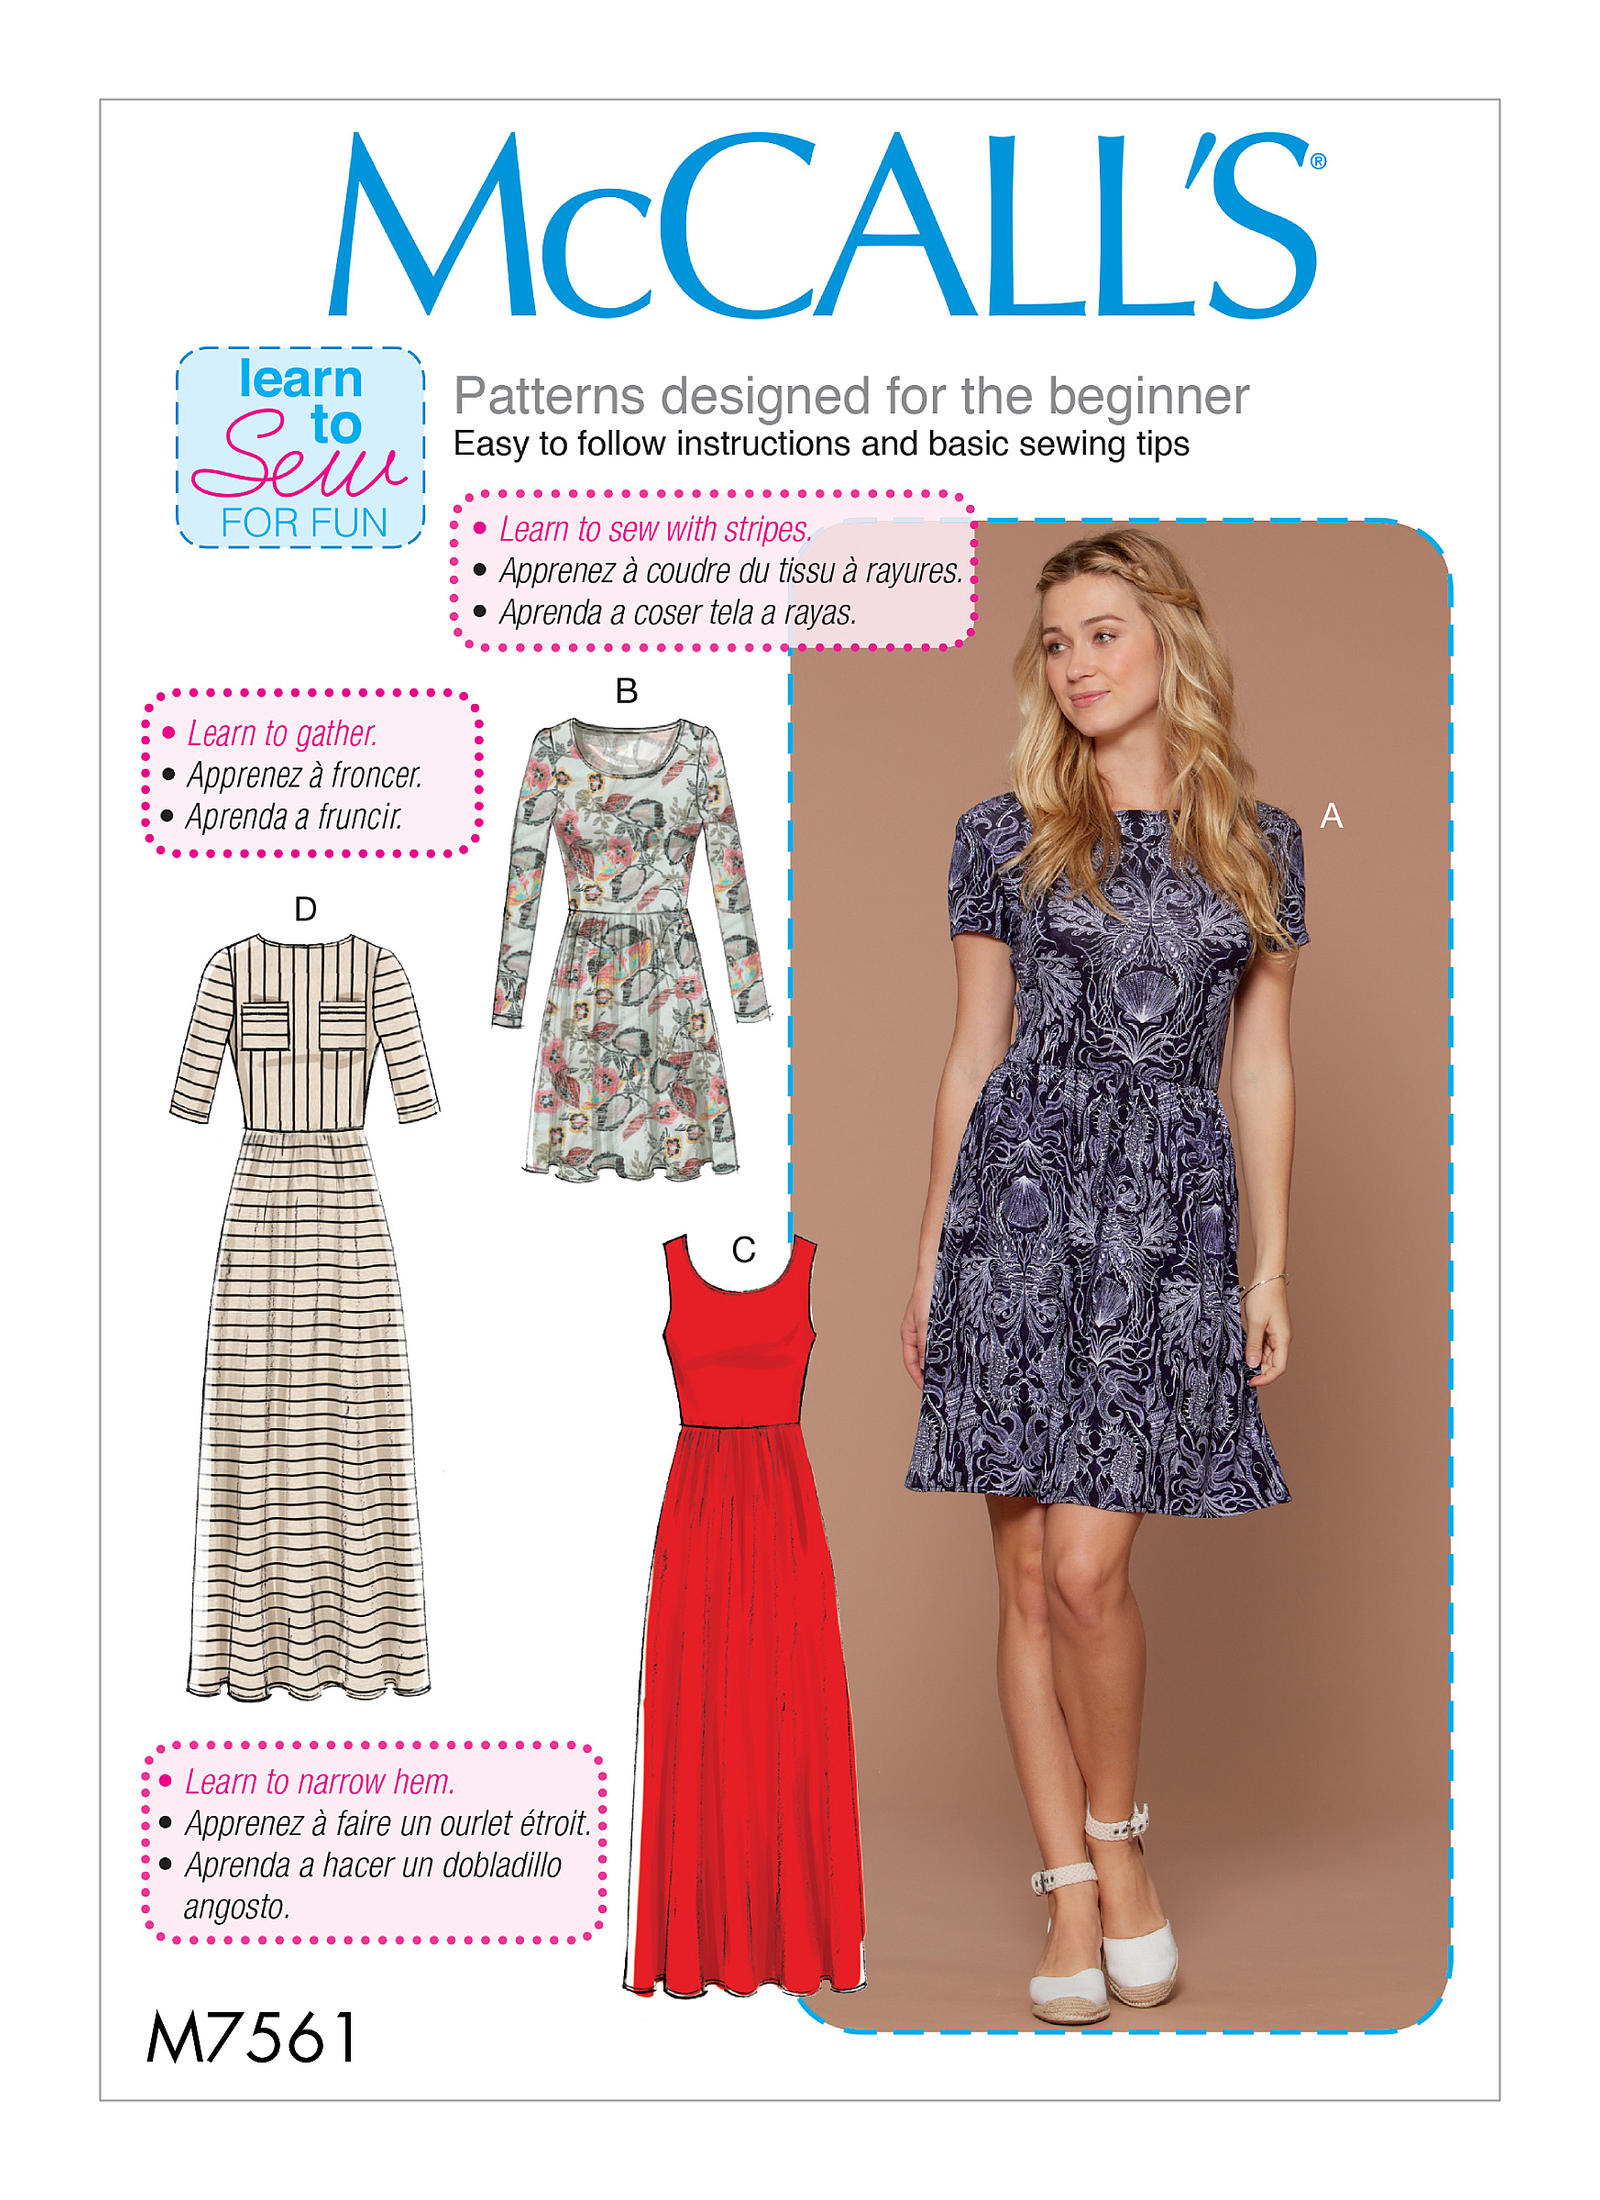
Image result for images McCalls 7561

I used this pattern from McCall's: 7561.  It is so easy to put together.  Literally, I completed this dress during one and a half episodes of Fixer Upper today.  Sometimes we all need an instant gratification project like that! 


 I lengthened this dress from the above knee-length version.  I also added a neck-band. 


With super-stretchy knits like this, I know I need more of a swayback adjustment, but I always forget to make one.  Maybe sometime I will learn!


The fullness of the skirt doesn't look all that full when compared to the pattern picture.  It think their skirt is much more full looking.  I actually and happy with the amount of fullness.


Action shots!  


I can't tell you how much I love this dress!  


As you can see, I added a neckband, stretching it to fit.  Next I top-stitched with a triple stretch-stitch.  


For the hems, I used Seweyekeys fusible knit tape in 1/2" width for the sleeves and 1" for the lower hem.  
I really love this pattern.  It has so many possibilities!

Thanks for reading!
Sue